How to Plant a Staghorn Fern on a Board
")
How to Plant a Staghorn Fern on a Board
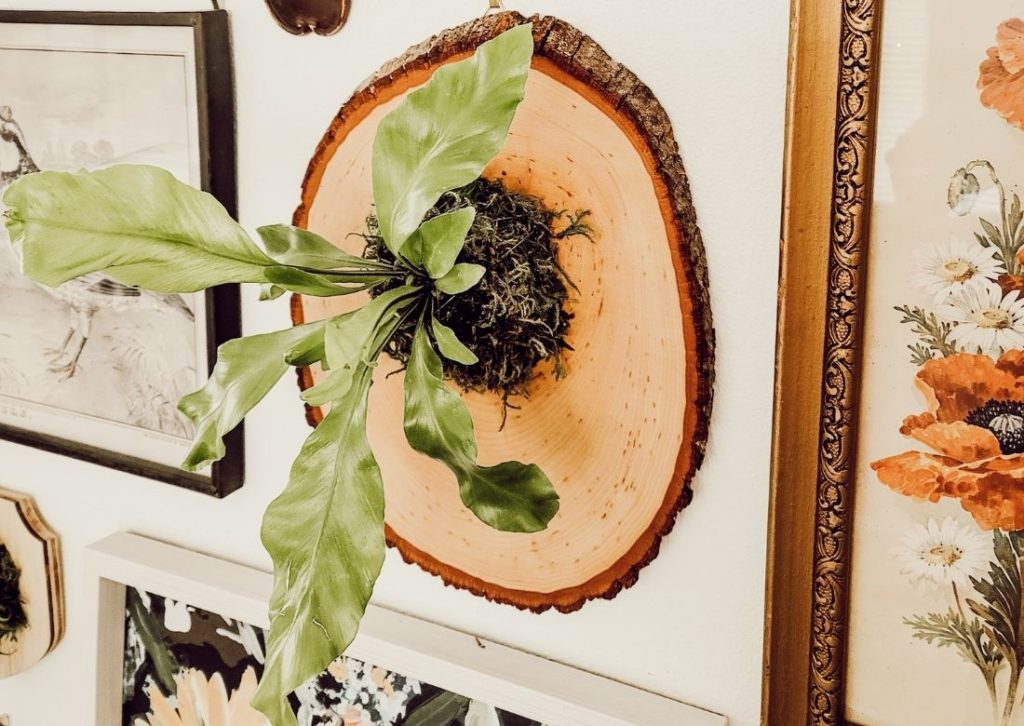
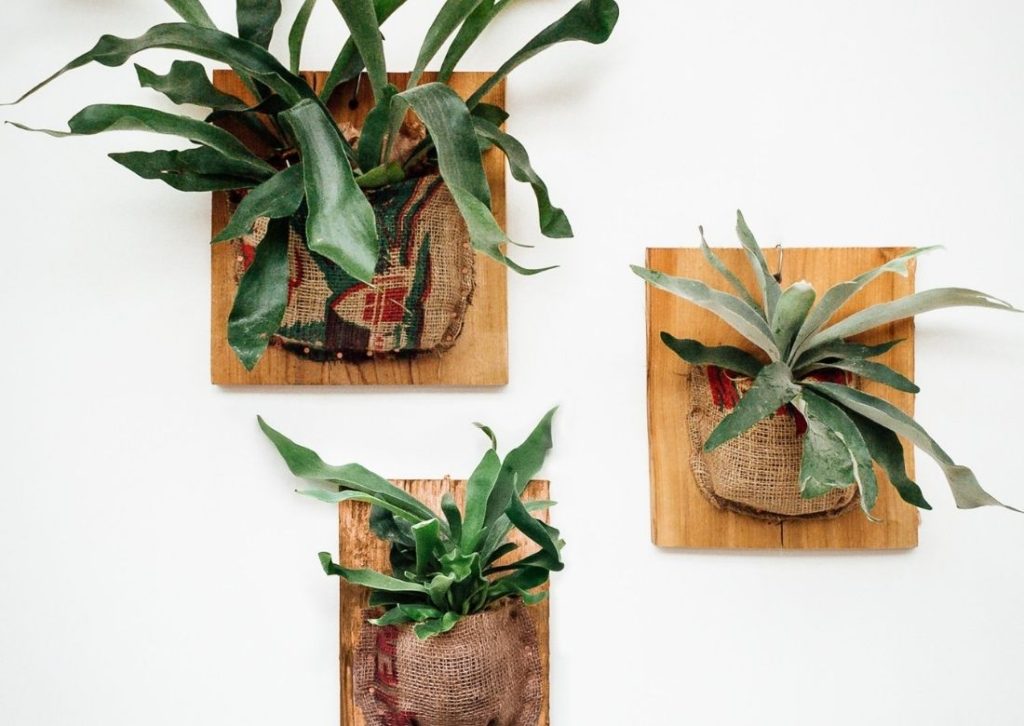
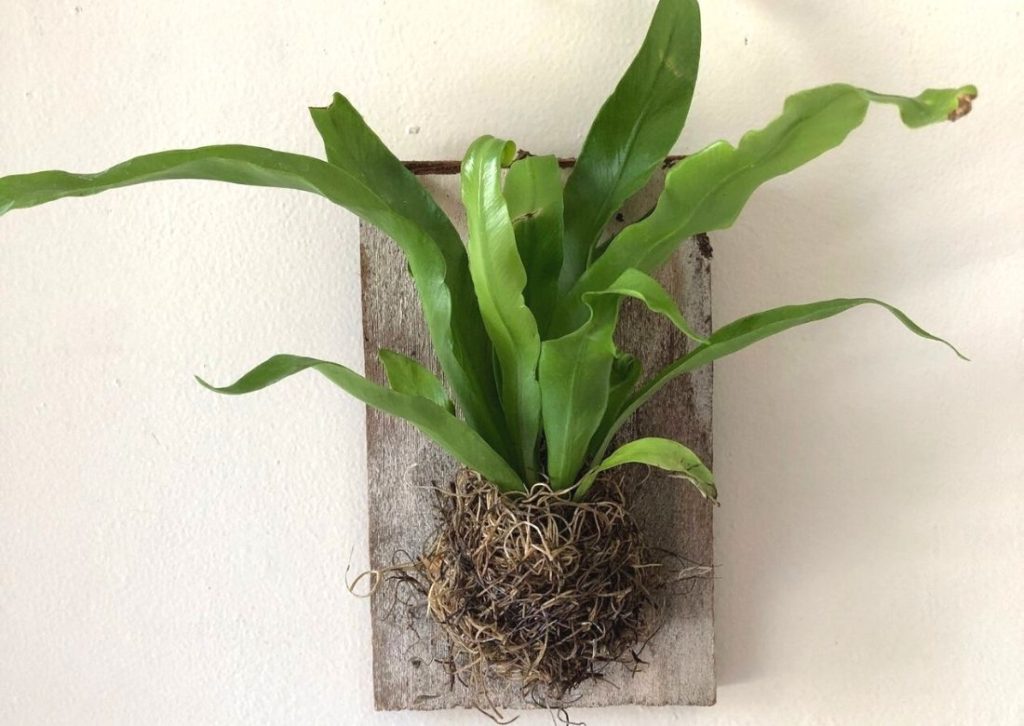
Creating living wall art is so fun and easy, and the results are gorgeous. I’m so excited to show you how to plant a staghorn fern on a board. You can use any board or wooden material that you prefer as well as several types of ferns that naturally grow outward will work. Staghorn ferns naturally grow outward and are commonly found growing off of trees – so this position is natural and normal for this plant as well as some known others (my favorite is a birds nest fern – shown below). They also grow out of moss and don’t require a ton of sun. In fact, they prefer indirect sun and usually only need to be watered once a week during the warm months, less during cooler months.
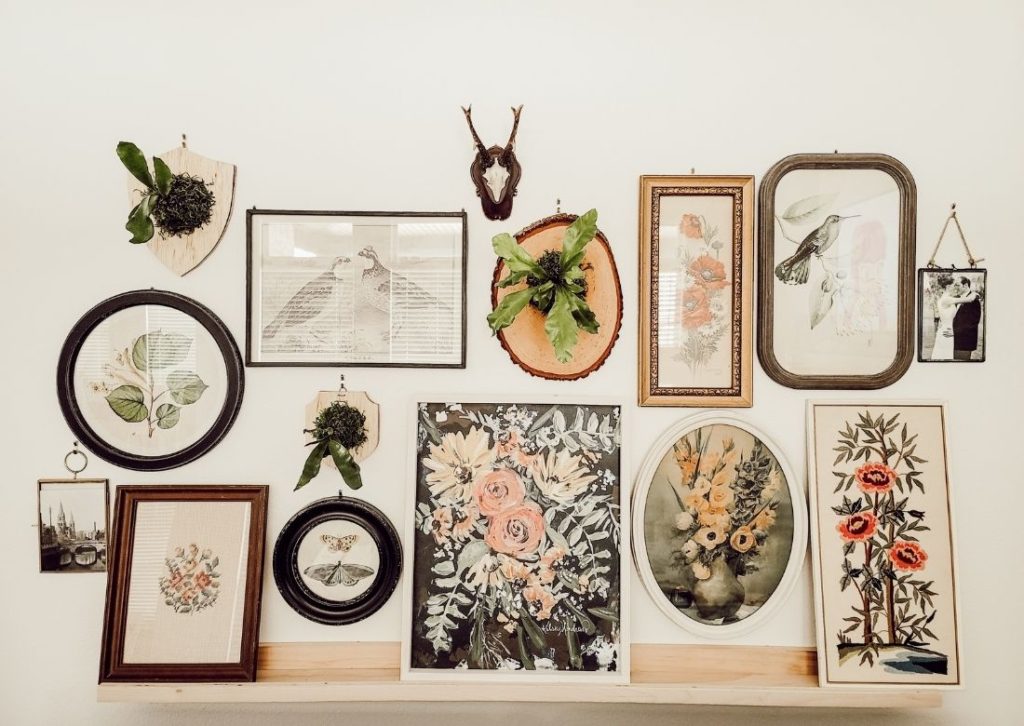
I can see this living wall art growing in popularity and becoming a beloved trend. Succulents are still popular mainly because they are so beautiful, easy to care for, and are fairly drought resistant. Staghorn ferns seem to be a more hearty plant as well and once you find a good spot for it and know the best watering schedule, they can grow quite large. If you love the look of this living wall art, but aren’t sure if you can do it yourself, just take one look at the price of buying one already mounted and you may change your mind. Mounted staghorn ferns can be quite pricey, but if you decide to DIY, it’s very affordable and so satisfying to create yourself, and the cost to mount this plant yourself can be minimal or up to around half the cost of buying one.
How to Plant a Staghorn Fern on a Board – Shop this post:

This post may contain affiliate links. This means I may receive a small commission from each purchase, at no cost to you. Thanks for considering my links!
How to Plant a Staghorn Fern on a Board – Templates:
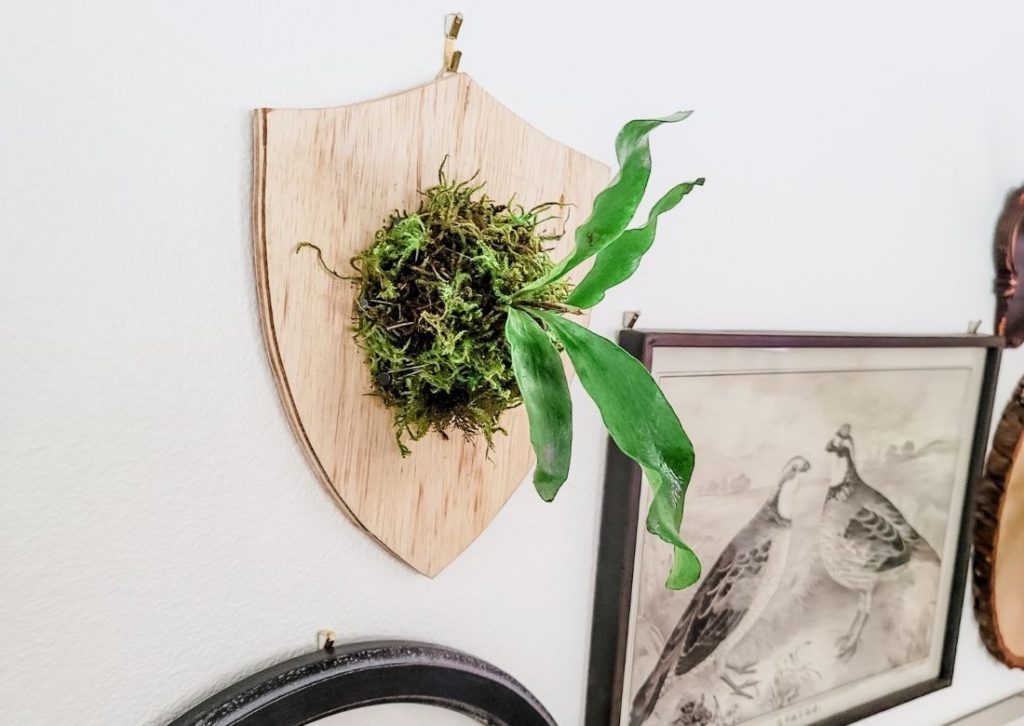
I took my mounted staghorn fern wall art a little further by cutting my own wood plaques. You can buy wood plaques, use reclaimed wood, old fence wood, a wood slice, a cutting board, or any piece of wood that can be treated. The style and color are up to you and your preference. I decided to use raw birch plywood to cut my own shapes because that’s the wood I already had on hand. I also had a wood slice that I wanted to try as well. If you go the wood slice route, just be careful to not split the wood when you nail your nails and hanging hardware. If you like my plaque shapes and want the same, you can download and print your own template. My plywood is just 1/2 inch thick and it cut so easily with my jigsaw.
How to Plant a Staghorn Fern on a Board – Step by step:
I made a short video to show you how to plant a staghorn fern on a board. I hope it’s valuable for you hands-on learners, but here are the steps to help as well:
- Treat the front of your board with safe linseed oil and beeswax by Tried & True (to prevent water from soaking through and not exposing plant to toxins)
- Treat the back on your board with polyurethane (to prevent water from soaking through)
- Once the board is treated and dry, soak a few handfuls of the Sphagnum moss in a bowl of water (this way it’s easy to shape and handle)
- Use the fern pot or a similar circular shape to trace onto the front, upper center, of the board. (this is the area the plant will go)
- Use tack nails (not longer than the thickness of your board) and hammer approximately eight nails around the circle at an angle.
- Once the nails are in, add the mounting hardware to the backside, or drill holes to add hanging wire (you can cover the hardware with painters tape)
- Take a long piece (about three feet) of fishing line and tie one end (double knot) to the bottom nail on the board
- Remove the staghorn fern (or bird’s nest fern, etc.) from the pot, remove excess dirt and some of the root ball to make it fit within the circle. To locate the top of the plant, look for a few leaf starting to sprout – that’s the top. If you don’t mount it topside up, the plant will adjust, so it’s not the end of the world.
- Grab bits of the moss (squeeze out excess water by hand or with a towel) and begin to shape the moss around the dirtball of the plant
- Once the plant is covered with moss and is shaped within the circle of nails – make sure there’s a little more moss to cover the nails and fluff out
- Take the tied off fishing line and carefully pull across to the opposite side of the plant and then wrap a loop or two around that nail. Zig zag back and forth across the plant keeping the fishing line tight enough to hold the plant, but not too tight to flatten it.
- Once the moss and plant and securely held by the fishing line, tie off the line with a double knot and cut off excess line. You can fluff the moss up to cover the line.
- Hold the board up to test the security of the line and then carefully clean bits of moss off from around the board.
- If you didn’t water your plant recently, add some water to the mossy plant ball and leave the board laying flat until the plant drinks up the water. Some people spritz their staghorn ferns and they know how much to spray. You can determine what method works best for you. Be sure to watch for wetness on your wall and take care to give your plant more time to drink before hanging it up, or add another layer of polyurethane to the backside.
- Then find a place to hang your living wall art – keep out of direct sunlight, but in a well lit space.
How to Plant a Staghorn Fern on a Board – Video:
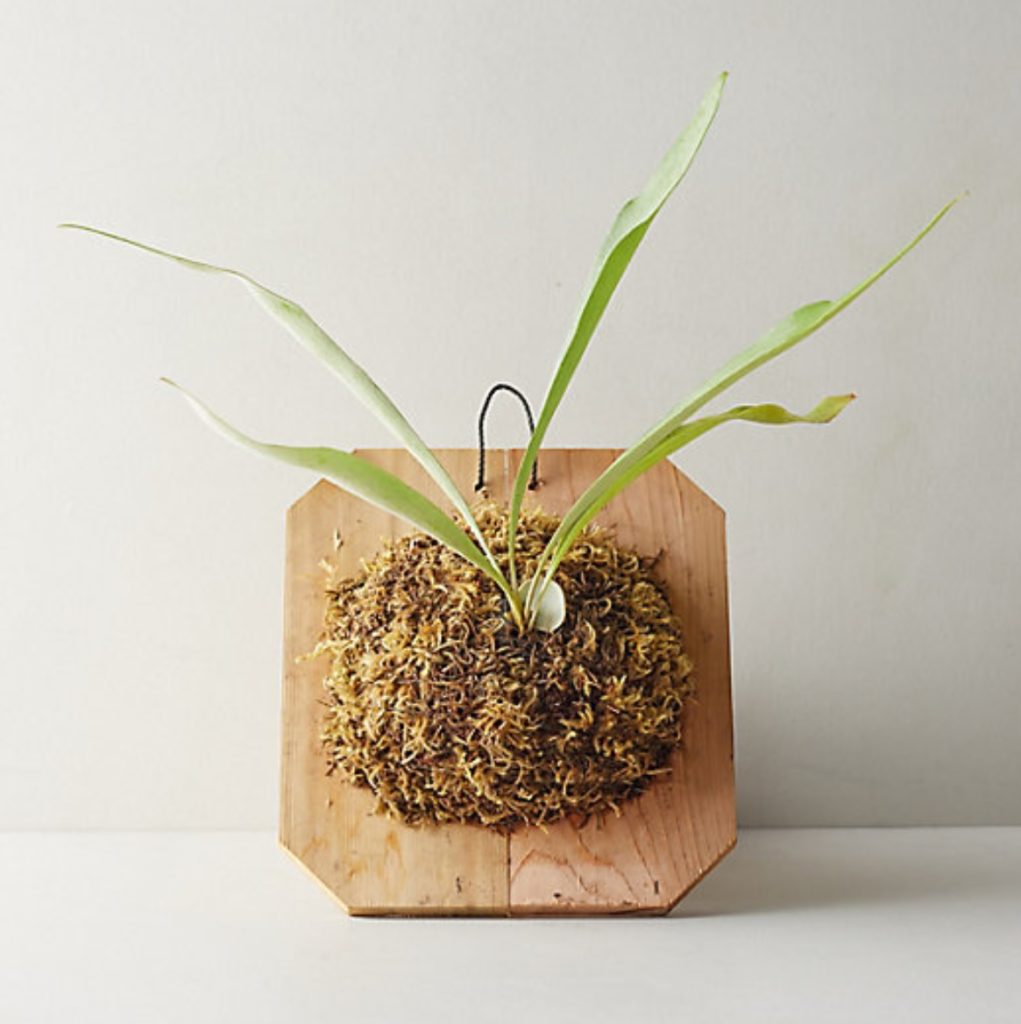
How to Plant a Staghorn Fern on a Board – Already made for purchase:
Here are just a few already mounted staghorn ferns that you may purchase. There are a ton on Etsy in different sizes and on different shapes of wood too. These examples are all lovely and very inspirational, but I’m telling you that you can make your own for a fraction of the cost – and then you can show friends how to make them too!
How to Plant a Staghorn Fern on a Board
This living wall art can decorate your home inside or out. You can have just one or a collection. There are different types of plants that work well for mounting, you can do a little research to find the plant that you prefer. I am so in love with this look and I love how the wood plank and plant warm up a wall. I had both my staghorn ferns and the birds nest fern shipped from Amazon. All three plants arrived well packaged and in great health – you can rest assured that you will receive healthy nice plants (or Amazon Prime will take them back). Two of my plants had a bit of residue on the leaves so I just took a cotton ball with some coconut oil and cleaned them off. They were shiny for a few days, but now they look healthy and beautiful.
Some YouTube videos talked about adding a piece of banana peel under the lower leaf to provide a natural fertilizer, but this will attract fruit flies and I believe these potted plants come in soil with some fertilizer already. You can always spritz a little plant food on the moss down the road. I hope this tutorial on how to plant a staghorn fern on a board was helpful and inspiring. It really is super easy and the results are gorgeous. You could even take a long board and plant three ferns spaced down it. The possibilities are endless, just be sure to have fun while you’re doing it. This mounted plant also makes a great gift idea for the plant-lover in your life. It’s so unique and fun, and helps to add plants to your wall art!
Will you create your own mounted staghorn fern? Let me know in the comments below – I’d love to know where you’re going to hang it as well!

You may also like:


POSTED IN: DIY crafts
Let's be friends!
Related Posts


Search
Categories
Subscribe
Get the latest posts, discounts, and design inspiration right to your inbox.
