Fluted Molding Pole Wrap Nightstand Makeover
Fluted Molding Pole Wrap Nightstand Makeover
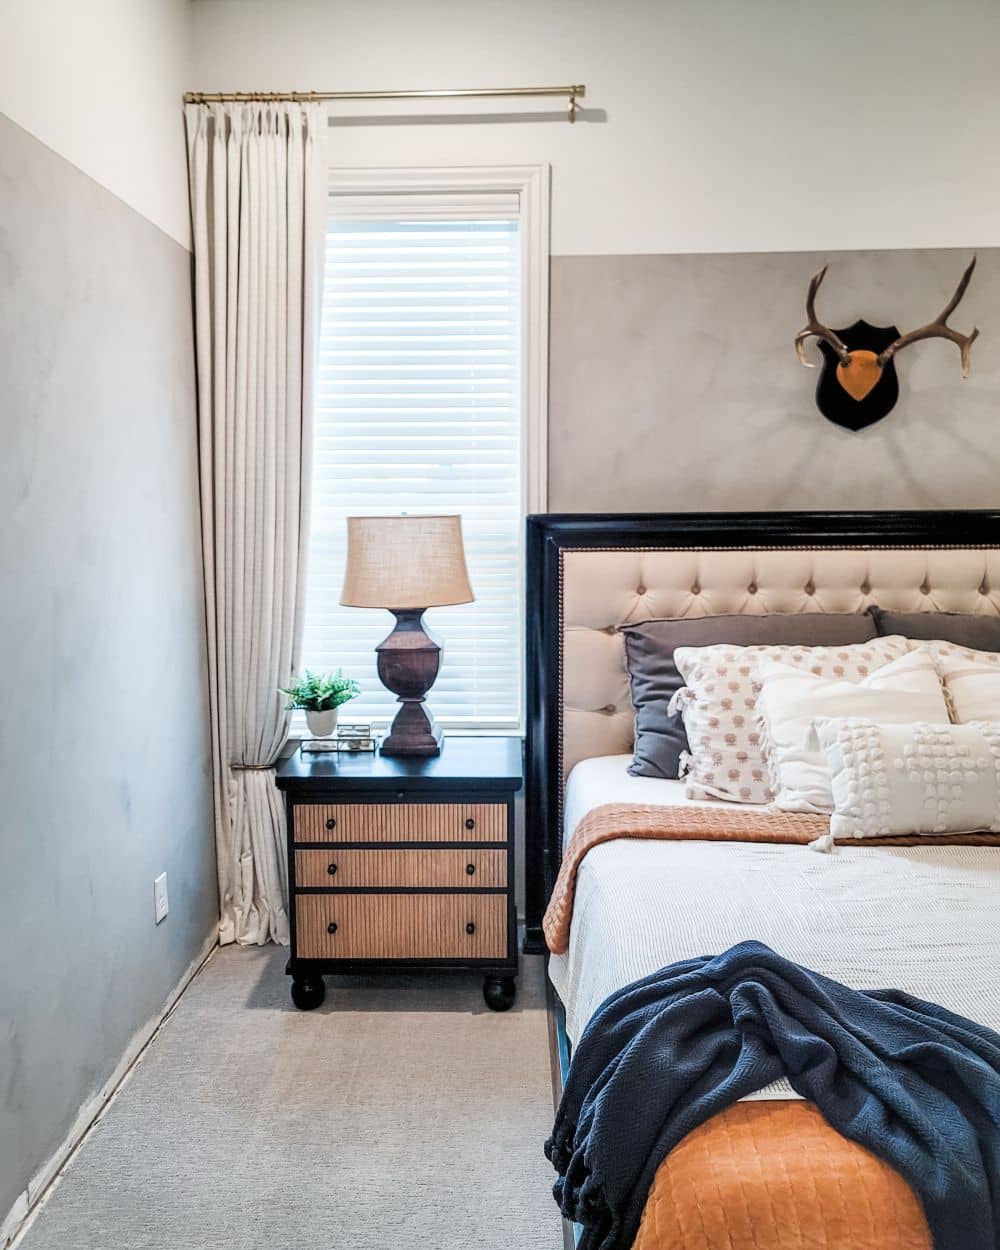
I waited two months for this oak pole wrap to get back in stock so I could do this nightstand makeover. The day it arrived, I immediately started measuring and cutting it. The fluted molding look isn’t for everyone, but I love the warm modern vibe it has given our nightstands. You will notice in my photos that our walls are grey. This wall treatment took a while and involved several steps, but I absolutely love it. I’ve been waiting to share because we haven’t had a chance to order the new baseboard trim, but I’m thinking it’s best to share soon because at this rate, it could be years before new baseboards get installed. I mention the walls because I think you can see how it coordinates with a more modern nightstand. Our home has a vintage cottage feel, but I want our primary bedroom to feel modern and relaxed.
The best way to get our bedroom feeling more relaxed is to address the pieces that may make it feel stuffy, formal, grand, or traditional. I also have my eye on a new bedframe that exudes a relaxed modern style, even though I love our bedframe that we’ve had for about 15 years now. I love our upholstered headboard with a nail head trim, but the heavy wood frame has been attacking our shins for years. Jeremy literally has scars on his shins from getting back in bed during the night, and I’ve stubbed toes on it for years too. It’s funny and not so funny at the same time. All this is to say, we won’t miss a bulky wood frame that injures us. I’d also like the new frame to be narrow enough that it fits within the side windows.
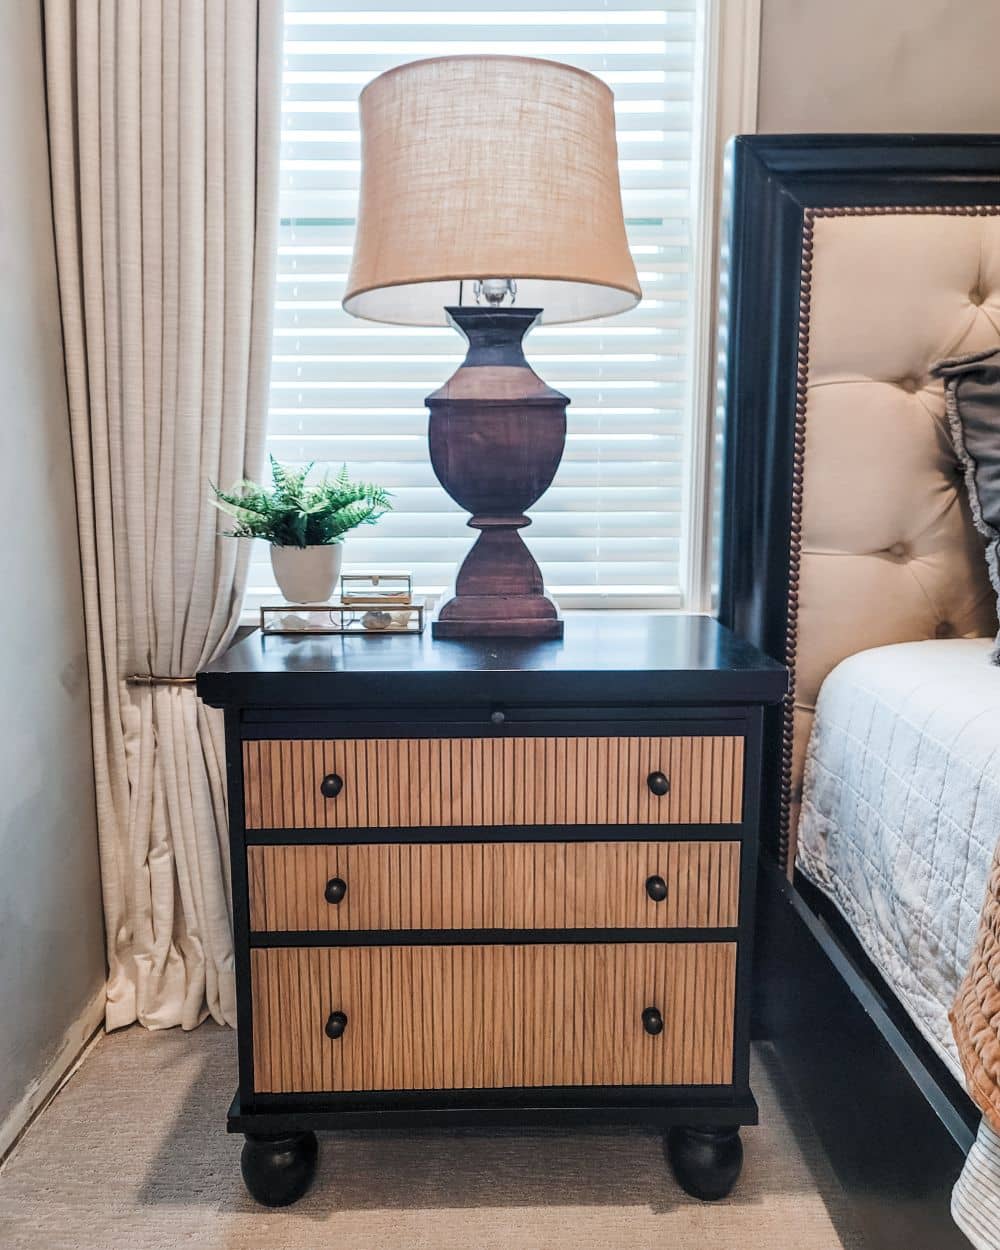
In the meantime, I decided to makeover our traditional nightstands from Pier 1 because it would be way less expensive to update them instead of replacing them. Again, I really like our traditional nightstand and dresser set from Pier 1, it’s solid wood and has nice lines. However, it’s very bulky and heavy looking which doesn’t say relaxed or modern. I updated the legs and knobs about a year ago to try to get more life out of them, but once I lime washed the walls, all the furniture looked too formal and fancy. So, the original mushroom legs went back on, and then I replaced the knobs with fewer knobs to also help it look less fussy. Hardware can make a big difference when updating furniture. These nightstands originally had small gunmetal knobs, so I replaced them with these knobs because they’re a nice matte black with a base and they have a more substantial look.
To cover a piece of furniture with oak pole wrap is very simple. You need to make sure the piece you’re covering has enough flat surface to glue the pole wrap onto and then cut the pole wrap to fit. Once I had all my pieces cut, it was time to stain it. You could stain it after glueing it on, but what if the stain didn’t apply evenly or you messed it up? Always stain beforehand. I took a scrap piece of pole wrap and tested out a few of my favorite stains and combinations. I used Varathane stains and highly recommend them. For the pole wrap, I didn’t sand the entire piece (only frayed edges) and I also didn’t use pre-stain wood conditioner even though that’s usually what I do. The pole wrap has a nice finish to it and the test piece turned out very even, so I took a risk in not conditioning first. The one mistake that I made was not stirring the can of weathered oak stain often. The coloring settles to the bottom of the can, so be sure to stir often to keep a consistent color when staining. When the stain was dry, it was time to glue on the pole wrap.

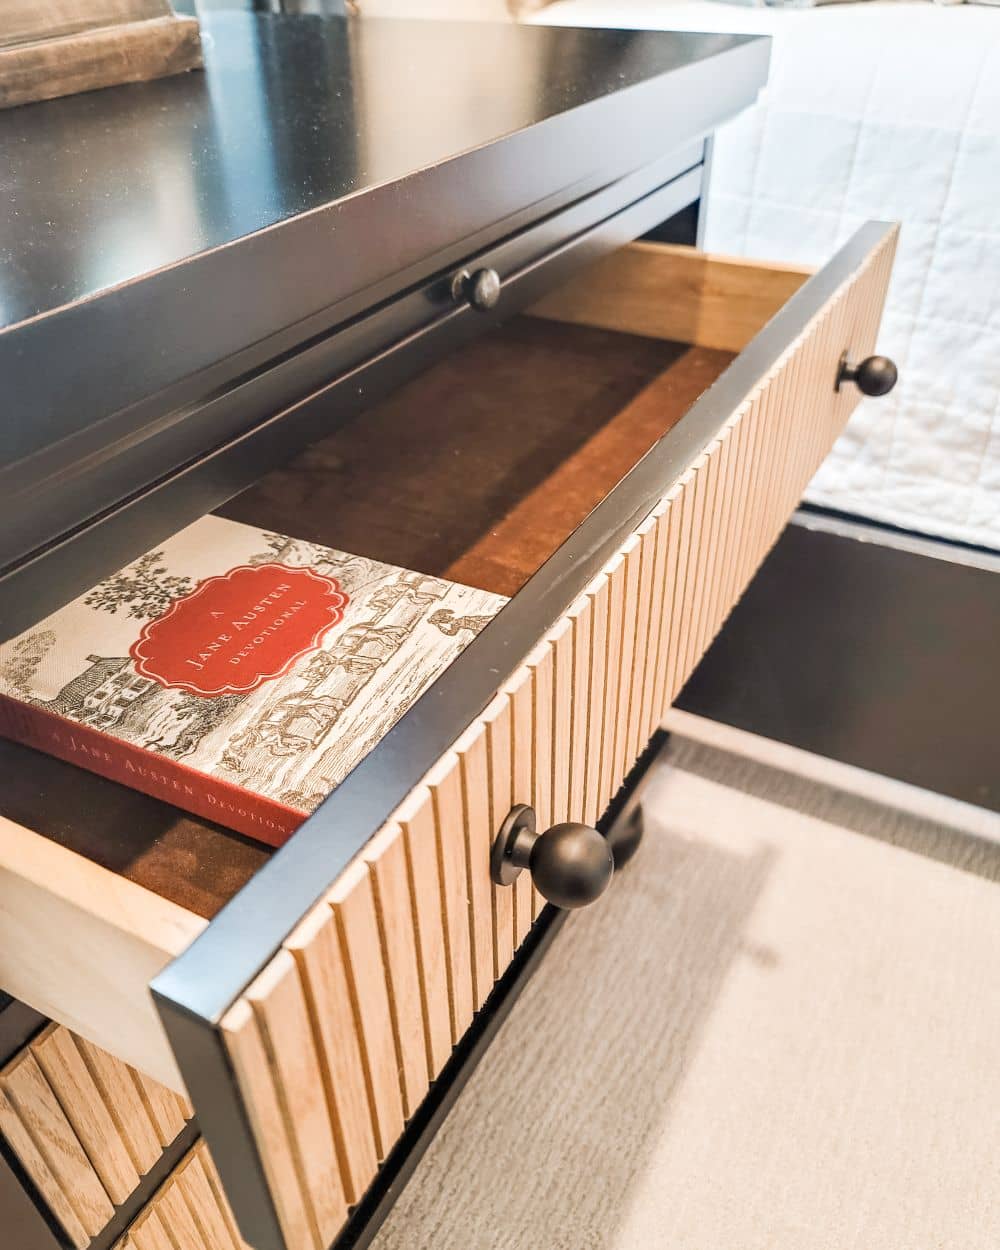
First, I used a high grit piece of sandpaper to rough up the surface of the nightstand drawers. This gives the wood glue something to grab onto. I also grabbed several large heavy boards to keep the pole wrap flat and in place after gluing. Some projects may work better with clamps. The pole wrap is designed to curve and wrap around poles, and it comes wrapped up too, so make sure to put pressure and weight on your project while it dries. It’s very important to make sure the wood glue is all wiped up if it squishes out around the edges, while the glue is still wet. Also make sure the glue is totally dry before drilling holes for the hardware. When drilling, I used clamps to get extra support for the pole wrap since I knew the entire surface wasn’t covered with wood glue.
The pole wrap isn’t very thick, but it’s also not flush with the nightstand body. Be sure to consider this if you’re only covering drawers for your project like me. If you’re covering an entire piece, it won’t matter but be sure to dry fit the pieces in place to make sure you like the look before gluing them down. I love the modern look created by the oak pole wrap and I think the look adds to the casual vibe of my lime washed walls. You can use pole wrap for furniture updates or even accent walls – it’s a beautiful product and is creating a stir on Pinterest and Instagram. Like I said, this modern look isn’t for everyone, but if it is, it’s a great way to update furniture and get more life out of your furnishings.
Video tutorial
You will notice that I didn’t apply the pole wrap to the dresser. My goal is to find a new piece to replace the dresser with, and then sell the dresser to help buy the new piece. I don’t want all black furniture in the space because I prefer a coordinated curated look. Matching bedroom sets are fine, but I prefer pieces that coordinate and can also be used in other places around my home if I want. I’d love to find an armoire for this side of the room. I need something to store bedding and pillows. My closet redesign will have drawers for the things I use the dresser for. So many plans, so little money! A home you love takes time, and I’m fine waiting to do the projects I really want to do to make our home function better for us. Step by step, I’ll get our primary bedroom to be our style and full of the comforts that we want – like no bloody shins~ I hope you enjoyed this post and feel inspired to look at your furniture in a new way.


If this technique is one you seriously want to try, be sure to watch my YouTube video to see how I cut it, dry fit it, stained it, sanded the drawers, glued it, and drilled hardware holes. There are some little details that will help you along the way. Thanks for visiting my site!

POSTED IN: DIY Projects
