Easy Shaker Peg Rail for the Bathtub

Easy Shaker Peg Rail for the Bathtub
Don’t you just love it when style and function come together!? I love a beautiful home that functions well for the family. When we built our home, we didn’t have much say on… well much. We didn’t want a bath tub, but that wasn’t an option. I suppose for resale, it will be a nice thing to have, but I don’t enjoy taking baths and wanted to use the space differently. However, I think I found a way to elevate bath time and create a spa-like experience with this easy shaker peg rail for the bathtub.
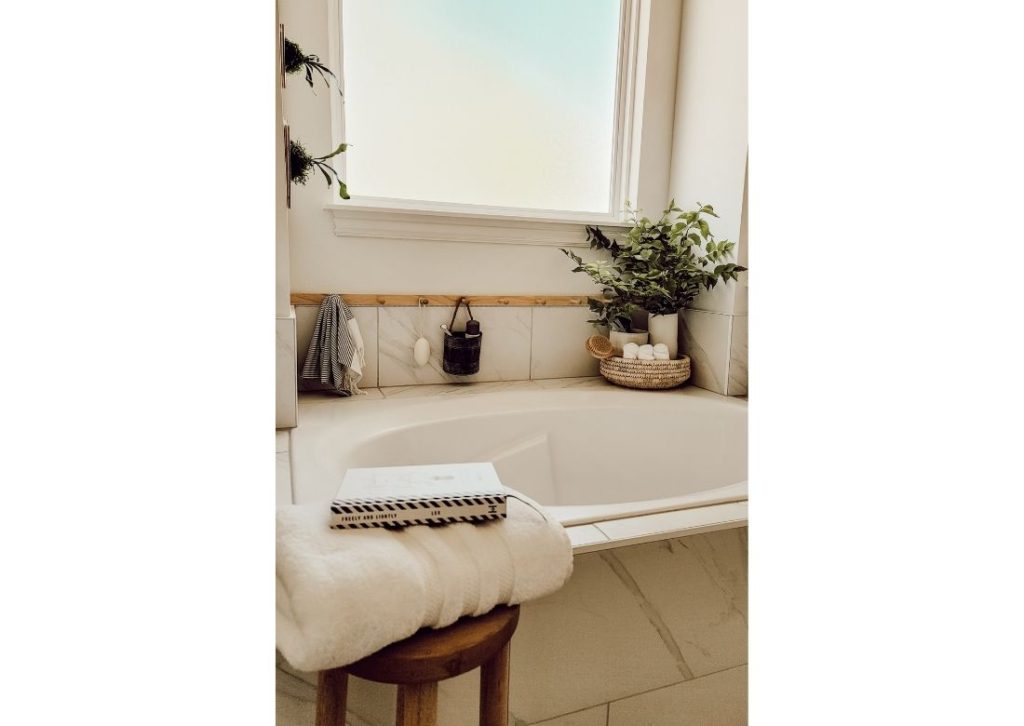
The bathtub surround is pretty plain, and a shelf wouldn’t work with how far the window sill sticks out compared to the space between the bathtub and the wall. So, the next best way to add character and function to this little space is with an easy shaker peg rail for the bathtub! I decided that this bathtub could be a nice place to shave my legs, and then I thought, this simple peg rail and some accessories would be a great project for dads and kids to treat their mom to a bathtub makeover and perhaps a quiet relaxing bath… without interruptions… or screaming… just saying.

For my easy shaker peg rail for the bathtub, I’m going to install the peg rail directly on top of the tile backsplash. If you don’t have backsplash or tall tile like I do, just consider installing the rail at a height that is easily accessible from a sitting position in the tub. For a reference point, my tile backsplash is 12 inches tall. The idea is to use some of the pegs for items and decor, but not to fill up every single one. Just like styling bookshelves, having negative space or blank space helps to highlight the used space. The shaker pegs are spaced 6″ apart and I cut the rail to go from wall to wall – this gives it a more original look instead of something hung on the wall after the fact. I love the built-in look and creating bits of architecture when I can.
I used a 1″x2″x6′ select pine board from Home Depot. I love the natural tone of the wood and the warmth it provides in my white and grey bathroom. After giving the board a light sanding, I sealed it with two coats of matte finish polyurethane. This will protect the wood in a humid environment. I also brushed a layer of polyurethane over the shaker pegs because the ones I purchased from Amazon are unfinished.
Easy Shaker Peg Rail for the Bathtub
My oldest daughter, Sawyer, helped me film this easy shaker peg rail for the bathroom DIY video. I think it’s easiest to follow video, but just incase you like steps, here you go:
- Measure the shaker peg rail space.
- Mark the select pine board at this measurement and make a clean cut. (I used a mitre saw)
- Give the select pine board a light sanding, including the corners and edges.
- Seal the select pine board and shaker pegs with matte finish polyurethane. Two coats is adequate, allowing each coat to fully dry.
- Find the studs on the shaker peg rail space and mark with pieces of painters tape.
- Mark the spots for the shaker pegs – I like to cut a string the length of the board, fold it in half to find the exact center – mark it, then mark each peg six inches out.
- Hold pine board up to wall and mark the board where the wall studs are located.
- Predrill holes for shaker pegs – not too large. Predrill the wood screw holes for mounting (you can use a larger bit to make some space to counter-sink the screws).
- Hand screw the shaker pegs in each spot.
- Install the board to the wall – making sure it’s level and in the wall studs. I used 3″ construction screws.
- Style the shaker peg rail and surrounding tub!
Easy Shaker Peg Rail for the Bathtub – Video
Easy Shaker Peg Rail for the Bathtub – Shop this post
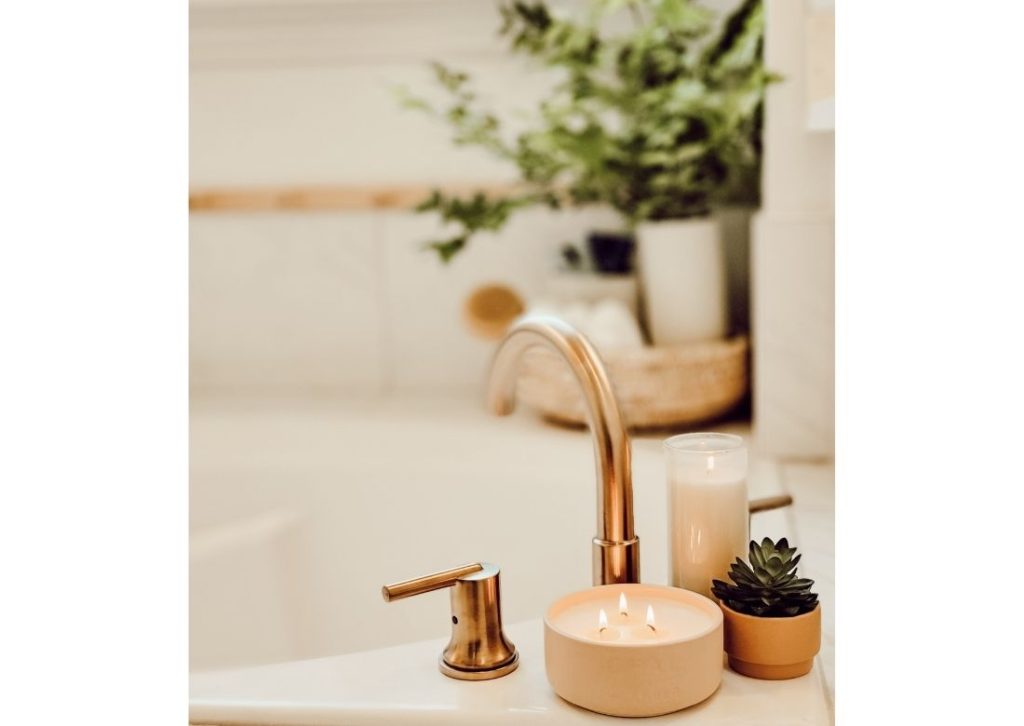
I knew I wanted a shaker peg rail somewhere, but the kitchen and laundry rooms weren’t options for me. I’m so glad we have some wall space around the tub to add this decorative feature. I think it adds warmth, function, and a coziness that a shelf just couldn’t pull off. If you like the way I’ve styled my easy shaker peg rail for the bathtub, here are some of the exact items I used:

This post may contain affiliate links. This means I may receive a small commission from each purchase, at no cost to you. Thanks for considering my links!

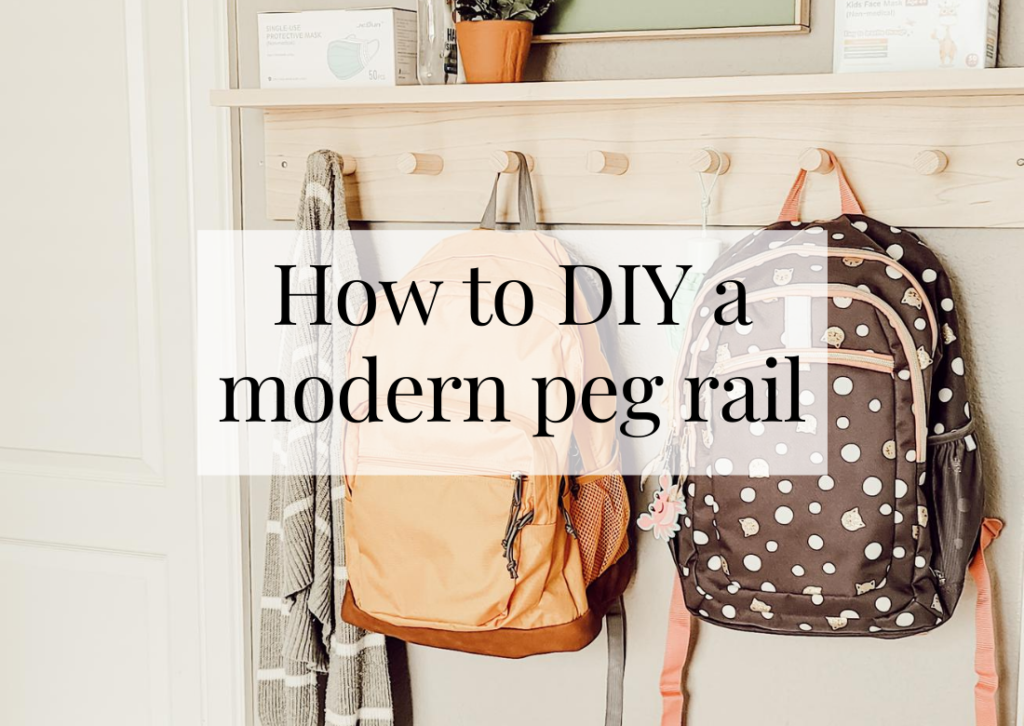
You can find shaker pegs all over, in stores and online, but the most common pegs require large holes to be drilled. I love the simplicity of these screw-in pegs because you don’t need a special tool to install them. This project can easily be done in an afternoon. You’ll need to account for a little time to acquire your shaker peg accessories, but this is an easy and quick DIY that can be done with the help of older kids too. I love that this peg rail can be used in any room to enhance the style of function of a space. A basement stairway, a drop zone or mud room, the laundry room, a powder room or bathroom, the kitchen, a utility closet, and even in a bedroom the peg rail can be a charming addition. I love my new easy shaker peg rail for the tub and I look forward to styling it in new ways in the future. Thanks so much for reading my blog, I hope you’ll subscribe and stay connected.

You may also like:

POSTED IN: DIY crafts
Let's be friends!
Related Posts


Search
Categories
Subscribe
Get the latest posts, discounts, and design inspiration right to your inbox.
