Easy DIY Floating Frame
Easy DIY Floating Frame
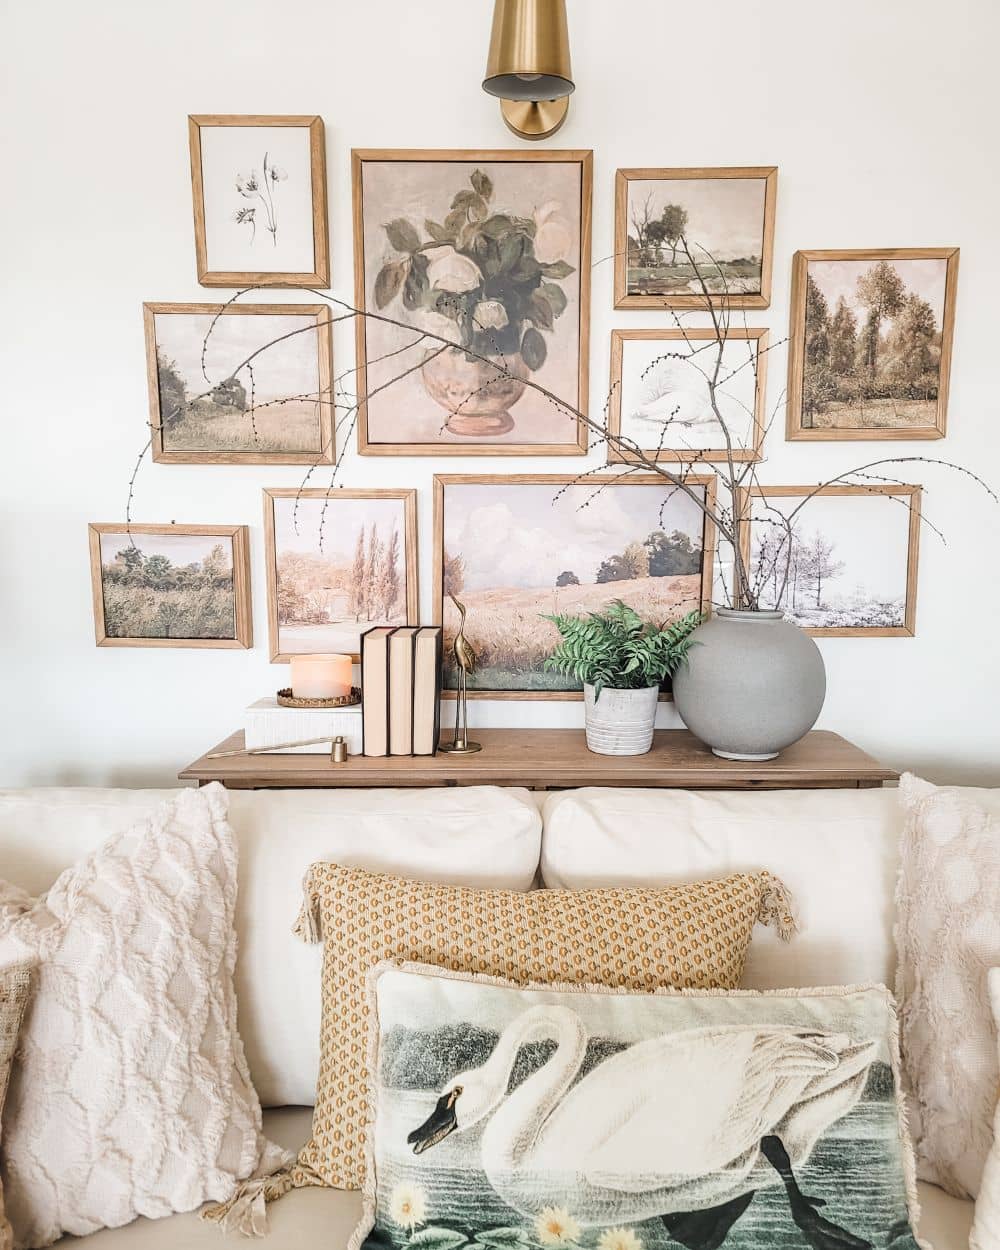
In this blog post, I’m excited to share how to purchase affordable and beautiful digital images from Etsy, how to print them onto canvases, and then how to build floating frames for the canvas art. This is a project I’ve been wanting to do for a while and the timing was just perfect since my idea for the main living room wall will need to wait a bit. With the new canvas art wall gallery installed, I love the warmth and beauty it adds to the space. This wall usually has my large faux vintage wall sign, which I love, but with the TV on the other wall, it creates two large rectangular areas of interest which isn’t my favorite combination. A wall gallery is a great way to change the shape of wall decor and create more interest.
Before we get started, I want to attempt to address a few common questions that I usually see on Instagram. The size of our wall is 14′ wide and 10′ ceilings. For the frames, I used 1″x2″ select pine boards from Home Depot. The stain I used is called Farmhouse, by Rove and Dwell. The single biggest tip I’m passing on from this project is to get your prints wrapped around the canvas. I thought the image would be perfectly lined up, but it wasn’t. Even if you lose a little bit of the edge of the image, it will be worth it. And finally, there are many Etsy sellers who provide digital artwork that you can print yourself, however, make sure that the size of the image will work for your wall or gallery arrangement. My package of images provided me with eight different sizes of each image, which is awesome. I can print cards, smaller framed art, or even use them on my Samsung Frame TV.
How to purchase digital art
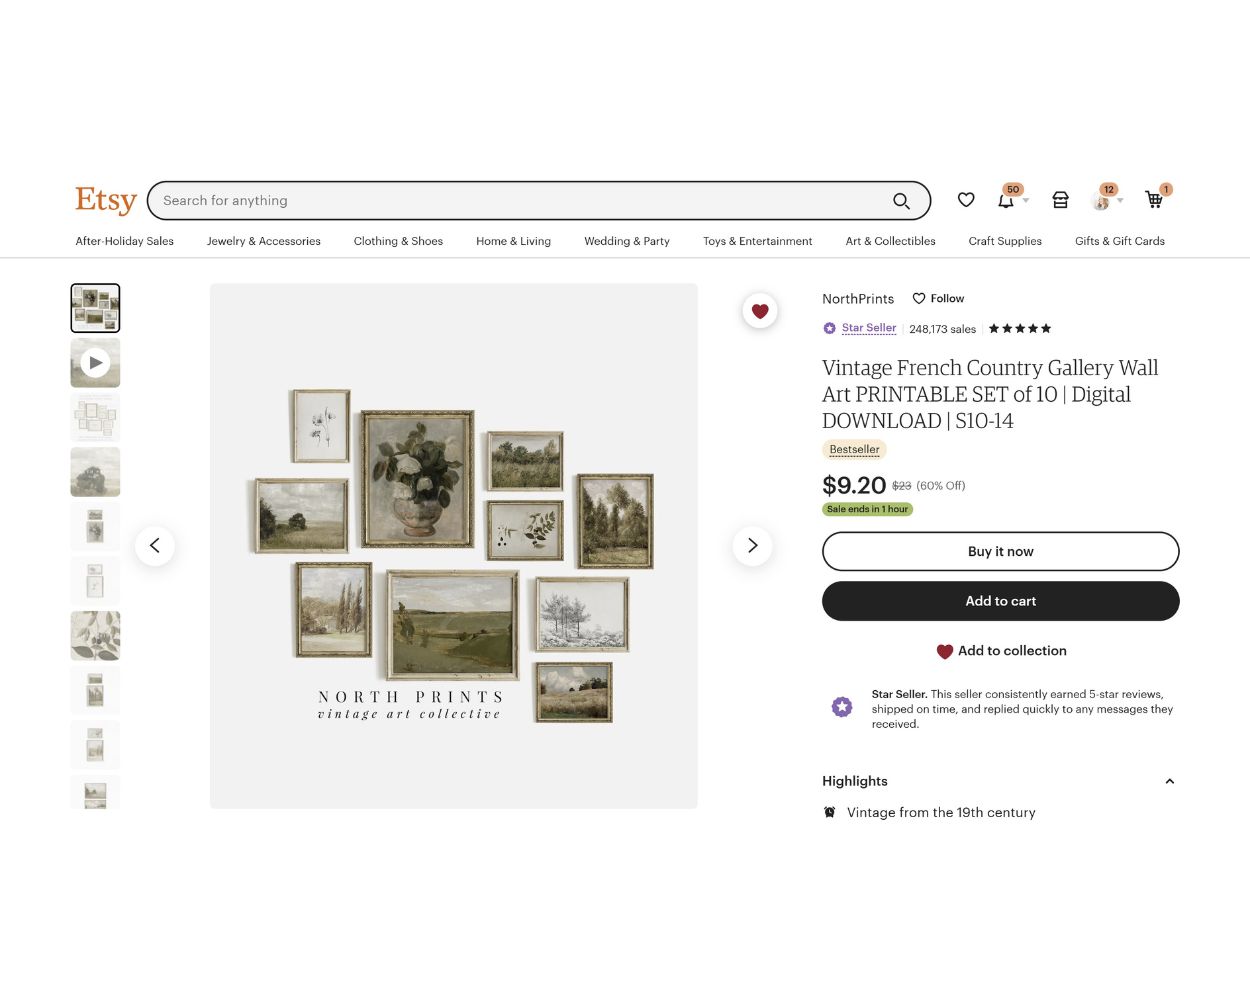
I’ve only ever purchased digital images from Etsy and I was able to instantly download my images with no issues. I can’t answer questions about other providers because I haven’t used them, but I do feel safe making these purchases on Etsy. The only thing you need to buy be able to buy stuff on Etsy is an Etsy login (you just need an email to sign up) and a way to pay electronically (credit card or my favorite, PayPal). As with any online purchase, be sure to read the entire product description and if you have questions, click that message seller button and just ask before buying. This is the exact listing I used to create my wall art gallery, but I did use a few different images from previous purchases that I preferred for my grouping. For only $10, I received ten awesome vintage images, printer resolution. I also like the Ginger and Co. Print Shop, they truly have lovely images and offer stunning groupings. Here are instructions and screen shots to help you with purchasing digital artwork on Etsy.
Step 1: Add to cart
Here’s an Etsy listing for 10 digital art prints. I love North Prints Etsy shop and highly recommend them. Once you’re logged into Etsy, you can ‘Add to cart’ whatever you want to purchase. As mentioned before, make sure to read the description of the listing and also check the seller’s rating to make sure you’re buying from a great company.
Step 2: Select your payment
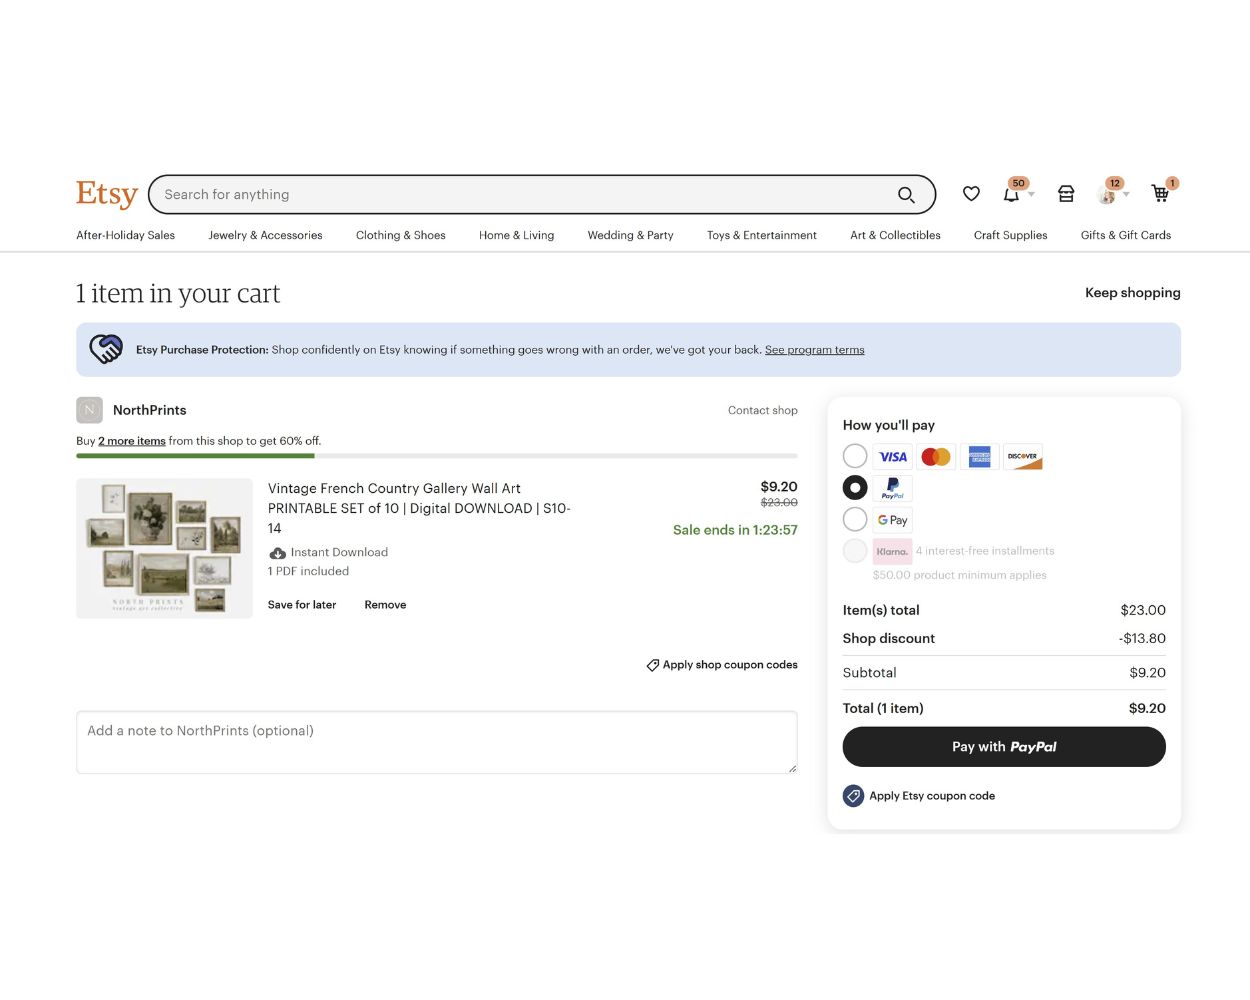
I always use PayPal when I purchase on Etsy, but each seller will list the types of payment they accept. Etsy has a good reputation for operating a safe environment for buying online, I’ve never had a problem, but if I did, I feel extra safe using PayPal so that I can easily dispute a wrongful payment going out through PayPal. In the image below, I selected the PayPal button to pay that way. Then I had to login to PayPal and authorize the purchase.
Step 3: Place your order
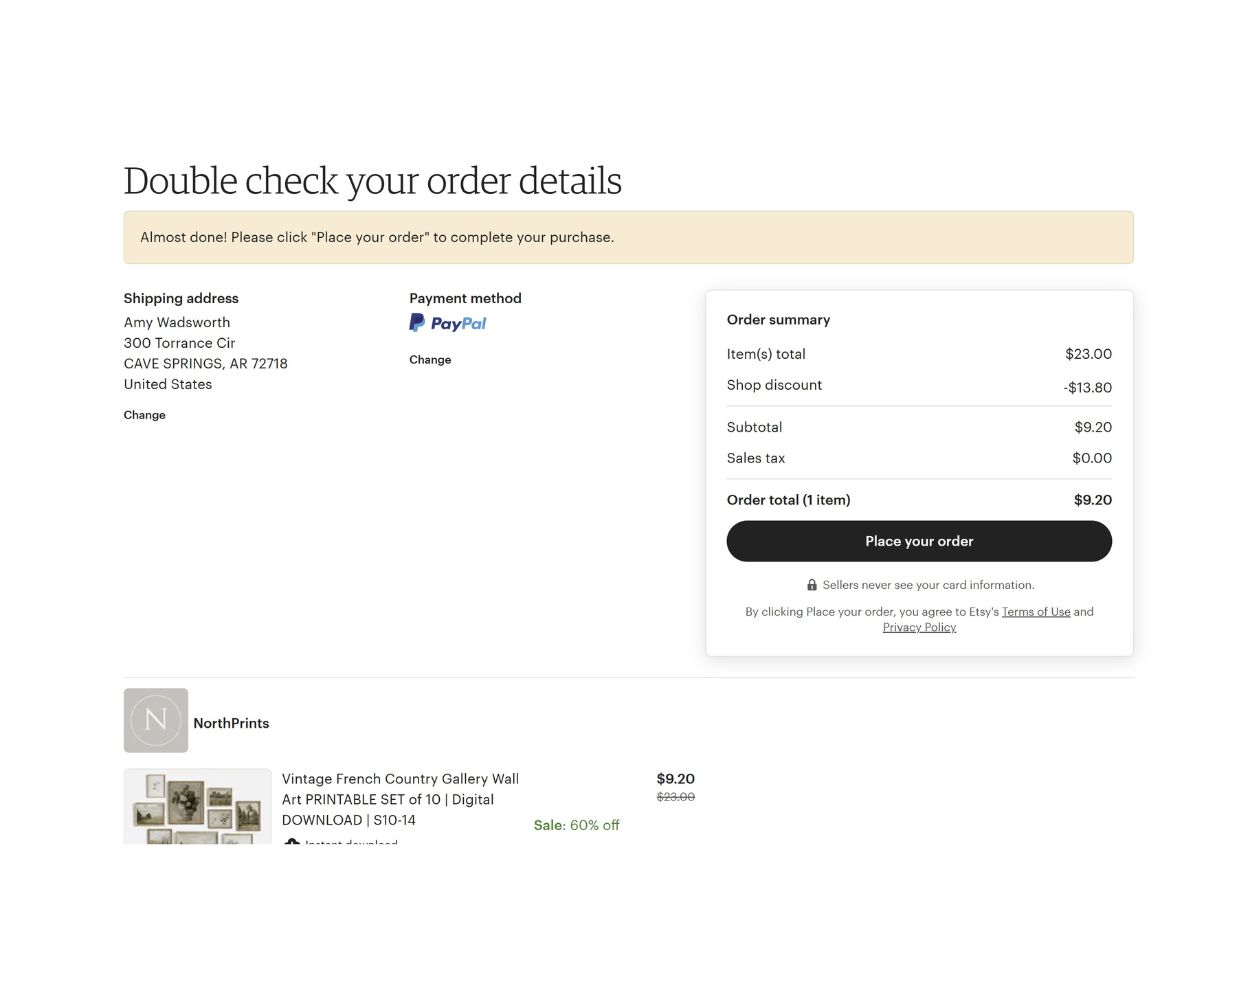
Once you’ve selected your print(s), and then your payment type, the final step is placing your order. Just click the ‘Place your order’ button. Once done, you will receive your prints to download to your computer.
Step 4: Save downloads to your computer
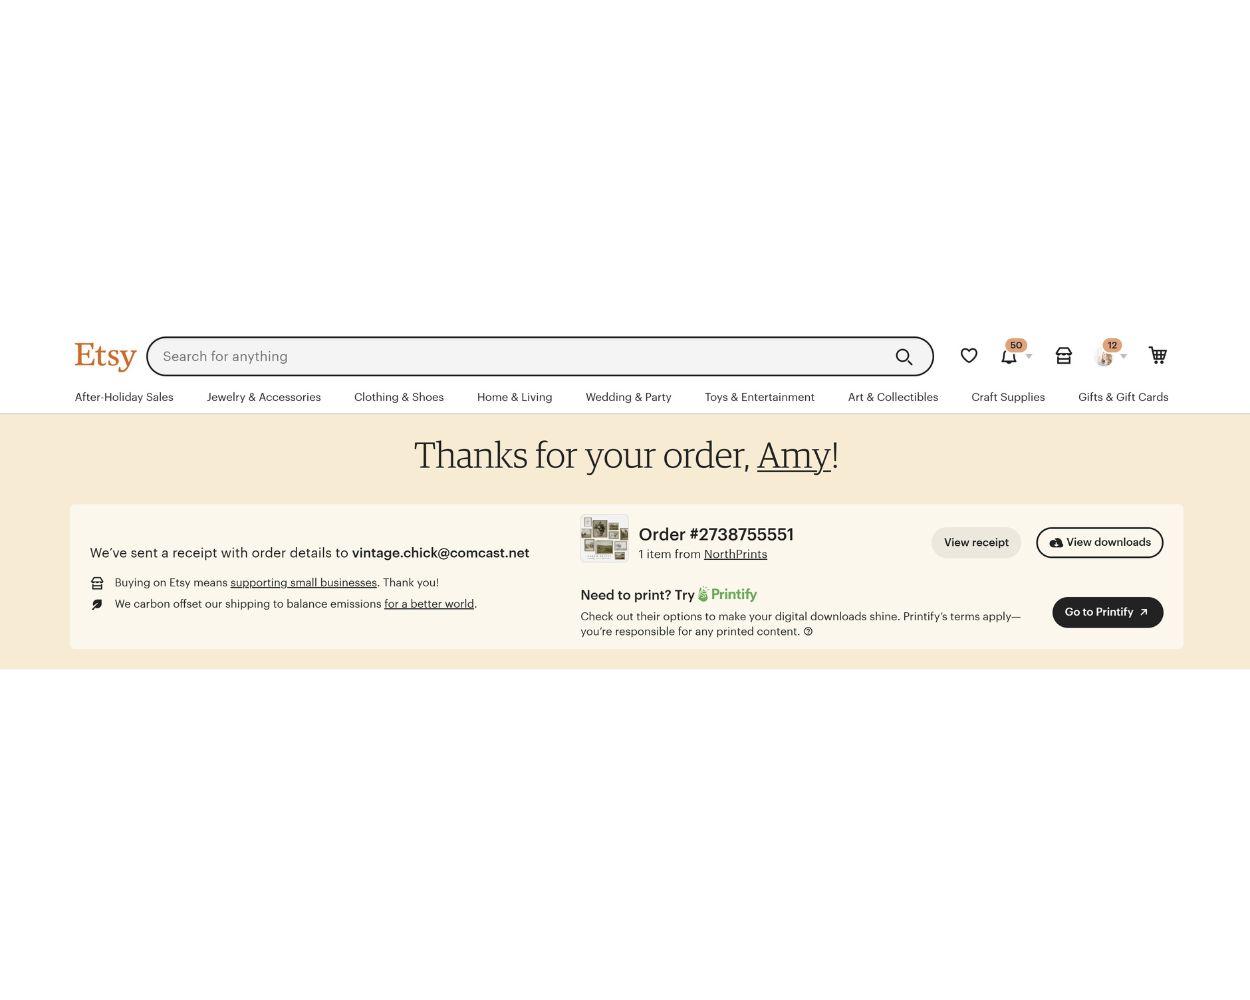
At this point, just click the View Downloads button. My digital image purchase was 10 images, and each image came in eight different sizes, so my images came in a zipped file due to their large size. Don’t worry if you’re not a techie, just keep going and follow my steps. It’s very easy once you do it.
Step 5: Download images
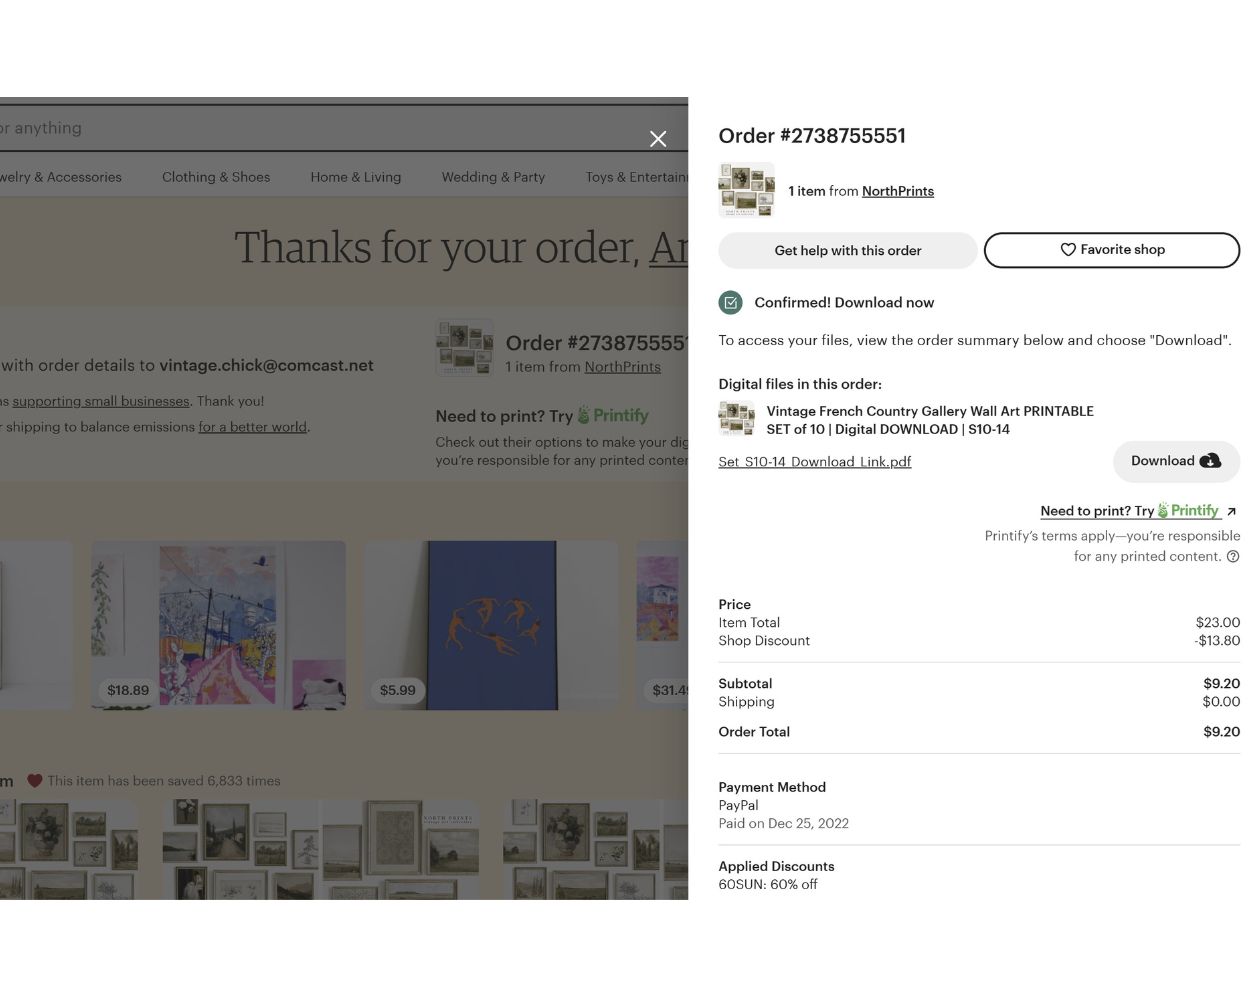
At this step, there is usually a link to a PDF and a button to download. Each seller does things their own way, but never fret if your screen doesn’t look just like mine – just read your options and determine how to download your images. I clicked the Download button at this point.
Step 6: Follow the sellers instructions
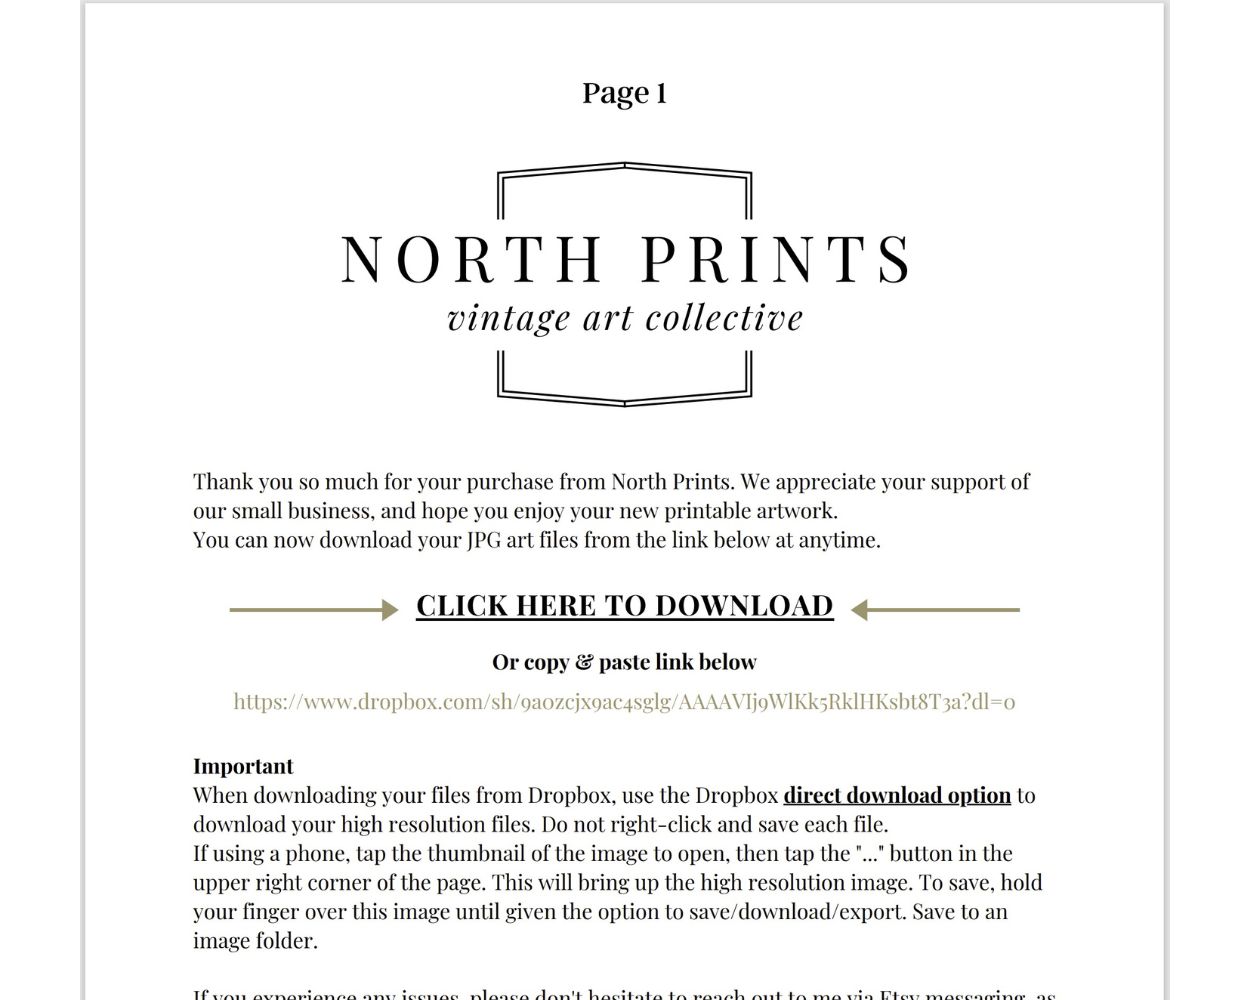
When I clicked on the Download button, this document opened to give me instructions. Keep in mind that you can always message the seller with any questions or problems. They’re happy to help because they want you to leave a positive rating on the sale. At this point, I clicked on the text that says, “CLICK HERE TO DOWNLOAD.”
Step 7: Download directly from Dropbox
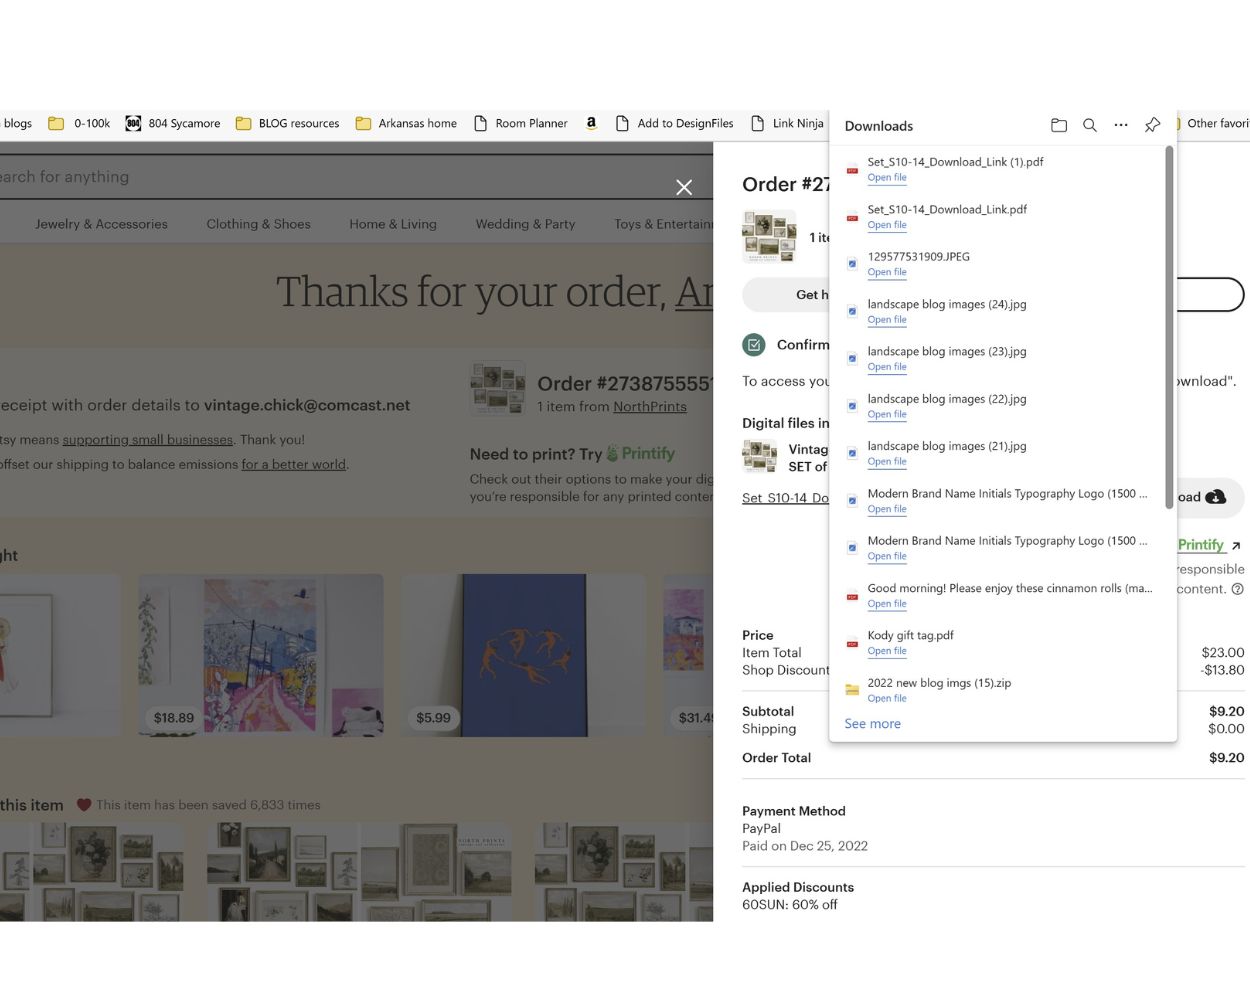
This seller uses Dropbox to deliver their digital images. I followed the instructions from above, and you can see the large download at the top of all my latest downloads is rather large and it took a few to download (80 files to be exact). The image files are organized into 10 folders and each image is named with the size of image it is. This makes it so easy to upload a specific image, that’s an 11×14 size, as you’ll soon see.
Step 8: Extract the downloads
Once the zipped file is done, you can click on it and a window will open showing you the 10 folders with your images. You will click on the Extract All button along the top of this window to save them to your computer.
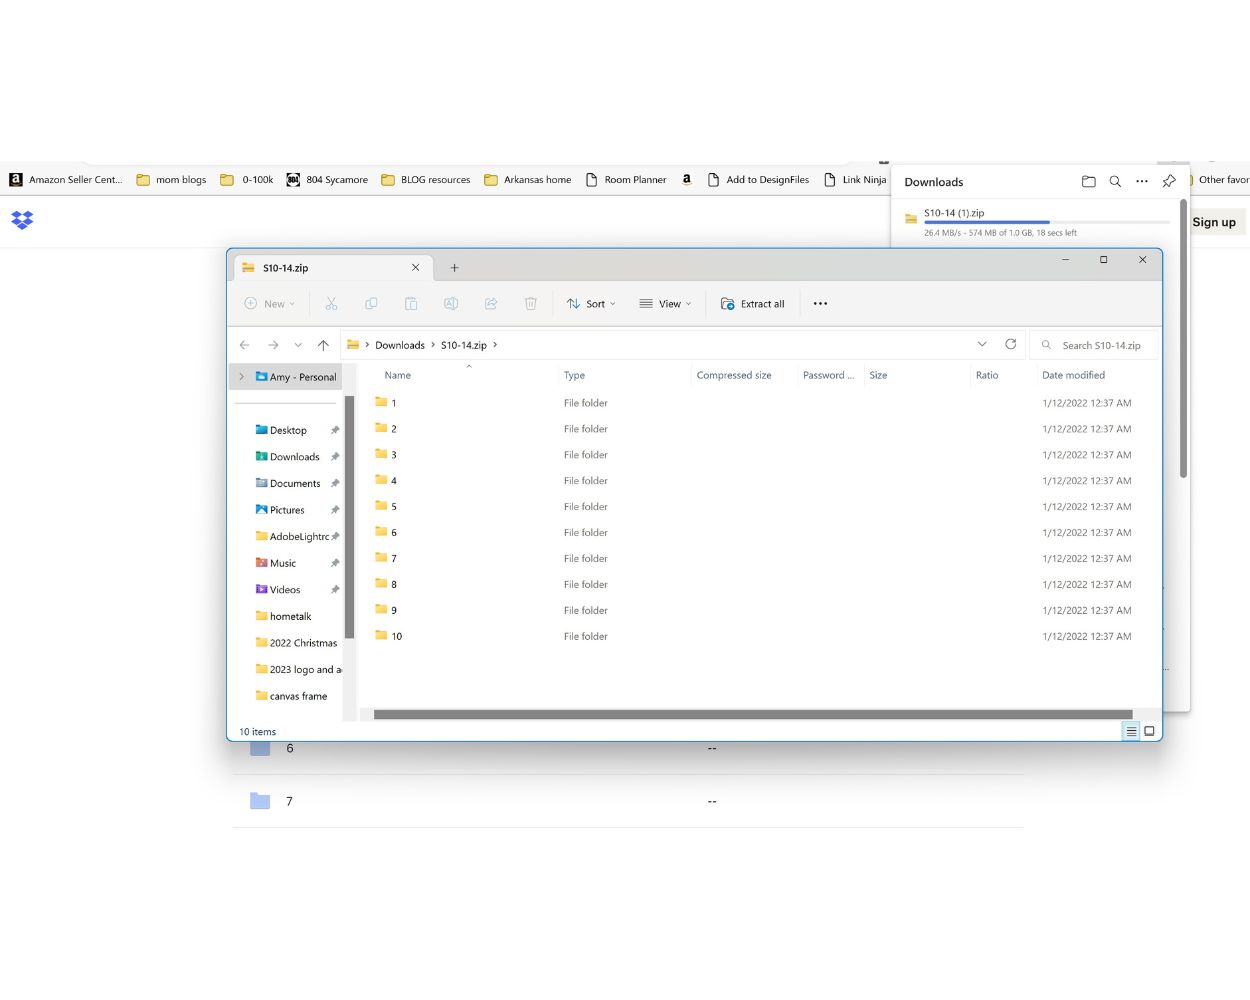
Step 9: Browse to the folder to save the images
Once you click Extract All, your computer will want to know where to put the files. Be sure to first click the Browse button so that they don’t save in the computer’s default location. I clicked Browse, and then I went into my blog folder and created a new folder to keep these images. Wherever you save the images is fine, just be sure to save them somewhere that makes sense to you and you can remember to access later.
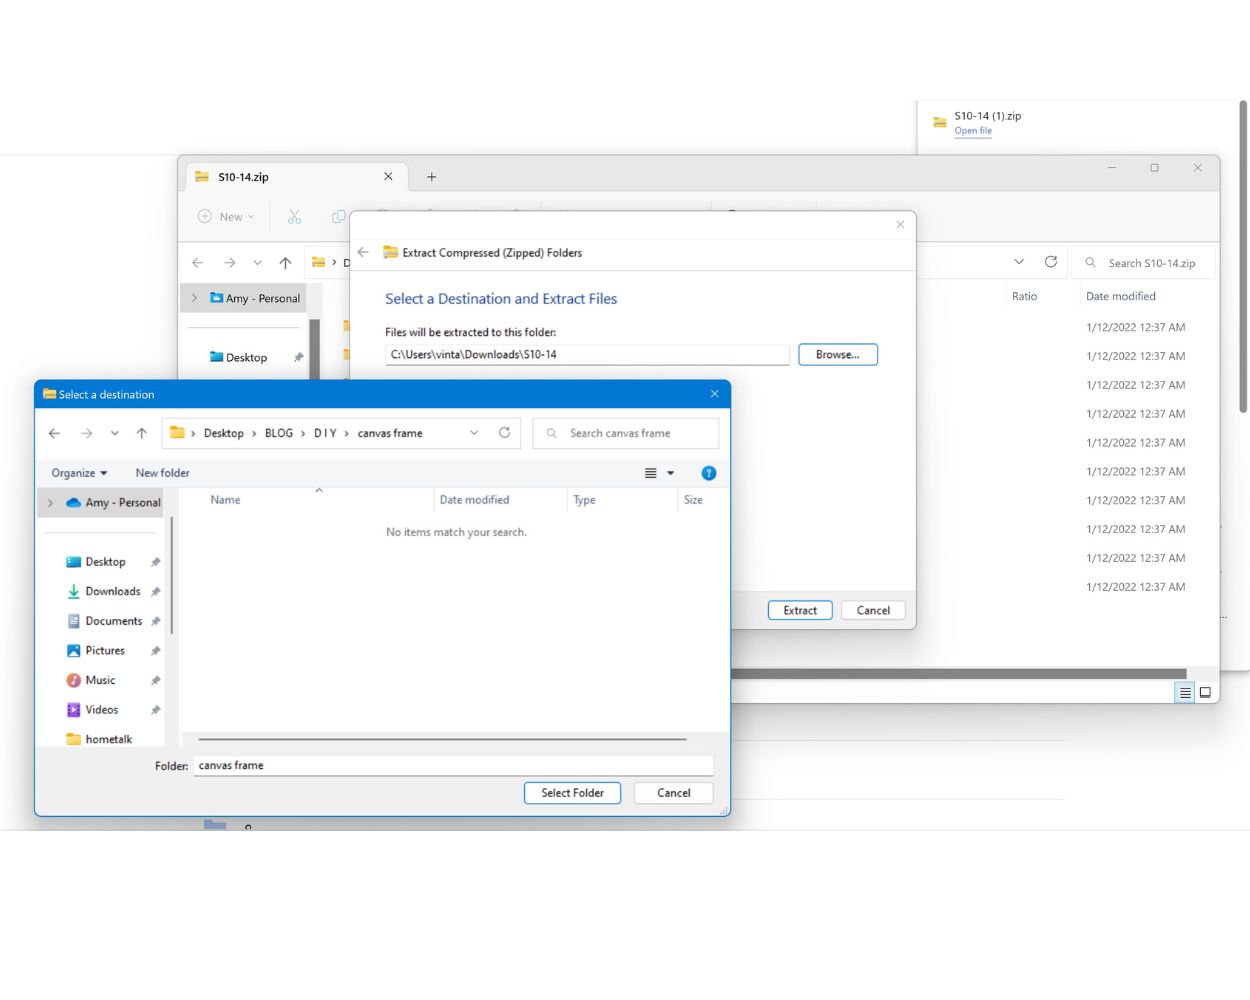
Step 10: Download images
The graphic below is showing you that it takes a second to download (save) the 80 files to your selected folder. Once it’s done, a window will open showing you all 10 folders with your images. You can double click on a folder and see what’s inside and how the images look closer up. This is the point that I began selecting which images would be in my gallery and which ones would sit on the bench, so to speak.
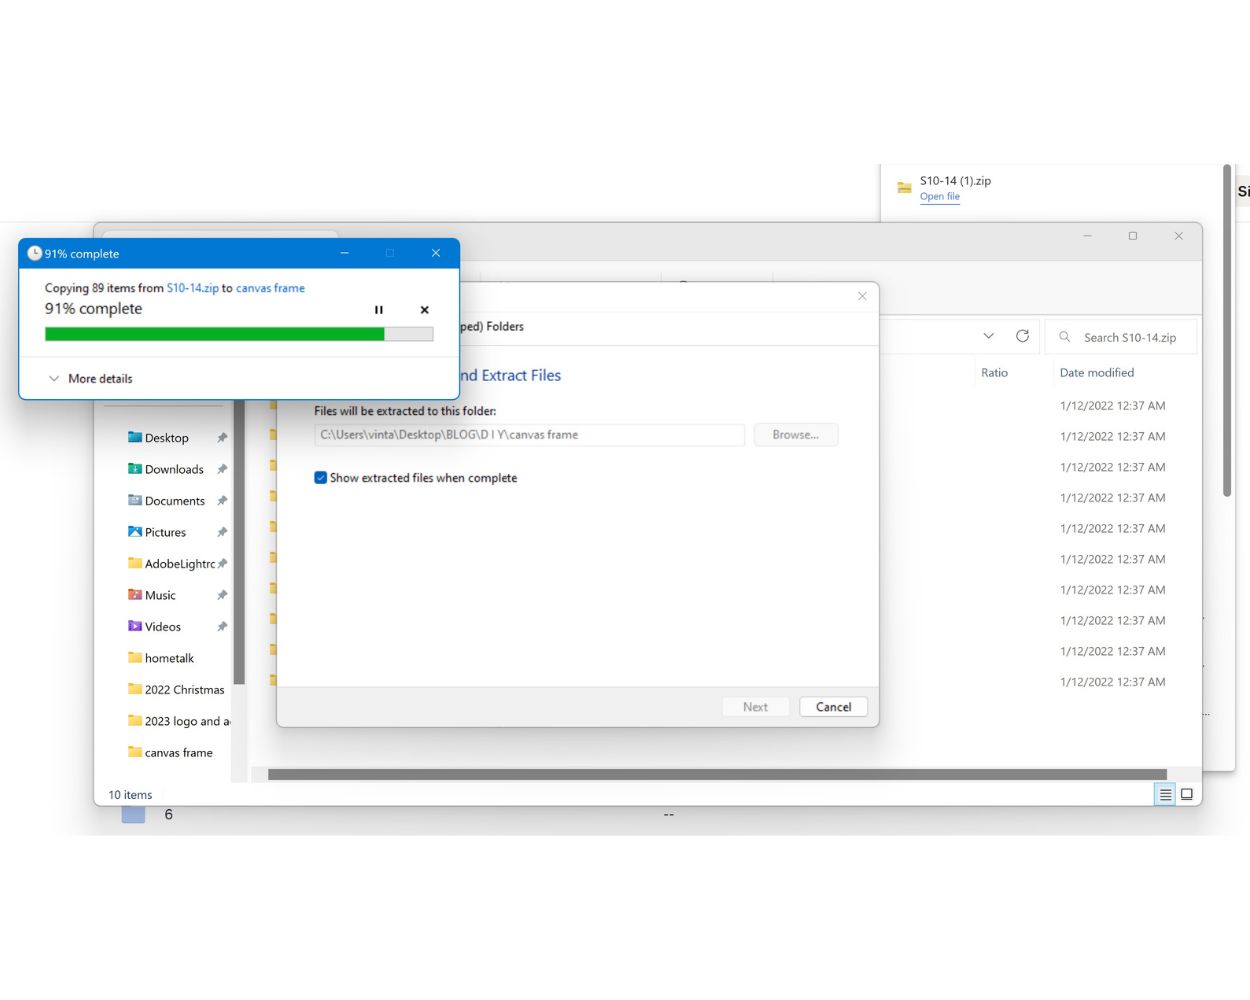
Now these images are yours, for personal use, not to resale or distribute. There is a lot of fun to be had with such beautiful images. I felt like $10 was an incredibly affordable investment to have such pretty vintage images, correctly sized in print-worthy resolution. I could have gone out and spent hours finding free vintage images, but it was just not worth my time. Now that you have these images, there are several places and ways to print them. I chose to print them on canvas and I found a very affordable shop to do it. If you’re interested in how to print these images on wrapped canvas, continue below. Otherwise, you can skip down and also learn how to create the floating canvas frame.
How to print images on canvas
After some research and price comparison, I chose canvasdiscount.com to have my images printed. I’m not sure it’s the cheapest place online, but after some time searching, they had the best prices for my project and it was very easy to order. And incase you missed it earlier, be sure to have the image bleed around the outer edge, this way you won’t see any white after framing the canvases.
Step 1: Open the website
I’m sure canvasdiscount.com has other ways to upload your images, but when I used the site, there was an UPLOAD PHOTOS button front and center on the home page which made it very easy to get started. Click the green button that says UPLOAD PHOTOS.
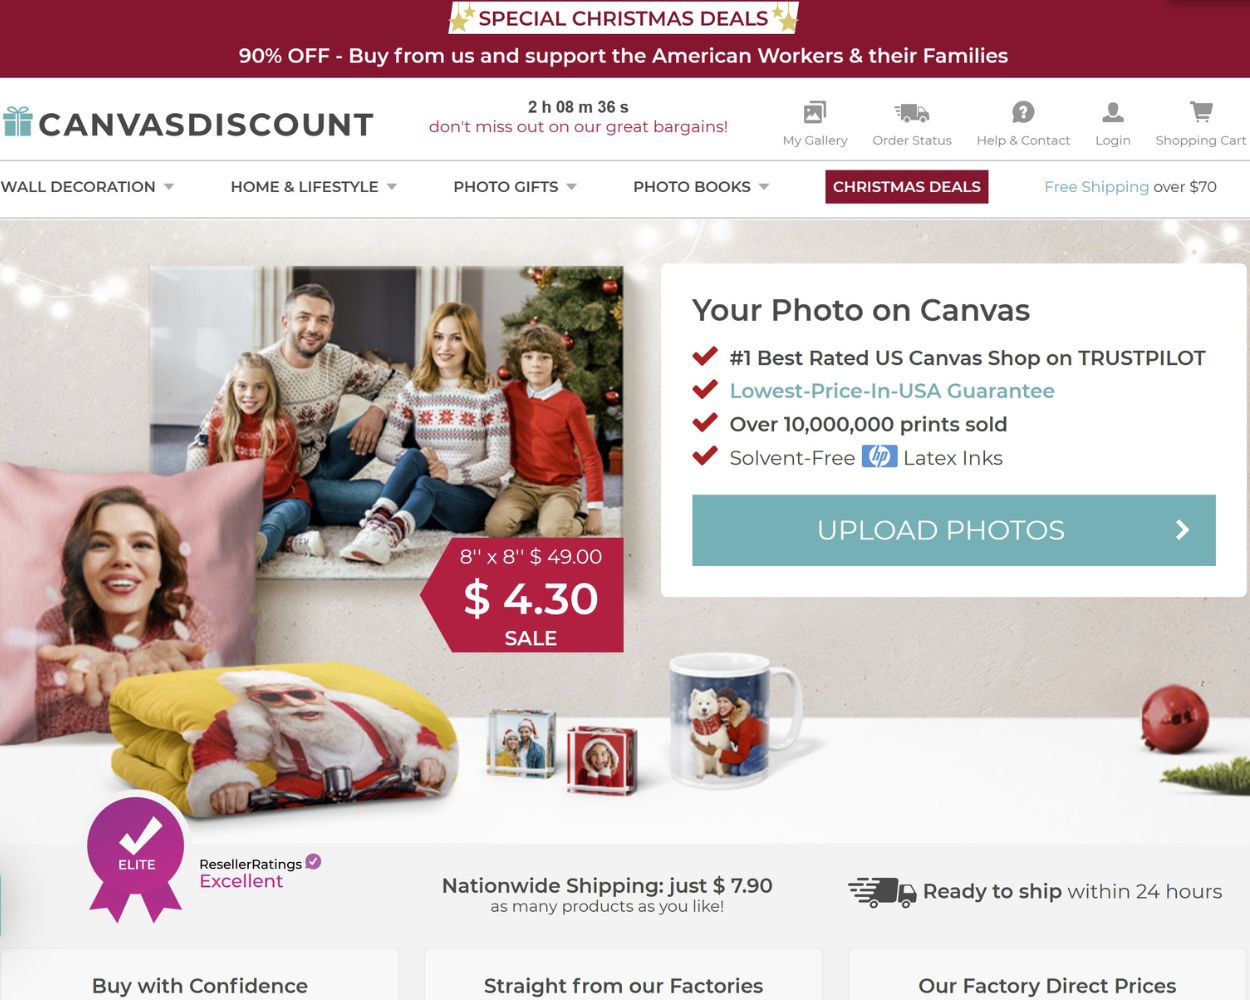
Step 2: Select the image
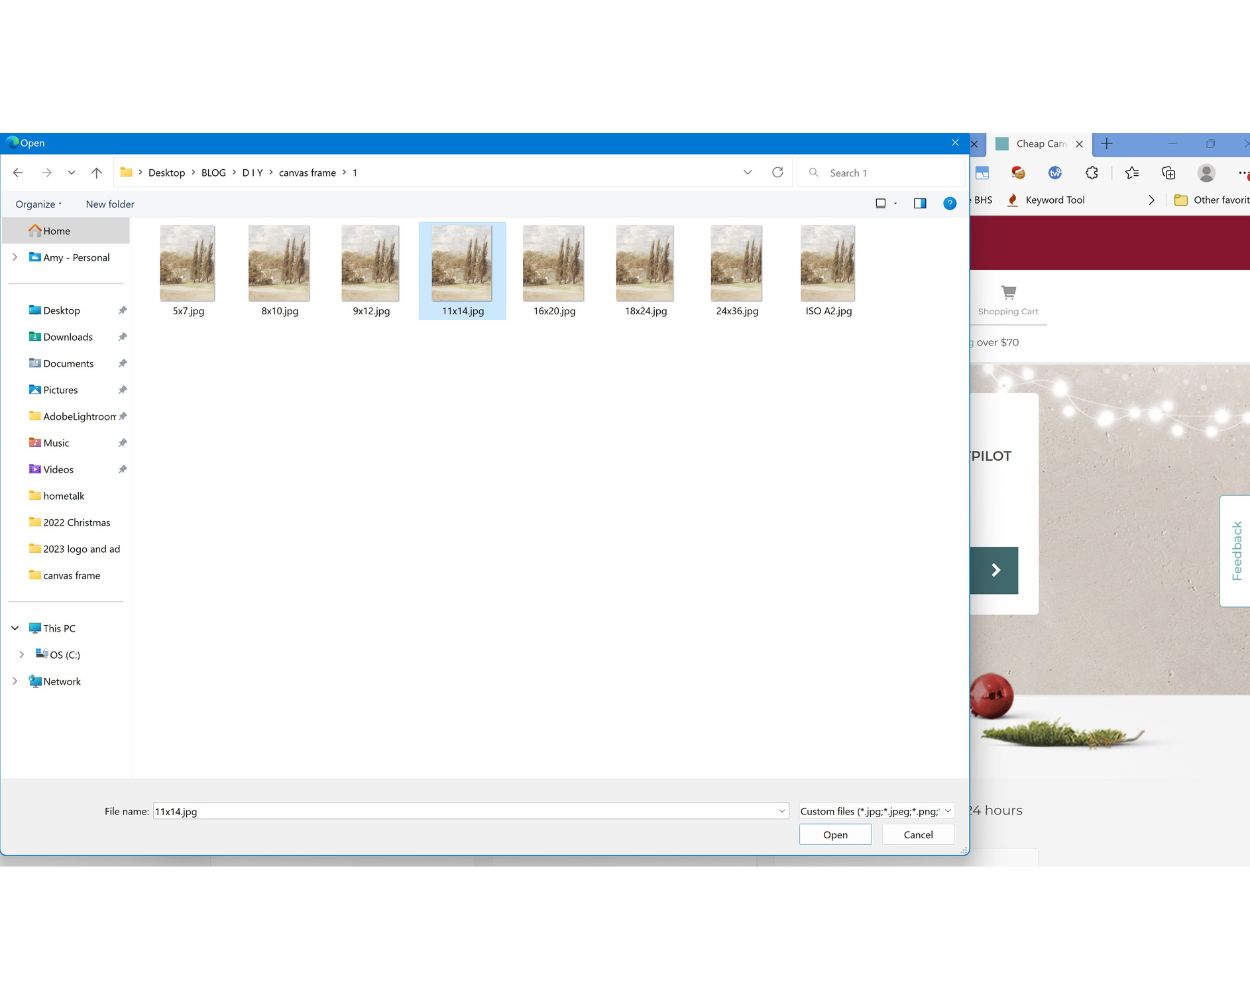
To make this step faster, you should plan out your gallery wall – which image and what size it should be printed at. If you really want to speed things up, you could copy the images for your gallery into a new folder and you could upload them all at once. I ended up selecting my images one by one, which is fine too. You can see below that one of my folders is showing and I’ve selected my correctly sized image to fit the canvas I want. It may take a few seconds to upload, that’s normal.
Step 3: Select what you want for the image selected
This is the step that you need to pay very close attention to. They give you a lot of printing options, so be sure that you’ve planned your gallery wall and the sizes ahead of time so that you know what size of each image you want printed. I printed out the main Etsy listing image of the gallery I purchased, and wrote down the size of each image I wanted as a reference for ordering.
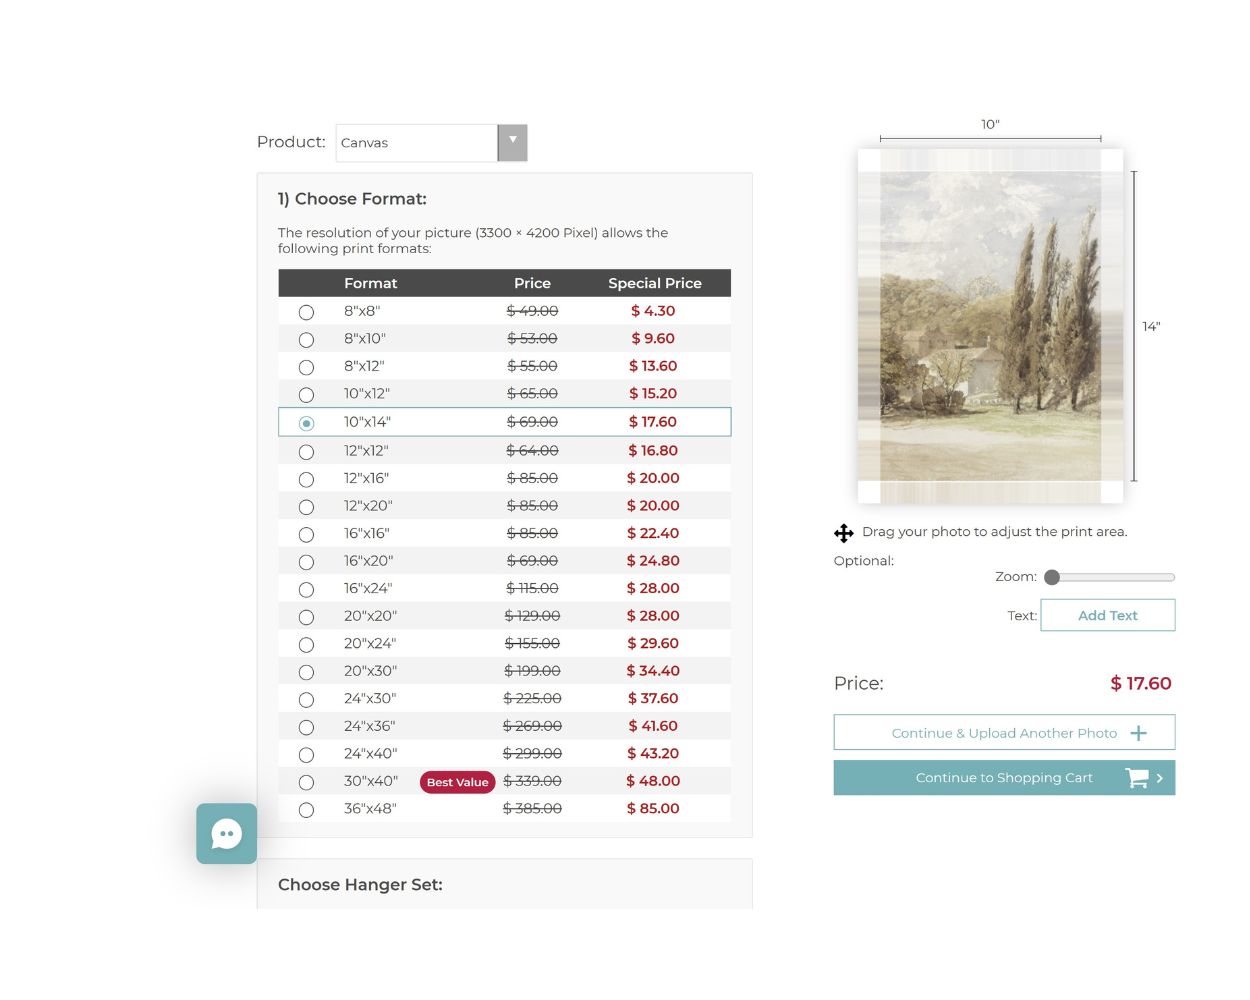
Once you’ve uploaded each image, selected the size of canvas, and other details, you can add them to cart and make the purchase. Note: When you’re selecting the canvas details for your order, consider the thickness of the canvas you want. I selected 3/4″ thick canvases because I knew I was going to use 1×2 pine boards for the frames. The pine boards aren’t exactly two inches wide, they’re actually 1.5″ so using a 3/4″ thick canvas meant that I could use 3/4″ thick square dowels to create the frame supports. If you don’t follow my size of frames, just be sure to design your frame size ahead of time so that you know what size canvas and dowel you’ll be using.
Pay for the canvas prints and complete your order. They shipped rather quickly for me and looked great. Now that you have your beautiful images printed on canvas and looking like artwork, now it’s time to build the very easy floating frames for them. Be sure to cut the wood for largest frames first because if you have any scraps, they may be usable for a smaller frame. Keep reading for the easy DIY floating instructions.
How to make floating canvas frames
When you cut the pine boards to create the frames, you can do straight cuts, but I like the professional look of 45 degree angled corners. To help me get the corners just right, I used a Kreg corner clamp. As mentioned before, it’s best to cut the boards for the largest sized frames first. Another tip is to make sure you measure each canvas and not just assume it’s the exact size it’s supposed to be. This is important because when you measure and mark your wood to cut, you will need to add 1/8″ to the length and width. Adding this little bit will give you 1/16″ on each side of your canvas so that the canvas will fit.
For the best step by step instructions, check out my YouTube video. Some key points in the video are to cut all the boards at once, then construct all the frames at once, and stain all the frames at once. Doing all the frames for each step is just more efficient. Also, I used 1.25″ long brad nails to connect the 1″x2″ pine boards, and .75″ long brad nails to attach the 3/4″ square dowels in the corners. The square dowels add stability to the frame and allow the canvas to seat properly.
Floating canvas frame video tutorial
Shop the post

This post may contain affiliate links. This means I may receive a small commission from each purchase, at no cost to you. As an Amazon Associate, I may also earn from qualifying purchases. Thank you for using my links to help keep this blog going!
Creating my own canvas wall gallery and using a curated collection that I tailored a bit for my style was so satisfying. You can paint the frames or stain them to coordinate with your style and decor, and you can decide how bold the floating frames will be. If I had to do the project again, I would probably add some wood glue to each corner before clamping and nailing them together. I just love this gallery and can install it anywhere in our home (It will probably spend some time in our bedroom too!). Thanks so much for checking out this project. I hope you’re inspired to look at your walls differently and know that you can customize your own look with affordable wall art, if you want.
POSTED IN: DIY Projects
