Amazing DIY Dollar Store Giant Snowflakes
")
Amazing DIY Dollar Store Giant Snowflakes
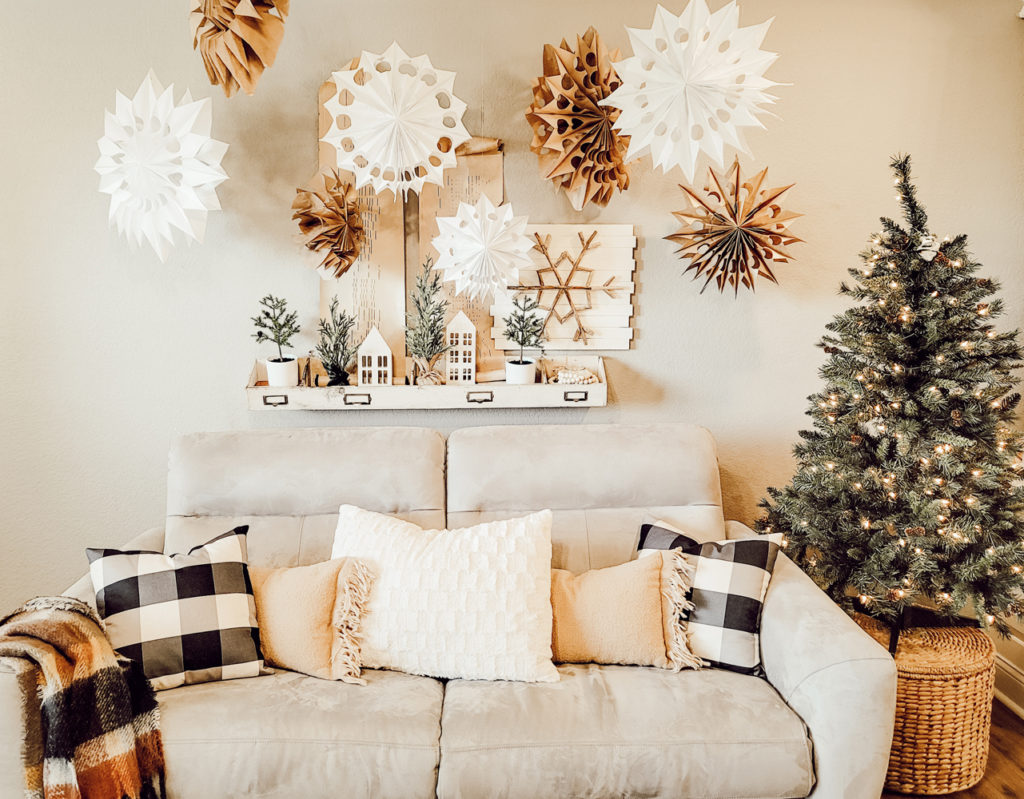
These amazing DIY Dollar Store giant snowflakes are so fun and easy. With Christmas around the corner and our house build getting closer to completion, I didn’t want to dig out our Christmas decor out of storage. However, I wanted to make our temporary home festive and fun for our girls… within reason. These paper snowflakes make such a big impact for just a few dollars.
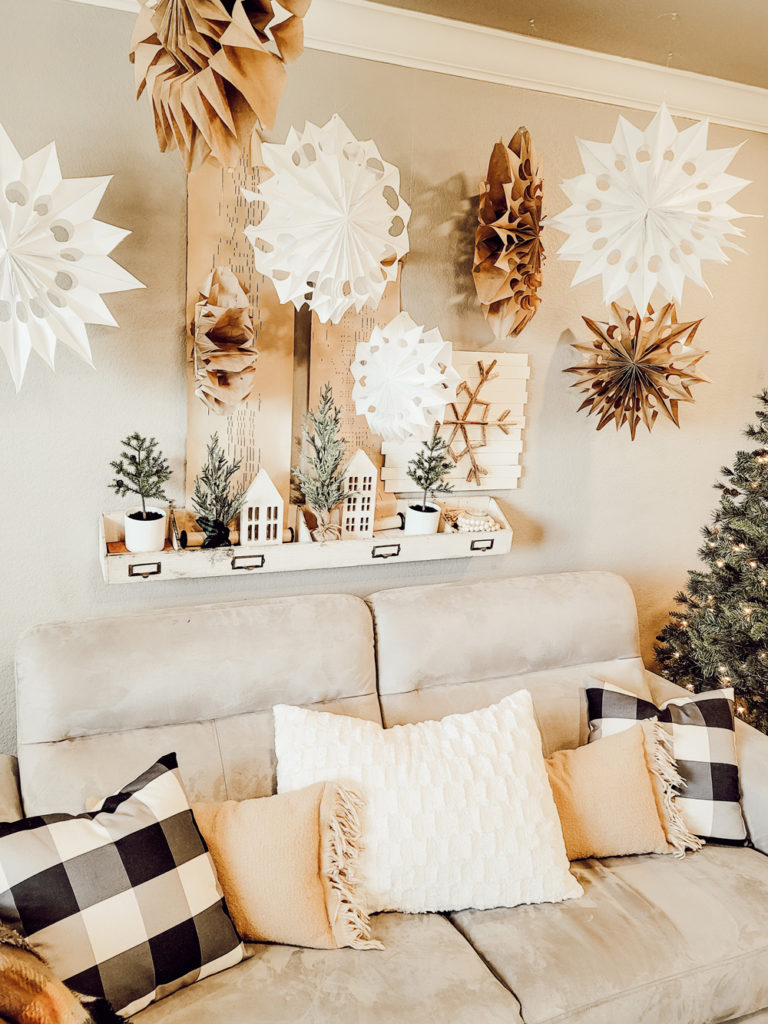
All you need is a package of paper lunch bags, a glue gun, and scissors! After some trial and error, I determined that nine lunch bags was the right number to get full looking snowflake. I also played around with size by cutting down the length so that I could have some giant, medium, and small snowflakes. I purchased the kraft brown bags because my Christmas decor is neutral and natural colors, but with our apartment’s grey walls they didn’t pop the way I wanted. So, I mixed in some white paper bags and I love the way the kraft brown and white paper look together. I also used fishing line and tacks to hang the snowflakes.
I created a short YouTube video, but here are the steps also:
- Start with nine bags, facing the same direction.
- Take three bags at a time and use a hot glue gun to glue the bottom edge of the bags.
- Then add a vertical line of glue right down the middle of each bag.
- Repeat this for the other groupings of three bags.
- You can use a ruler or just eye it, but cut a point out of the top of the bag without cutting the line of glue.
- Then you can cut out half circles from each side. I used a salt shaker to trace the round shape.
- It’s easier to cut through three bags at a time than all nine.
- Once all three sets are cut, glue them together as well. First the bottom edge and then down the middle.
- Once the glue is cooled and set, carefully pull apart the accordion shape to make sure glue didn’t connect pieces you don’t want connected.
- Once the accordion is free to move, then glue the final ends together to create the snowflake shape.
- You can cut a hole or use a hole punch, then hang the snowflake from the ceiling or anywhere you want.
- You can use fishing line, thread, twine, yarn, etc. You can also add glitter or fairy lights to further embellish the look.
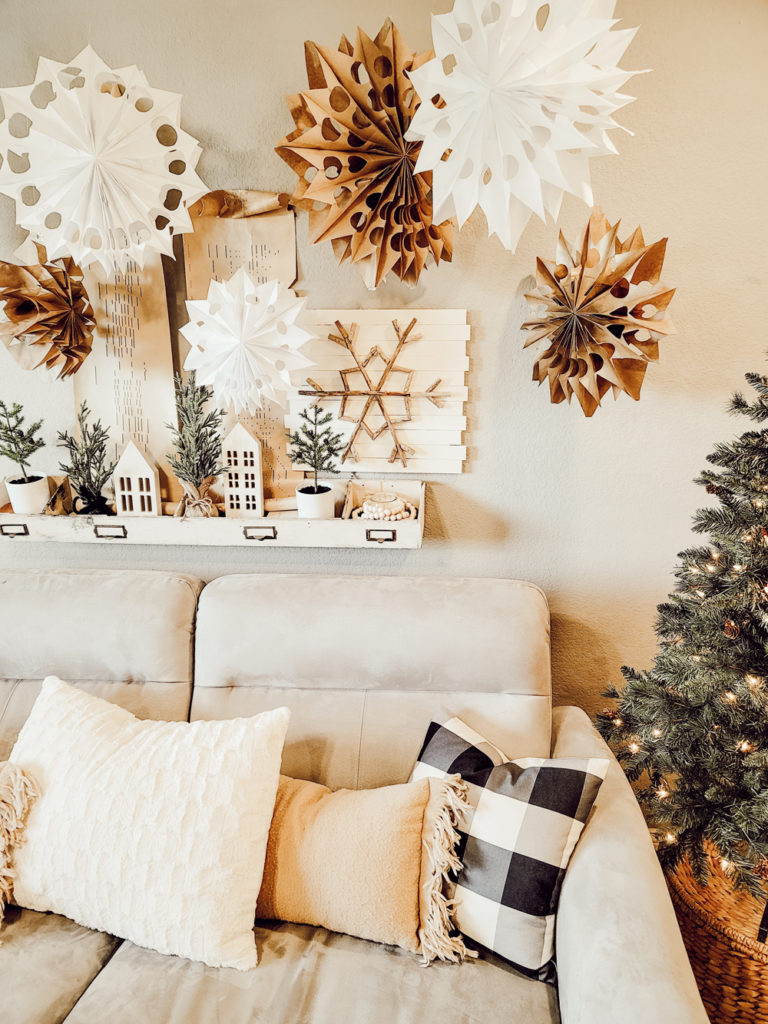
I just love the way my giant paper snowflakes turned out. They were fun and easy to make and I love how inexpensive this decor turned out to be. If you try this DIY, please let me know or if you have ideas of how to use these giant snowflakes, I’d love to hear your ideas in the comment box below. Thanks so much for checking out this post. You can also subscribe to receive a new decorating/diy blog post once a week. If you enjoyed this snowflake DIY, check out my Pottery Barn Driftwood Snowflake copycat!

POSTED IN: DIY crafts
Let's be friends!
Related Posts


Search
Categories
Subscribe
Get the latest posts, discounts, and design inspiration right to your inbox.
