How to DIY High-End Ornaments

How to DIY High-End Ornaments
Does your Christmas tree look similar each year, or does the style get changed up sometimes? Either way, you can DIY some new Christmas ornaments to go with your annual look, or to create a new look. I’m excited to share two techniques on how to DIY high end ornaments, using just a few supplies you probably already have on-hand! For your base ornament, you can use old bulbs that need new life, you can buy shatter-proof acrylic bulbs at Hobby Lobby and the Dollar Store, or you can repurpose some thrifted bulbs. I grabbed a 24-count tub of shatter-proof bulbs at Hobby Lobby for 60% off. The Dollar Store also had some plastic elongated bulbs and some extra-large round ones, so I grabbed a few of those too.
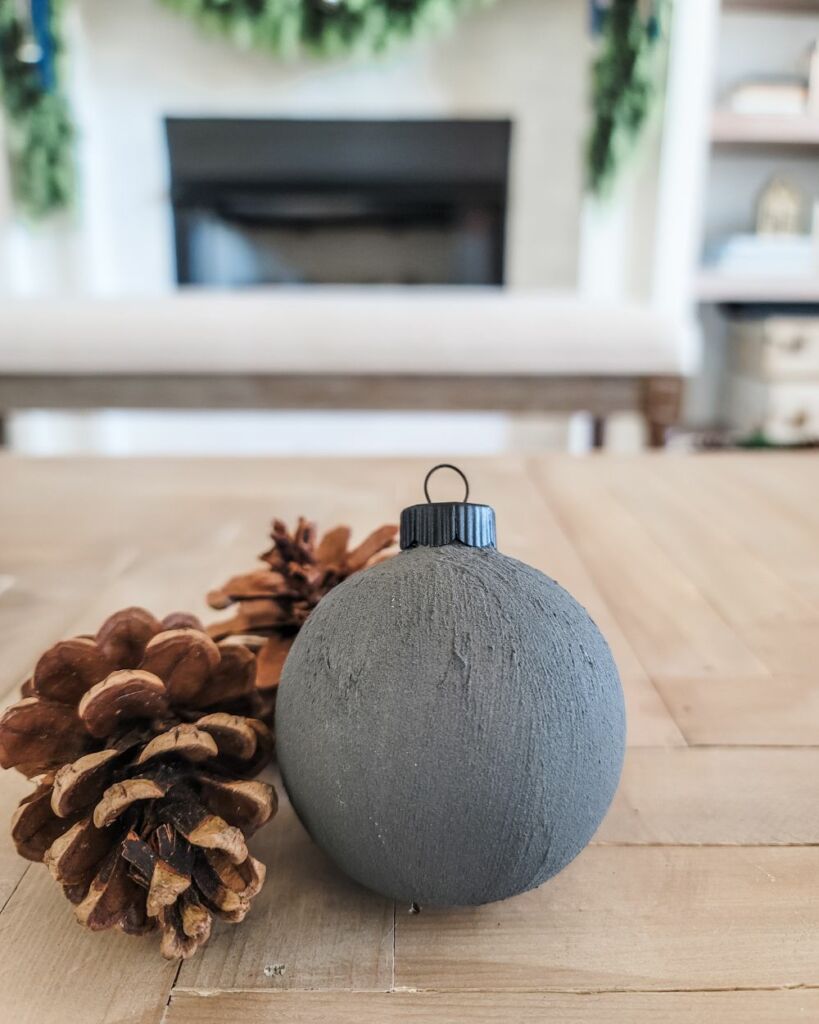
How to DIY High End Ornaments – Faux Concrete Ornaments
There are a few ways to create a faux concrete Christmas ornament, but this way is the easiest and least expensive. To prepare the surface of the bulb, using acrylic craft paint, just paint on any color of your choosing all over the bulb. Once it’s dry, take the final paint color you want and mix it with some baking soda. The measurements of paint and baking soda aren’t precise, if you don’t use enough soda then the texture won’t have the gritty concrete look. In this case, just add a little more soda until it’s right. If you add too much soda, then it won’t paint on because you will have created a paste. In this case simply add some more paint. Remove the ornament top, paint on an even layer, and allow them to completely dry. You can spray paint the tops of the bulbs if you want to further customize the high-end look. In hindsight, I would have preferred sticking to a solid color. I was being creative and getting fancy with the gold accents, but it didn’t really work with the baking soda texture for me. I would recommend picking your favorite color, and sticking to it!
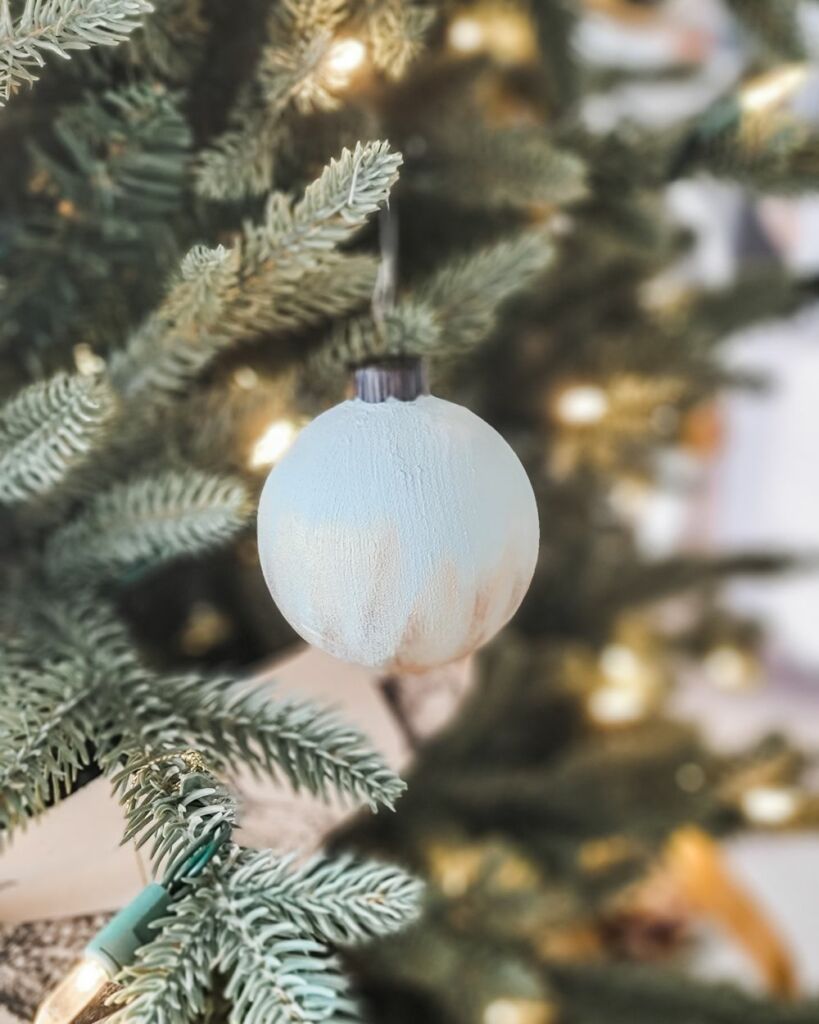
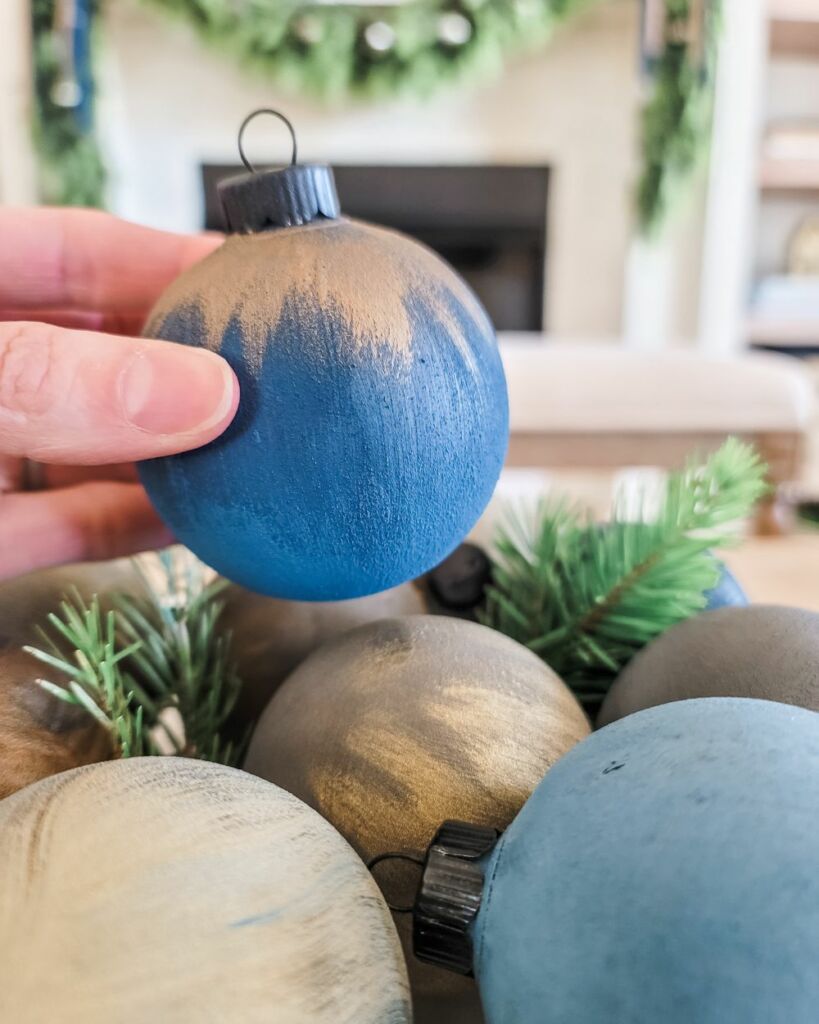

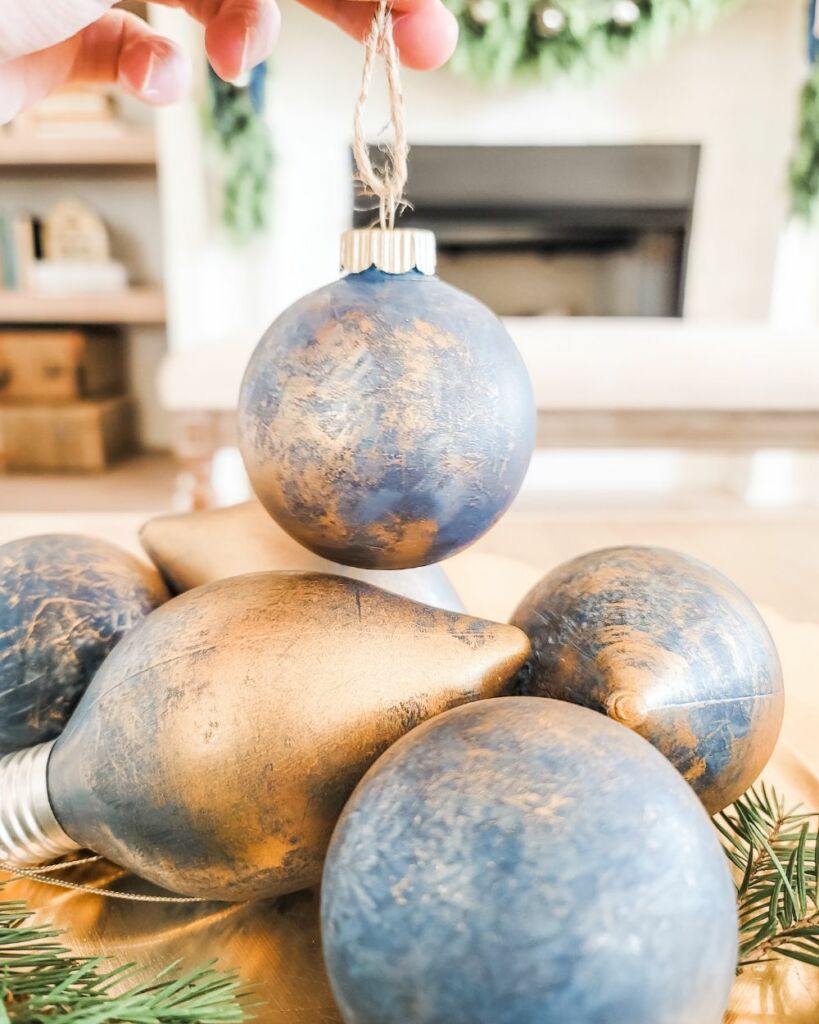
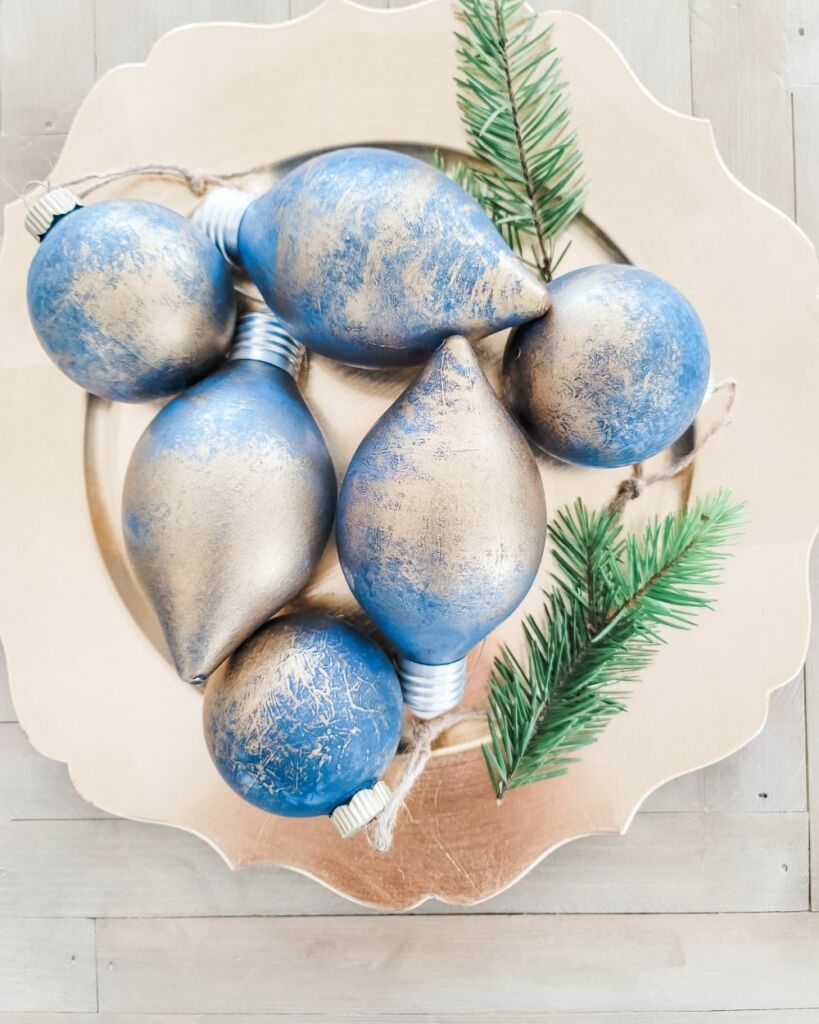
How to DIY High End Ornaments – Gold Marbled Ornaments
This technique has a ton of flexibility, and if you’re adventurous, you may discover some beautiful looks by mixing different paint colors. For this technique, grab the craft acrylic paint colors of your choice, a few sandwich bags, and gold Rub N’ Buff. Remove the ornament tops and prepare a drying rack. Add a small squirt of paint to a sandwich bag and then place a bulb in the bag and use the bag to rub the paint all over the bulb. You will be able to see through parts of the bulb at this point and that’s fine, just place your bulb to dry. Once dry, you can either repeat this step using the same paint color, a coordinating paint color, or a bit of gold Rub N’ Buff. Place your choice of medium (paint or gold) in the bag to swirl more color onto the dry bulb, then allow to dry again. For this second coat, you may want to just focus on certain areas of the bulb to highlight, or you can rub everywhere, but the goal isn’t to fully cover the first layer, but to add an accent to get that marbled look. So, use less paint for the second coat. Allow this layer to completely dry. At this point, a third layer or not, is up to you – don’t be afraid to try adding copper Rub N’ Buff or a slight dab of black or white, or another color, to further enhance the depth of the marbled look. The kids can get in on the action and create some beautiful bulbs without the typical mess that comes with painting. I love the final look and think the technique is so fun and easy too.

How to DIY High End Ornaments
For both of these techniques, you need to set up a drying station to allow your paint to dry. I took a piece of floral foam and stuck pencils into the foam, they are spaced out so that the bulbs could slip over the pencils and dry. You can use whatever works, but I have foam and pencils around so that’s what worked for me. To spray paint the bulb tops, I cut straight lines into an empty cereal box, and then slipped the bulb top inner-wires into the cut slit. This allowed the tops to all sit up on top of the box surface so that I could spray paint them all at once. I used a matte black spray paint for some of them and love the look, but any neutral spray paint can elevate the traditional silver color if it will coordinate better with your theme.
How to DIY High End Ornaments – Shop this post

This post may contain affiliate links. This means I may receive a small commission from each purchase, at no cost to you. As an Amazon Associate, I may also earn from qualifying purchases. Thank you for using my links to help keep this blog going!
How to DIY High End Ornaments
Well, I hope you enjoyed these two super easy techniques on how to DIY high end ornaments. I just love the idea that I can create a beautiful texture or look using a few simple things in my kitchen. I think the concrete technique is a wonderful way to upcycle bulbs with a chipped coating or the ones in colors that don’t really go with your style anymore. Either way, these techniques have so many ways you can play and customize your own look, and the kids can help! I love these matte white ornaments by Liz Marie. These techniques weren’t contrived by me of coarse, but I loved doing them and sharing with you. Hope you have fun this season creating your own DIY decor!

POSTED IN: DIY crafts
Let's be friends!
Related Posts


Search
Categories
Subscribe
Get the latest posts, discounts, and design inspiration right to your inbox.
