Z Gallerie Inspired DIY Canvas Wall Art

Z Gallerie Inspired DIY Canvas Wall Art
If you love Z Gallerie or even modern art – you’re going to want to check out this awesome texture treatment and painting technique! This Z Gallerie inspired DIY canvas wall art can be done on any size of canvas and the painting can be whatever you want. I’m not an artist so I kept it simple and modern. My 40″x60″ canvas is huge and such a statement size! It was originally covered in fabric, then I decoupaged vintage book pages and ephemera onto it, and then I decided to embroider it. You guys, my embroidery idea was so exciting and I selected one of my favorite scriptures, but each letter took me an hour to embroider with yarn and after that hour I had a kink in my neck and very sore fingers. If you watch my video about this Z Gallerie inspired DIY canvas wall art, you’ll get to see what the canvas looked like with my start of embroidered words. I couldn’t ditch all of my hard work though, so I saved the verse at the bottom and stuck with the grey tones for my art!
If you check out my video and enjoy it, I’d love it if you gave it a ‘thumbs-up’ and you can subscribe to get updates on my future videos.
Once the canvas is prepped, you can add the spackling compound to add texture and depth to the canvas. The type of spackling compound you use actually matters. I selected Fast ‘N Final Lightweight Spackling Compound because it has silicone in it which allows it to flex with the canvas and not chip off, and it is very lightweight which is especially helpful for large canvas wall art. Then I simply used a spackling knife to apply it to the canvas. You can apply it as thickly or thinly as you want and in any direction that you want. I liked to smear it on in diagonal directions and then lightly wipe it in the other direction to slightly flatten the texture. I didn’t want the exact same texture everywhere, I wanted a good mix all over the canvas to add interest and look as natural as possible.
Use this spackle:
We are a participant in the Amazon Services LLC Associates Program, an affiliate advertising program designed to provide a means for us to earn fees by linking to Amazon.com and affiliated sites. There’s no extra charge to you. Thank you for considering our links!
Once the compound is dry, you can paint your new highly-textured surface! I used the easiest painting technique ever and when I began, I had no idea what I was going to create. I actually procrastinated this project because I didn’t have a clear vision – the large canvas was very overwhelming. But, I got the itch to paint so I just went for it. I started out with craft paint in black, brown, cream, grey, and olive and added warm water to thin in out. Then I used a foam brush to apply it, but that method was taking too long so I moved on to putting the watered-down paint directly onto my old rag. Once applied with the rag, I folded the rag over and used a dry part to essentially dry brush the paint around. The dry brush effect gave me the exact look I was after and it was very easy to control.
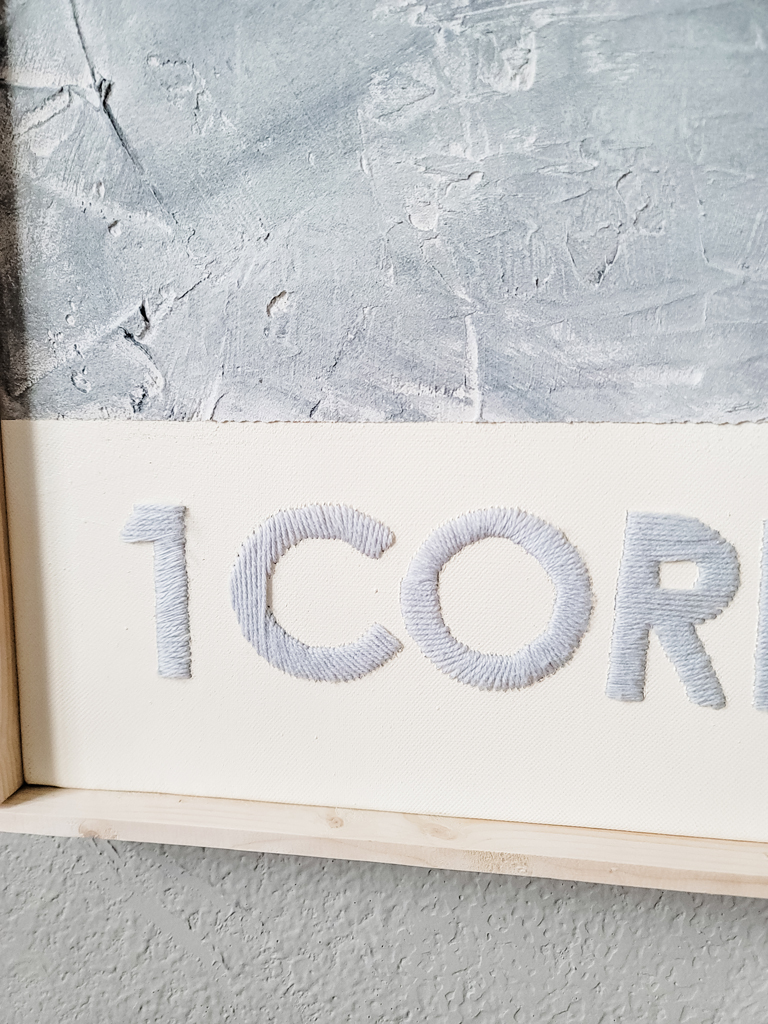
After working paint all around the border of my canvas, the idea to add a leaning cross came to mind and I just went with it. I love the simplicity of the design, and how the darker and lighter areas add depth and movement. I’m no artist, but I still enjoy painting now and then – it’s fun to create and experiment. The next day when the paint was dry, I added a simple frame using lattice boards and a brad nail gun. It’s not perfect and the wood isn’t treated, but I love the modern finished edge around the canvas and the warmth of the natural wood. Of coarse framing your canvas is completely optional, but if you’re interested in the details, check out my easy DIY canvas frame post.
Quick tips:
- If your canvas doesn’t have a hanger, add one before you begin the spackling process.
- If you have to use more than one container of spackling compound, make sure you use the same color.
- If you can see parts of the canvas that you missed with the spackling compound and you want to start with a base color, you can spray paint the entire canvas and spackle after it dries.
- The spackle dries quickly, so move fast, have fun, and don’t stress a perfect textured pattern.
- Use painter’s tape to protect any area(s) you don’t want spackle.
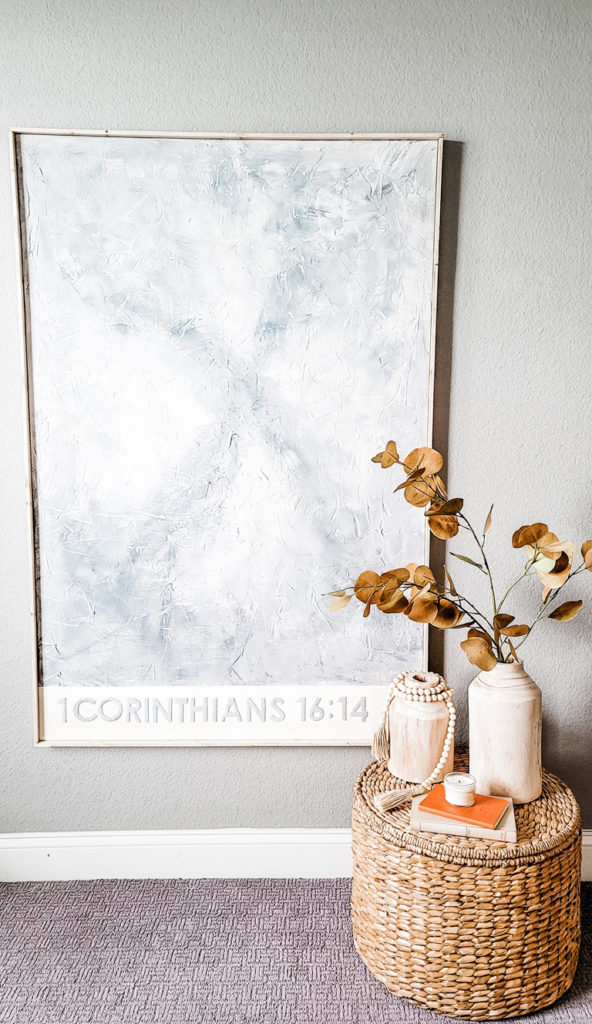
The Z Gallerie inspired DIY canvas wall art was so fun to create and really easy. Leave me a comment if you’ve ever tried this technique or if you’re going to try it! If you like the new fall pieces I styled with the canvas wall art, you can shop this post below. I absolutely love the basket ottoman for style and function, and I’ve been wanting the wooden vases for quite a while now – they’re so versatile. If you have any questions about this DIY, just leave me a comment and I’ll respond asap. Thanks so much for checking out this post!

We are a participant in the Amazon Services LLC Associates Program, an affiliate advertising program designed to provide a means for us to earn fees by linking to Amazon.com and affiliated sites. There’s no extra charge to you. Thank you for considering our links!
You may also like these:

POSTED IN: DIY crafts
Let's be friends!
Related Posts


Search
Categories
Subscribe
Get the latest posts, discounts, and design inspiration right to your inbox.
