Pottery Barn Inspired DIY Christmas Snowflake

Pottery Barn Inspired DIY Christmas Snowflake
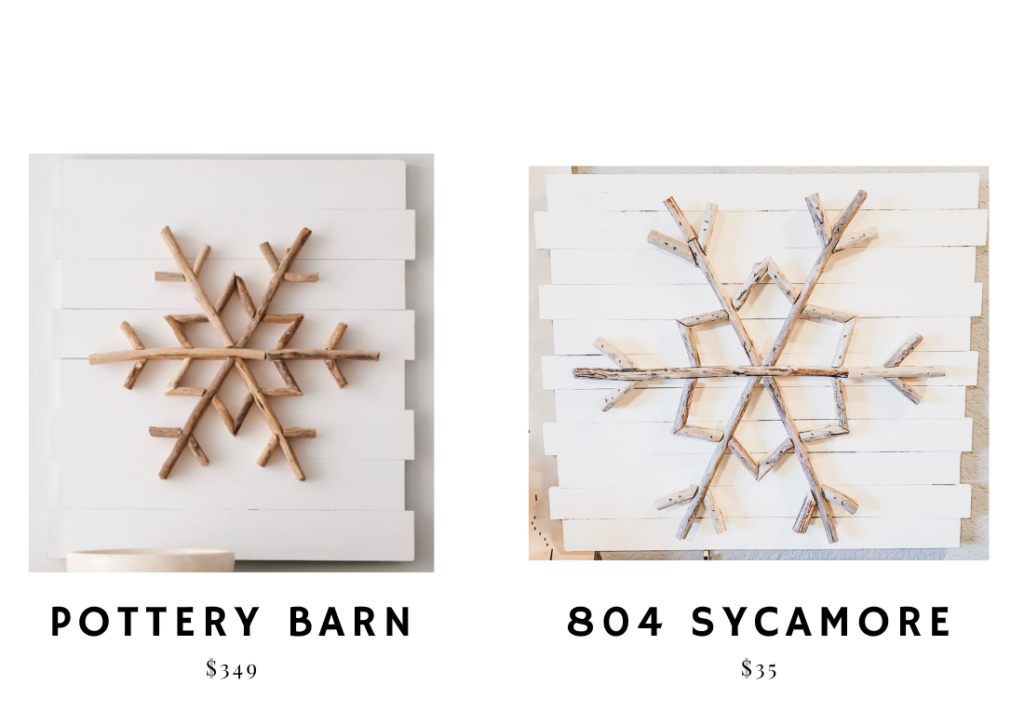
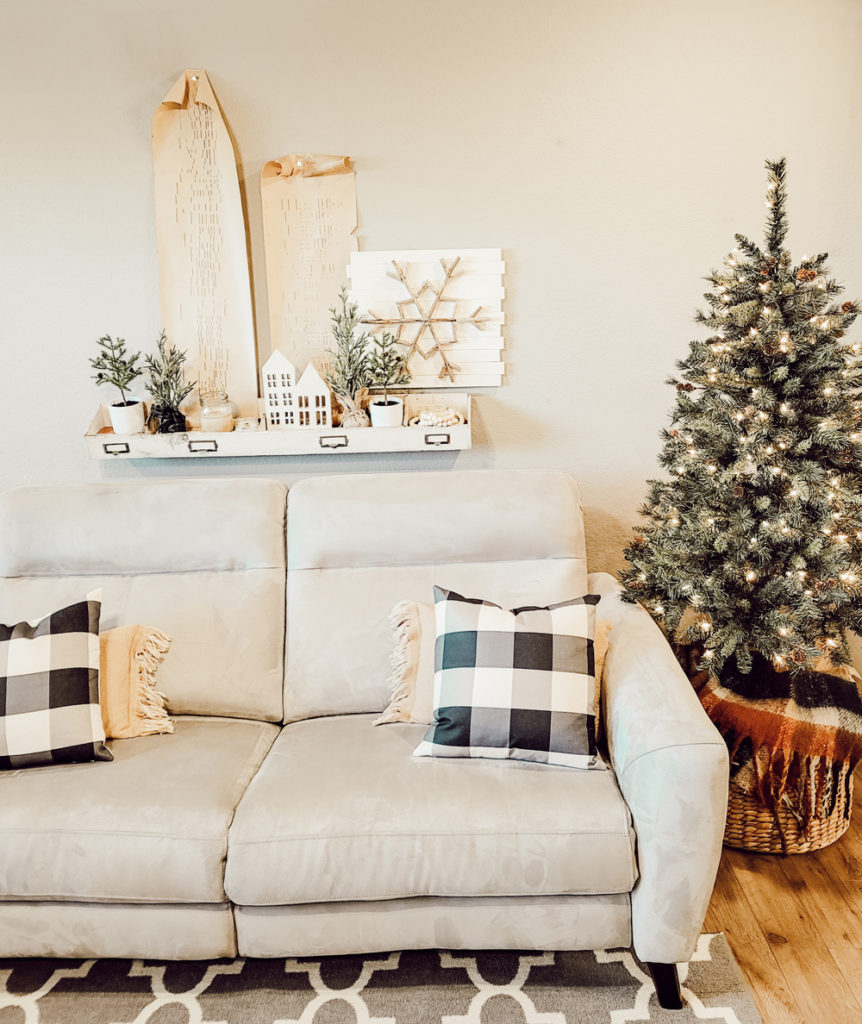
One of the only things I look forward to getting in the mail, besides packages, is the Pottery Barn catalog. I admire the clean lines, textures, and classic style that Pottery Barn offers. When I flipped through this year’s Christmas catalog, I was captivated by their snowflake wall art made of driftwood. I instantly wondered if I could replicate the look and I knew exactly who I’d give it to once finished. I had to create a video to show some of the techniques described below – sometimes it’s easier to show than explain. If you like the video, please give it a thumbs up and let me know what you think in the comments! You can also subscribe to my channel for a new decorating/DIY video each week. The video is at the end of this post.
Pottery Barn Inspired DIY Christmas Snowflake Supplies:
- 4 Lath boards (more or less depending on the size of back drop needed)
- Smooth driftwood sticks – Dream Driftwood Co
- Mitre box hand saw
- Brad nail gun (half inch nails)
- Two square dowels (the same or less thick than the driftwood sticks – I used 3/8 inch)
- Paint (can use acrylic craft paint or whatever you have on hand)
- Paint brush, sanding sponge, pencil, and tape measure

This site contains affiliate links to products. We may receive a commission for purchases made through these links at no extra cost to you. Thank you for your consideration in using my links!
Pottery Barn Inspired DIY Christmas Snowflake
My mom’s entire home is decorated in a coastal theme. Aside from her seasonal holiday decorations, her place is decked out with a beach vibe. Actually, she even decorated an entire Christmas tree with coastal ornaments and lights – it was so beautiful. In trying to decide if I should tackle this particular DIY, I sent a picture of it to my sister-in-law, Stephanie. She had the brilliant idea to make the snowflake removeable so that different decor could be layered in front of the plank backdrop. I so wish I could have done it, but I could barely create it attached to the planks! It was only tricky because I was figuring it out as I went, analyzing a photo, and guessing at what would work. So, before I list out the steps taken, I want to give you a list of my tips.
- You can glue the driftwood sticks onto the dowel instead of nailing them. This prevents the driftwood splitting or nailing into another nail.
- Make sure the brad nails are the correct length.
- Attach hanging hardware at the very end.
- Cut off the colored end of he square dowel.
- Wear a glove if hand-cutting every piece. I made around 74 cuts, but who’s counting?
- The size of the snowflake determines the size of the plank backdrop. PB has an extra plank above and below their snowflake – I chose not to.
Pottery Barn Inspired DIY Christmas Snowflake Steps:
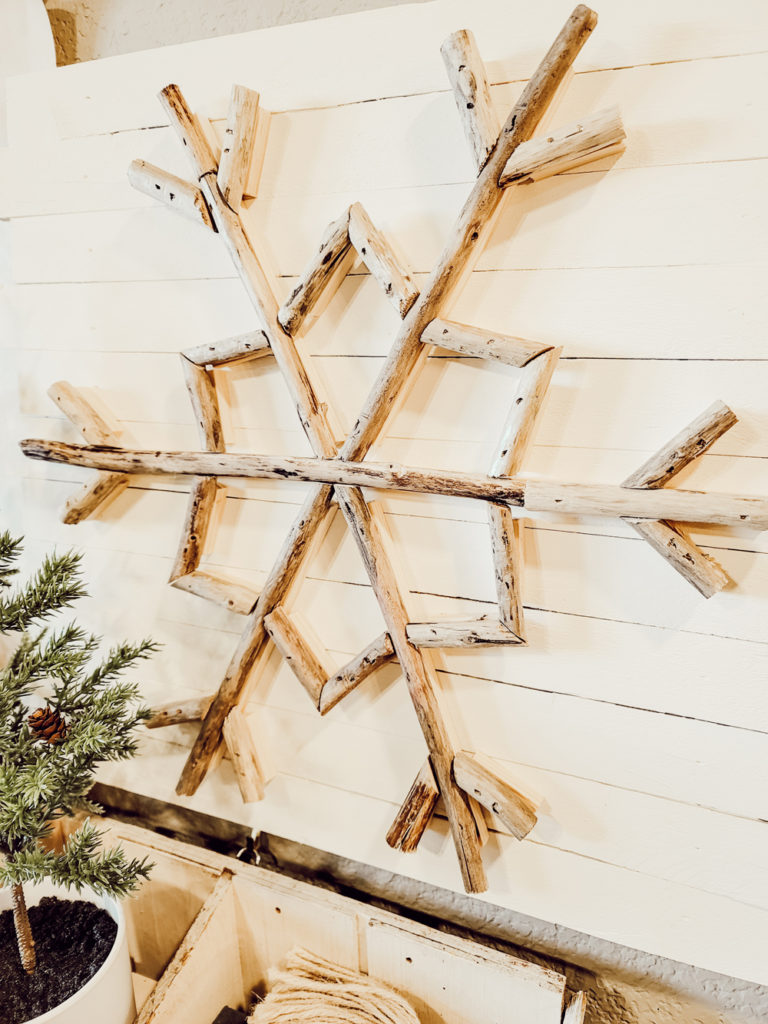
- Lay out driftwood pieces that are relatively the same thickness.
- Determine how long the main horizontal driftwood piece will be.
- Prepare the three longest pieces of driftwood.
- Make any necessary cuts to match the lengths evenly. Make 22.5 degree cuts where the four sticks meet the main horizontal stick.
- Set up these main pieces of your snowflake so that you can create the other pieces.
- Cut two stick ends at 45 degrees to make the inner points of the snowflake. Holding these ends together, line it up on the snowflake and use a pencil to mark the other two cuts at 22.5 degrees.
- Repeat this step until all your inner points are cut and set up on the snowflake.
- Measure the approximate length of one of the sticks from your inner points. Mine was 2 inches. For the outer points, I cut two inch sticks with one end cut at a 45 degree angle and the other end is flat.
- Once the driftwood snowflake is lined up, you can measure the width and height of it. This will help you determine the size of your plank backdrop.
- Once I determined the width I wanted my planks to be (lath boards), I cut the top one first (18″ long). To duplicate the Pottery Barn design, I used longer every other boards cut at 19″.
- Once I cut, sanded, and lined up my plank back drop, I made sure that every other board was a half inch off of the next board.
- Cut vertical lath boards to attach to the horizontal boards. You will attached the hanging hardware to these vertical boards at the very end. Use the brad nail gun to attach every horizontal board to the vertical ones.
- Then carefully flip it over and nail down the vertical board on the front side for extra support.
- Paint your plank back drop, let dry and paint a second coat. I ended up painting a third coat because I used inexpensive acrylic craft paint.
- Once the paint it completely dry, you can measure the parts of your driftwood snowflake and cut matching square dowel sticks. Cut them about an inch shorter than the driftwood so that it’s not sticking out past the driftwood.
- Determine where the middle stick will be, set your main horizontal dowel, make sure it’s centered, and then brad nail it to the planks. For long dowel pieces, nail the ends and center.
- Once the dowel is in place, you can attach the main horizontal driftwood stick. I nailed my driftwood, but glue would have been enough as the wood is light.
- Continue this process with the other four main pieces for the snowflake. It helps to measure the center of the main stick, then line up the driftwood to determine where the dowel will be placed. The angled cuts of the driftwood when held against the main horizontal stick will show you the angle of the dowel. There is no need to cut the dowel ends at angles because these pieces should be shorter than the driftwood.
- Next, cut 1.5″ pieces of dowel to go under the inner and outer points of the snowflake. First add the inner points, then finally the outer points.
- Check for any rough edges and sand them. Touch up any spots with paint. Measure, mark, and predrill holes to attach hanging hardware.
- Hang level and enjoy!
Shop this space:
This site contains affiliate links to products. We may receive a commission for purchases made through these links at no extra cost to you. Thank you for your consideration in using my links!
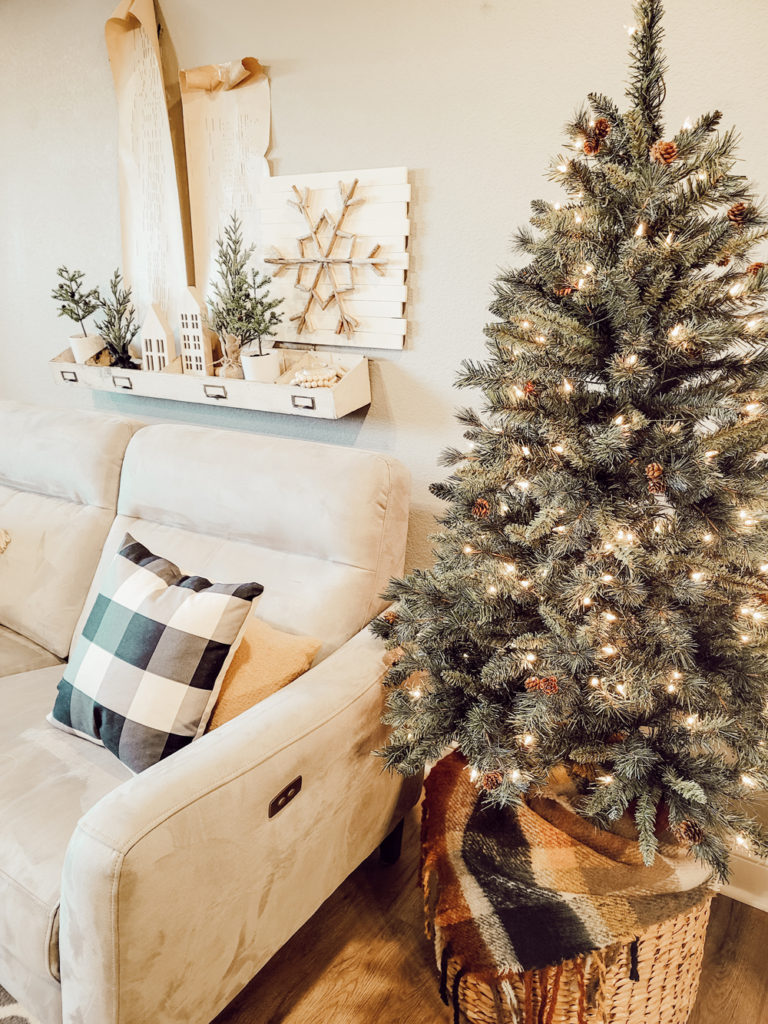
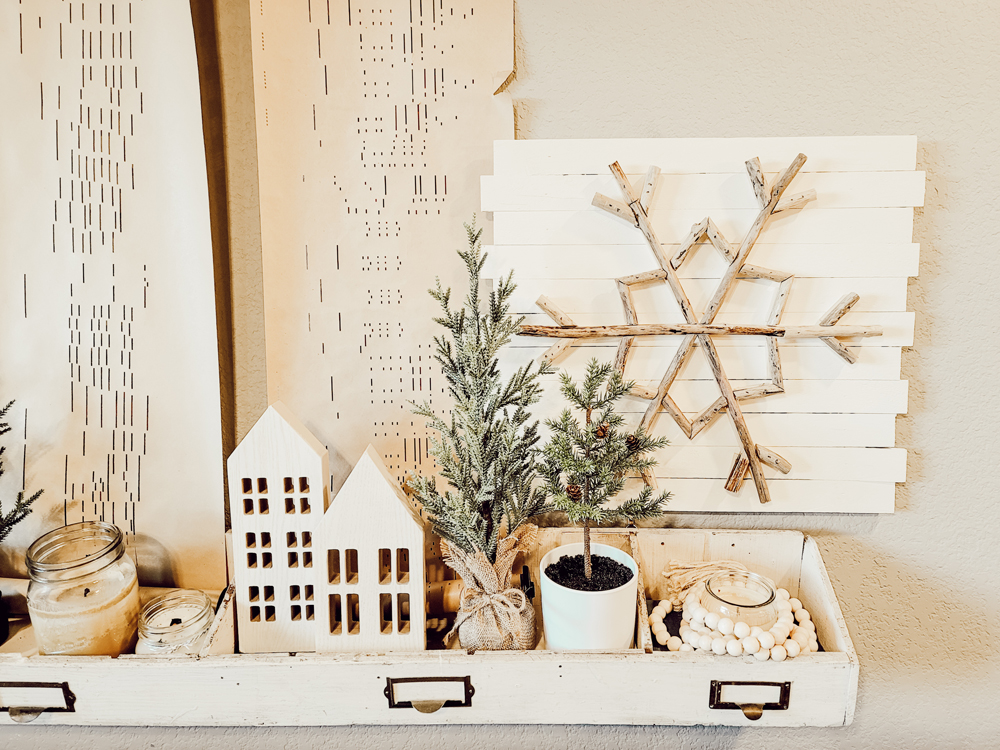
Thank you so much for checking out my Pottery Barn Inspired DIY Christmas Snowflake. I am so happy with the way it turned out and I’m excited to gift it to my mom – I think she will love it. If you enjoyed this project, you can subscribe to my email list and I’ll pop into your inbox just once a week with a new decorating/DIY post. And if you liked this Pottery Barn inspired DIY, you may also enjoy my Pottery Barn Inspired DIY Fall Garland or my Gorgeous Boho Canvas Art And DIY Frame. Let me know what you think about this driftwood snowflake down in the comments below, yeah or nay?

POSTED IN: DIY crafts
Let's be friends!
Related Posts


Search
Categories
Subscribe
Get the latest posts, discounts, and design inspiration right to your inbox.
