How to display school photos

How to display school photos
I love getting school photos back each year! If Ramblin Rod was still going, my girls would definitely be “smile winners!” Sure, sometimes their hair is a little wacky or maybe the oldest wears something I wouldn’t have selected, but they’re school pics so I don’t care.
For me, school photos are for memorabilia and nostalgia purposes. We get family photos taken every other year and those are the ones where I select their outfits, hairstyle, and ensure they’re ready to behave. Family photo sessions cost a lot more and it’s a fun family memory because our photographer makes it so fun and easy.
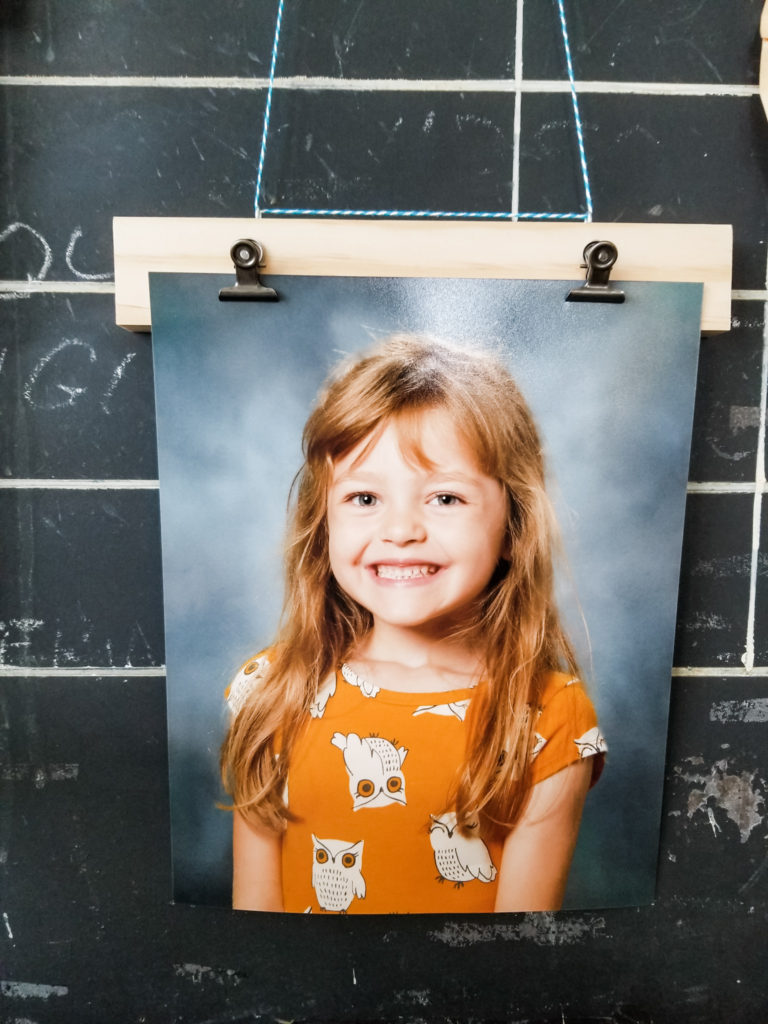
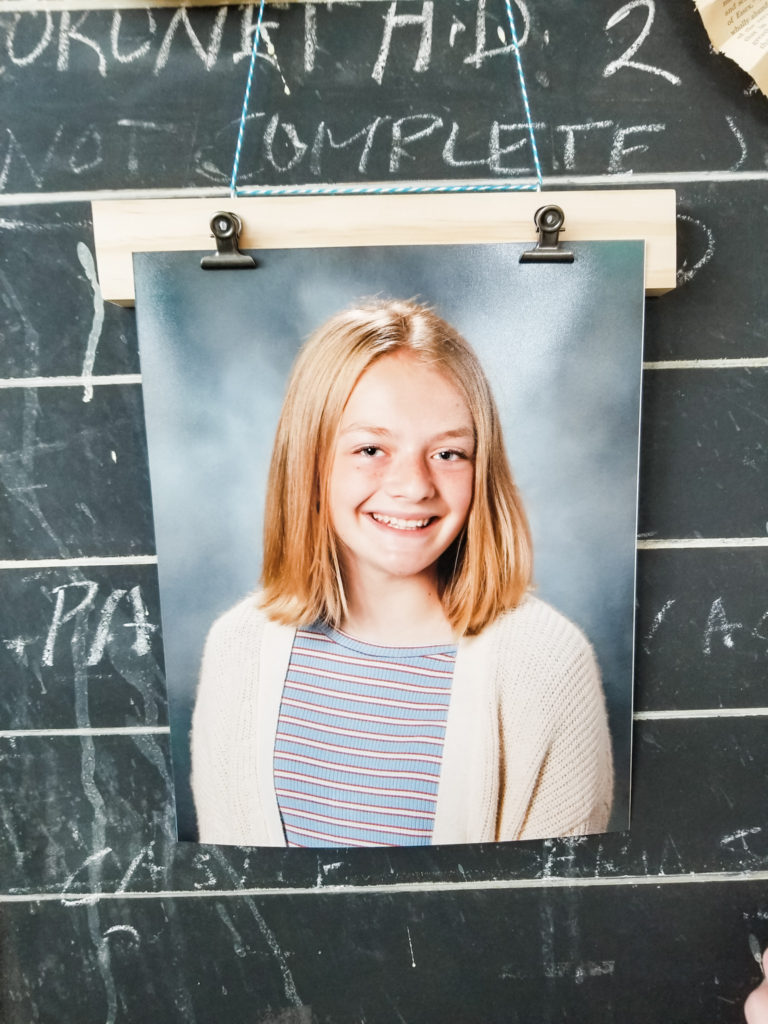
Each year when school photos come back, I want to figure out a way to display them. The girls like it, and it’s fun to see how much they’ve changed from the last year. For a few years now, I’ve clipped the 8×10 photo onto a clipboard and leaned it on a bookshelf, desktop, or hung it on the wall.
This year I wanted to incorporate their pics with our Thanksgiving decorations. We’re so thankful for our girls and I wanted the photos to be enjoyed and out where we see them often.
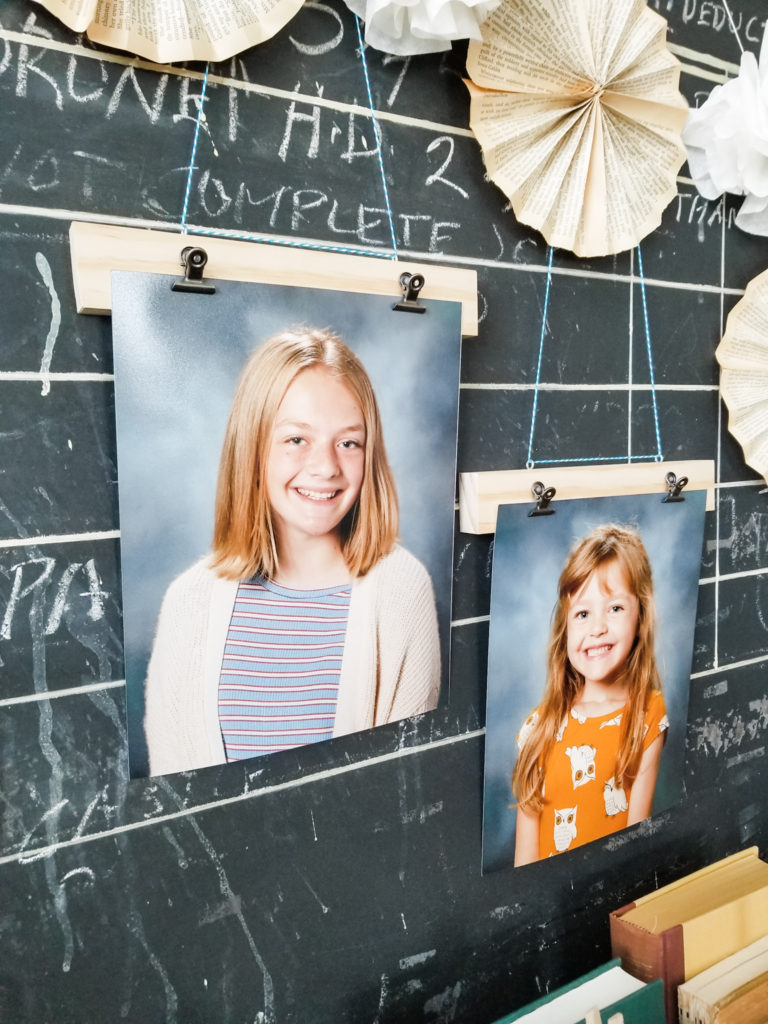
This easy and original way to display your kid’s school pics is fun and unique. I like the schoolhouse style with the vintage clips, as well as the frame less look.

This DIY project takes minutes and a few supplies, but I’m going to offer some alternative ideas because I realize not everyone is going to have a mitre saw or want to use one.
Tools to create easy DIY photo frame:
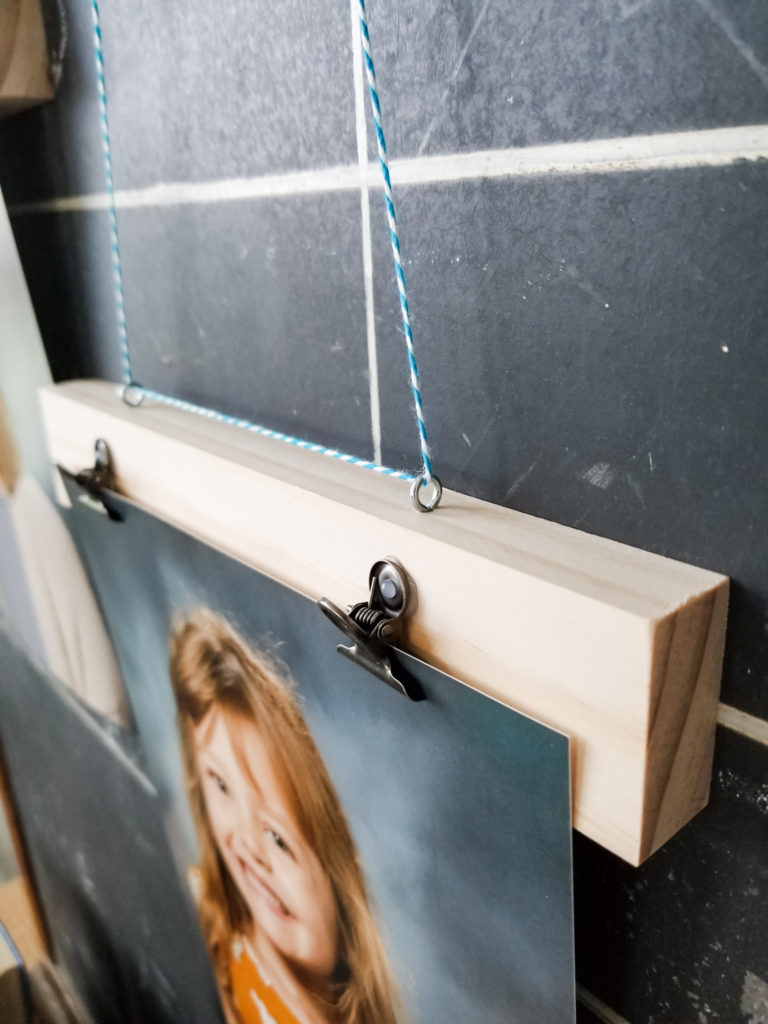
2″ select-pine board – cut at 9″ long
Two 1/2″ eye hooks
Two binder clips
Bakers twine (or sturdy string)
Thumbtack
Instructions for this schoolhouse style frame:
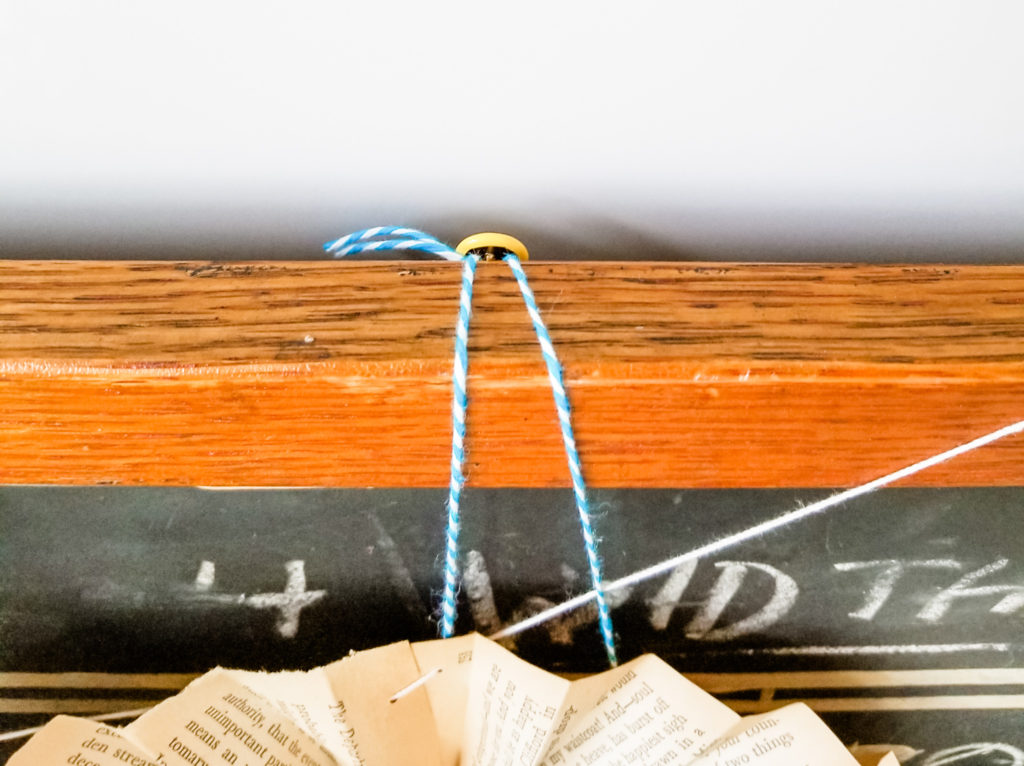
I just used a glue gun to attach the binder clips about two inches in from the edges. Then I screwed in the eye hooks along the top directly above the clips. Add whatever length of string you want and hang from a thumbtack. I placed the thumbtack behind my vintage chalkboard so that I don’t have new holes on my grid wall.
Alternative ways to display school photos:
Use a glue gun to attach the binder clips to a ruler and then glue magnets to the back of the ruler. This is a fun schoolhouse style frame if you want to post school pics on the fridge.
Instead of cutting the select-pine board at nine inches, use a longer piece to display multiple school photos across the board. Just be sure to measure equal space between the clips. You could display all your kid’s photos for that school year or one child’s photos for each school year to see how they’ve changes.
If you like the idea of displaying multiple photos along the board, consider hanging the board vertically. This could make a big impact when hung in a small space.
I’m sure there are many ways to take this concept and customize with your creativity and personal preferences. I think the customizing is what makes a DIY project so much fun! I’d love to know how you display school photos – please leave a comment here or on Instagram.

POSTED IN: DIY crafts
Let's be friends!
Related Posts


Search
Categories
Subscribe
Get the latest posts, discounts, and design inspiration right to your inbox.
