Easy DIY Zipper Bedding

Easy DIY Zipper Bedding
Do you make your bed every day? I used to, but now it’s an occasional thing. I think it will be easier to get back into the ritual once Jeremy and I get up at the same time. I don’t think he’d be too happy if I made the bed around his sleeping form! I would really like to get my daughter in kindergarten to get into the habit, but I want it to be easy and even fun – is that possible?! I think it might also be a little satisfying with zipper bedding. I am so excited to share how I tackled this easy DIY zipper bedding for a twin sized mattress.
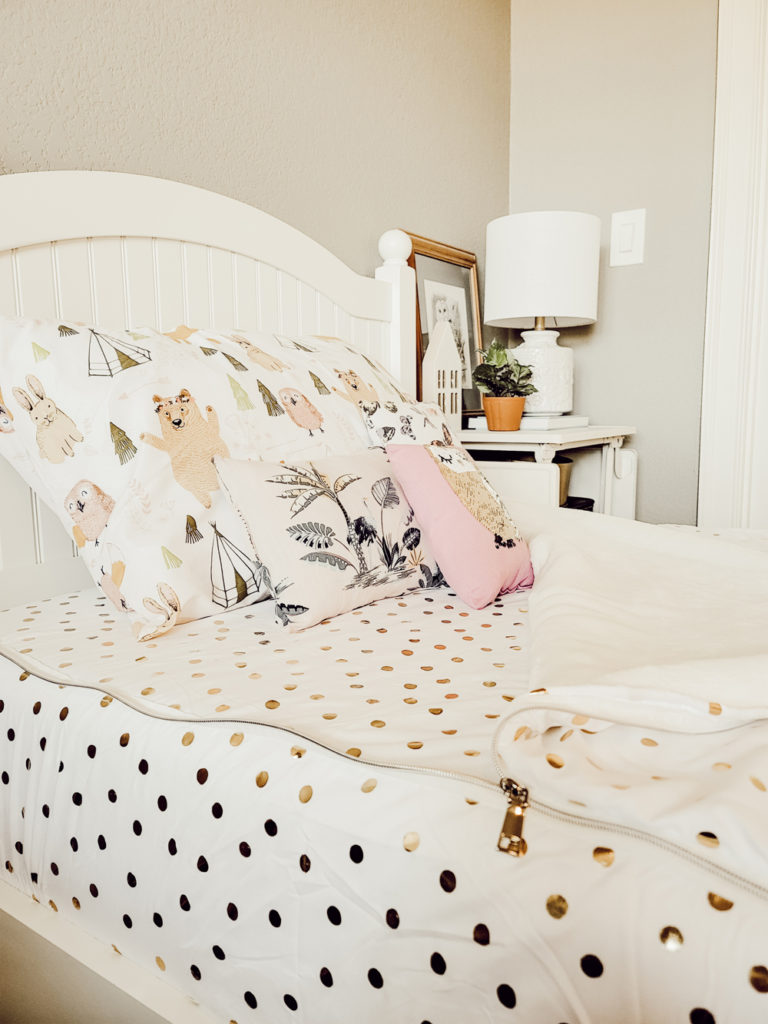
You may have heard of Beddys zipper bedding and accessories – I believe they were the pioneers to really launch this fabulous concept of bedding that zips up. Zipper bedding helps kids and adults to easily make their bed. I love the beautiful finished look of Beddys bedding, but it’s not in my budget, so I decided to make my own. If you’re not sure whether or not your child would like the feeling of zipper bedding, you could always start by using an existing sheet set and fleece blanket – that way you only need to buy the zipper. If they love it, you can invest in a new sheet design and update their room later. Quinn’s sheets are very worn and a little stretched out, so I got an amazingly great deal at Target on a gold-dot sheet set – under $7!!! However, I made the mistake of buying a microfleece blanket which has a lot of stretch. It was so soft, but it would have been easier to sew fleece that didn’t have any give. I also used an all purpose upholstery thread just to have some extra toughness against my six-year-old zipping it over and over again. I was able to buy 10 yards of zipper on Amazon, and cut the exact lengths I needed.
Easy DIY Zipper Bedding

This site contains affiliate links to products. We may receive a commission for purchases made through these links at no extra cost to you. Thank you for your consideration in using my links!

Easy DIY Zipper Bedding Steps:
- Measure your mattress width and length. My mattress was 38″ x 74″
- Lay out (and maybe iron) your flat sheet. Measure and pin your width and length – be sure to add some room for your seam allowance (38.5″ x 74.5″).
- Cut out the flat sheet, cutting along the outside of your pins.
- Lay out your fleece fabric/blanket and pin the cut out flat sheet on top of it, right-side faced down.
- Cut out the fleece and leave them pinned together.
- Sew the flat sheet and fleece together, leaving a 12″ opening at the bottom to turn it right-side out.
- Turn right-side out and sew the opening closed when you sew a top stitch around the entire perimeter.
- Cut two 74″ lengths of zipper (one for each side of the bed), and unzip the zippers.
- Sew a zipper half to each length of the flat sheet/fleece top. The zipper should be face-down and facing in. Sew it along the top-stitch.
- Place the fitted sheet onto the mattress. Using sewing chalk, mark along the edge of the mattress on each side.
- Line up each zipper half and pin along the chalk line. Make sure the zipper is face-down and facing out.
- Take the zipper pulls and thread each half into a pull to zip up each side.
- You can sew the bottom end to the fitted sheet or not.

You may also be interested in:
Little Girl Bedroom Makeover – Bed Décor
Little Girl Bedroom Makeover – Wall Unit
Anthropologie Inspired Butterfly Pendant Light
Do you like to sew? Is this a project you may try out? If you do, please leave me a comment below. I’d love to see your fabric choices and finished projects – they’re so inspiring and encouraging! Thanks for reading this post – I appreciate you and am so happy to be connected!

POSTED IN: DIY crafts
Let's be friends!
Related Posts


Search
Categories
Subscribe
Get the latest posts, discounts, and design inspiration right to your inbox.
