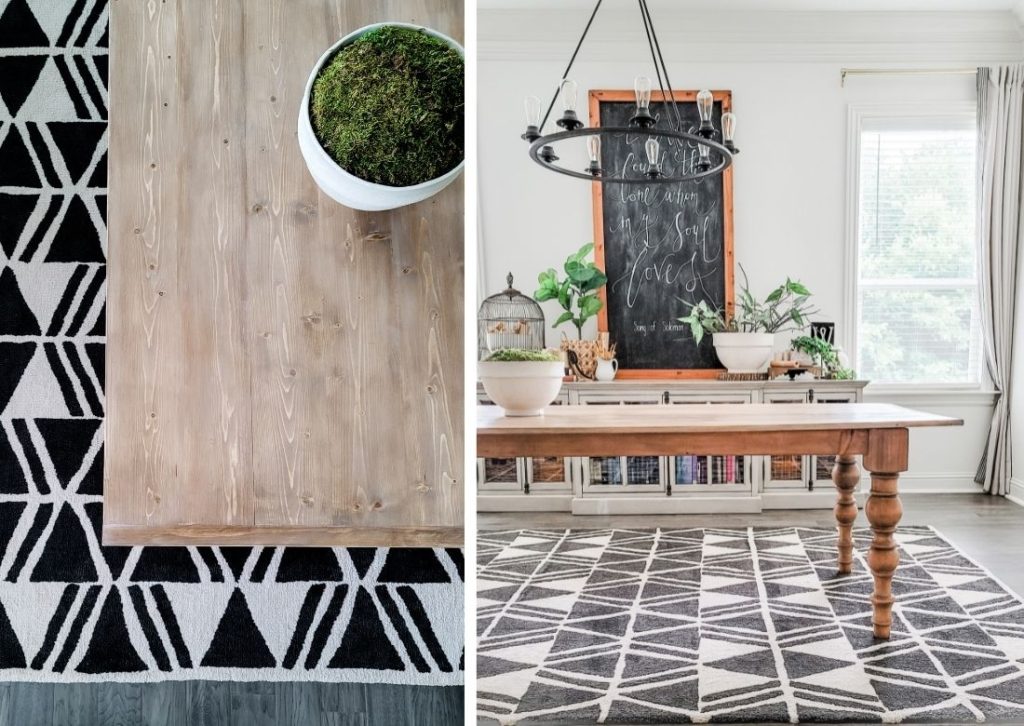
DIY Vintage Farmhouse Dining Table – Arhaus copycat
")
DIY Vintage Farmhouse Dining Table – Arhaus copycat
Before I dive into sharing my DIY Vintage Farmhouse Dining Table – Arhaus copycat with you, I think I should begin by admitting to you that I’ve been drooling over the Arhaus Francis Dining Table for quite a while, but I knew the price tag was outside my budget. I searched for copycats, even tables with skinny turn-style legs, with no luck in the price-tag department. Beautiful tables are expensive, this shouldn’t be shocking, but it was disappointing. Ultimately, we decided to purchase a modern farmhouse style table for our daily dining needs (for durability, affordability, and style) and we love that our $800 table extends longer to suit more guests and it has a simple design with a pretty finish. However, I couldn’t stop admiring the Francis from afar, wondering how long before someone may sell one on Marketplace (probably never). That’s when I decided that I could possibly make my own turn-style leg farmhouse table, and maybe even achieve a similar finish to the gorgeous Francis.
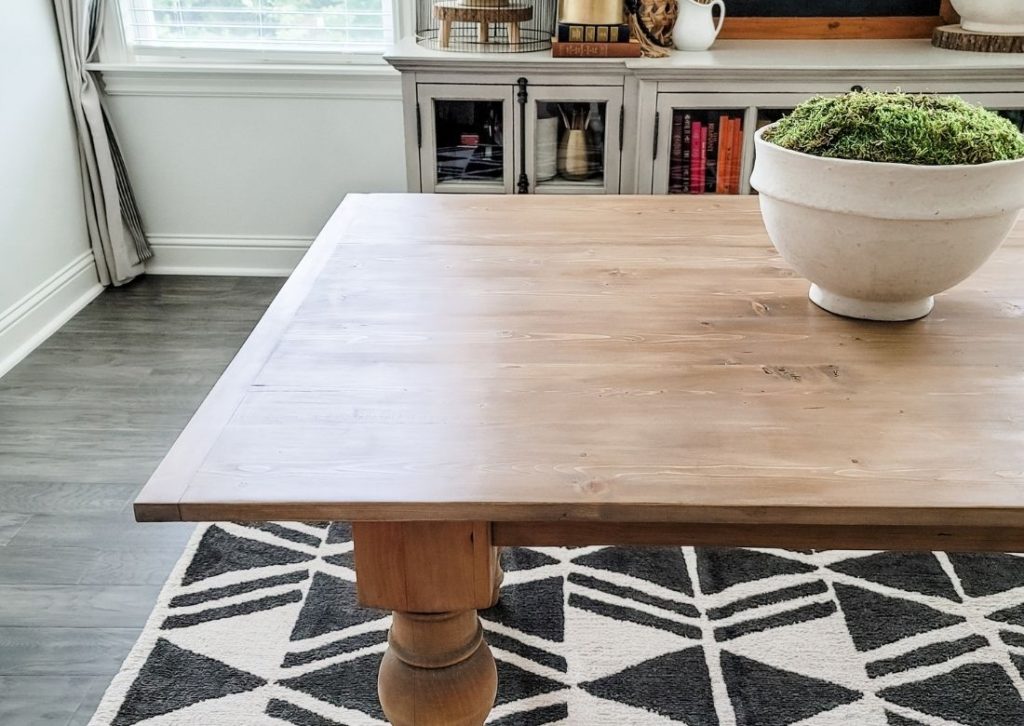
Speaking of copycats, Pottery Barn also has a similar designed table, but it’s a console and not large enough to function as a full dining table, and also not in my budget. In my desperate quest to acquire a table like the Arhaus Francis, I also found the Bordeaux by Parker Gwen as well as the Rancher’s dining table by Alley Exchange. These tables are gorgeous, but still out of my budget. With the willingness and determination to DIY my own table, I was able to make a DIY vintage farmhouse dining table – Arhaus copycat for about $350 – that includes all the wood, screws, sandpaper, stains, and wax. I already had some items (i.e., wood conditioner, Kreg pocket hole jig, and other tools). However, it took some time to determine how to get the stain color the exact color and look that I wanted. I tried different stains and in various layers until I finally landed onto an easy process that produces a gorgeous weathered vintage look and color. You could add some aging and distress marks to this table, but I needed my top to have a smooth surface, so I just kept it simple. You could also router the table top edge to get that elegant curve the Arhaus Francis has, but I don’t have that tool yet.
DIY Vintage Farmhouse Dining Table – Arhaus copycat – Examples:

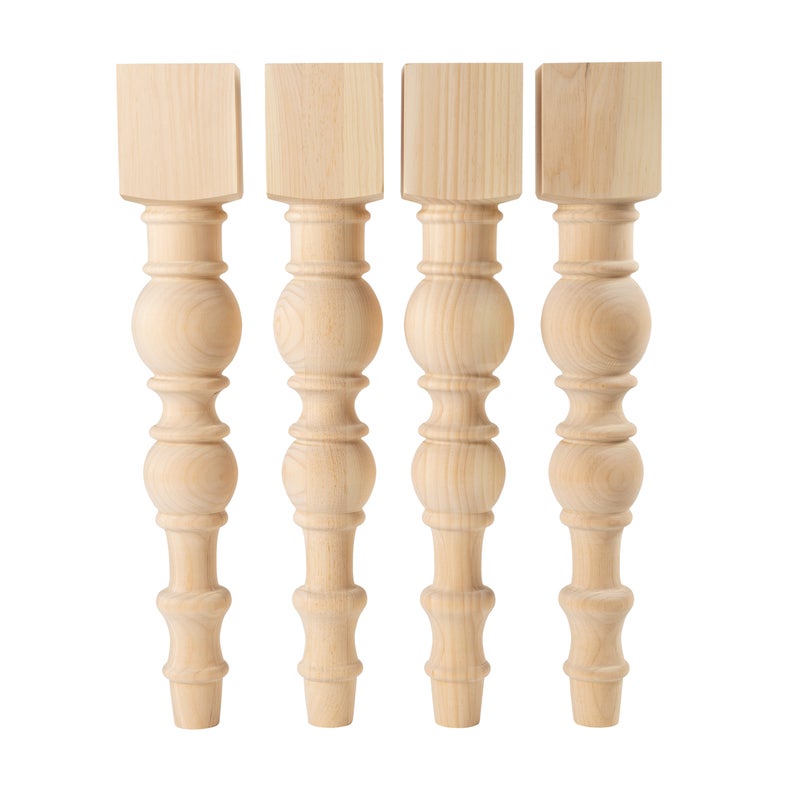
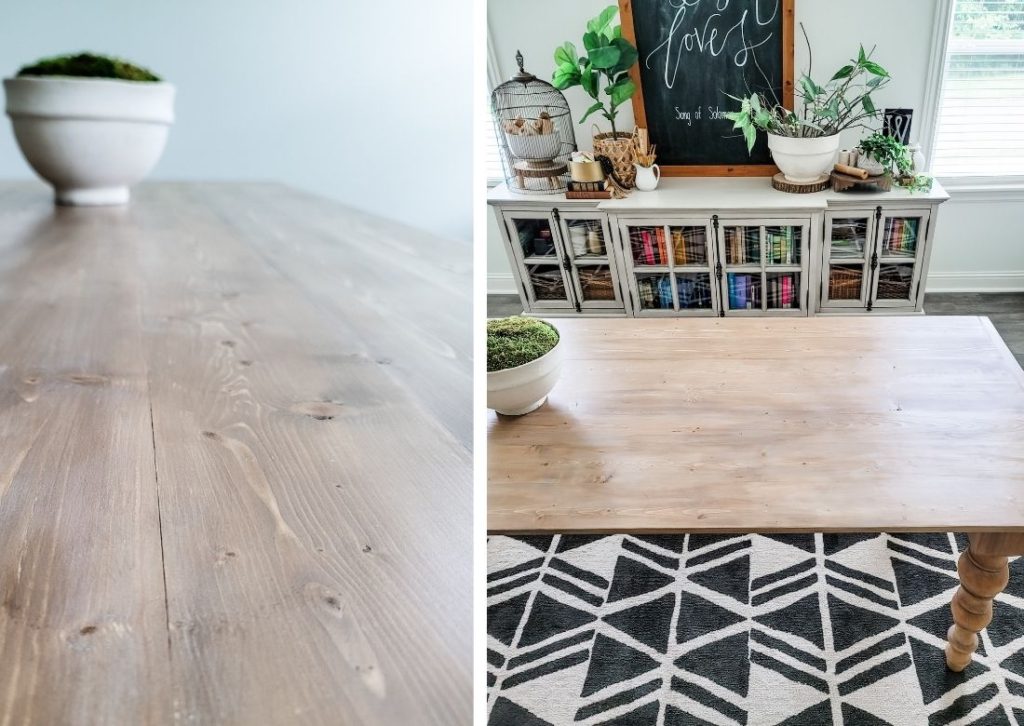
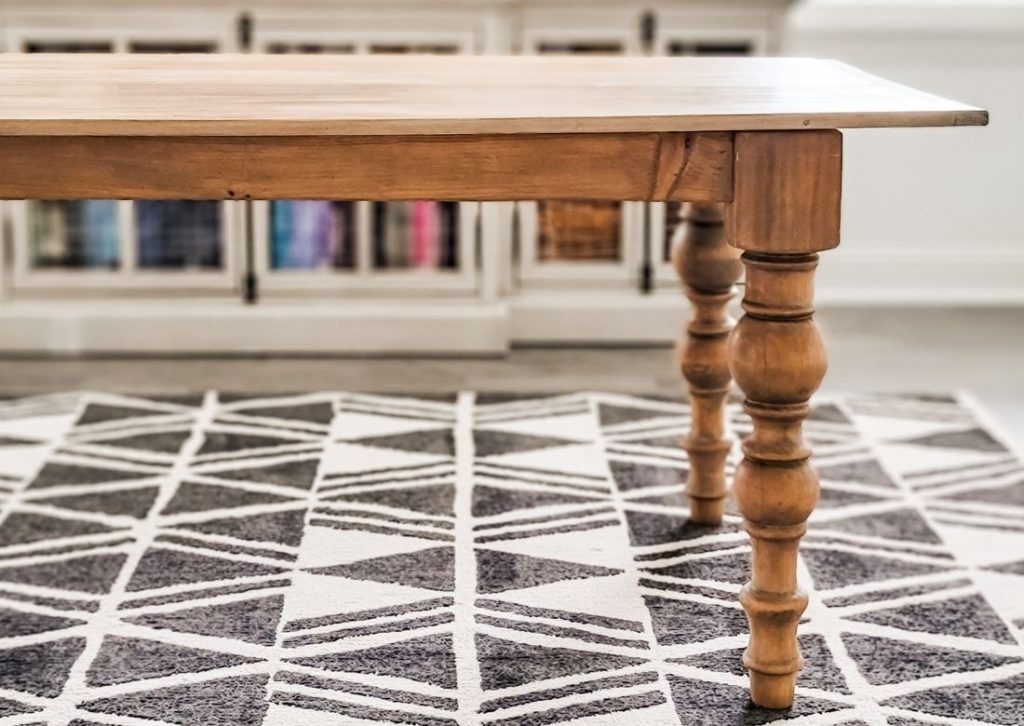
To encourage my dream of having a vintage farmhouse table like the Arhaus Francis, I found the large turn-style legs on Etsy. Maybe they’re elsewhere, possibly at local millwork shops, but I thought I might cry when I found them on Etsy at a great price, by a highly rated seller, and in the exact measurements that would work for my project. It was at that moment that I knew I would build my own table with these legs, even if it was difficult, and I purchased them on the spot. My DIY vintage farmhouse dining table – Arhaus copycat will be used as our games/arts and crafts table upstairs in our bonus space. I wanted a table upstairs that we can leave our projects out on without having to worry about cleaning it all up before dinner. I also wanted a light-weight table that didn’t cost a lot, and looked nicer than one of my plastic six-foot folding tables.
DIY Vintage Farmhouse Dining Table – Arhaus copycat
To further my Arhaus Francis table copycat aspirations, I found two tutorials that I loved and felt confident that I could replicate. This tutorial, by Jen Woodhouse, is what I followed to create the base of my table. And this tutorial, by Ana White, is what I used to create my table top. The whole table isn’t terribly heavy at all, but to make moving it upstairs easier, I waited to attach the top once it went upstairs. It’s much easier to move the two pieces one at a time and it saved my walls from dings. The top is attached using corner braces which also allow the wood to shrink and expand as wood does. This will reduce the chance of the wood splitting and cracking as well. Overall, I’m so happy with the two designs that I selected and feel like they created a very beautiful DIY vintage farmhouse dining table – Arhaus copycat! My YouTube video is coming – you can subscribe to my channel and click the bell button to get alerts so you know when it’s been published!
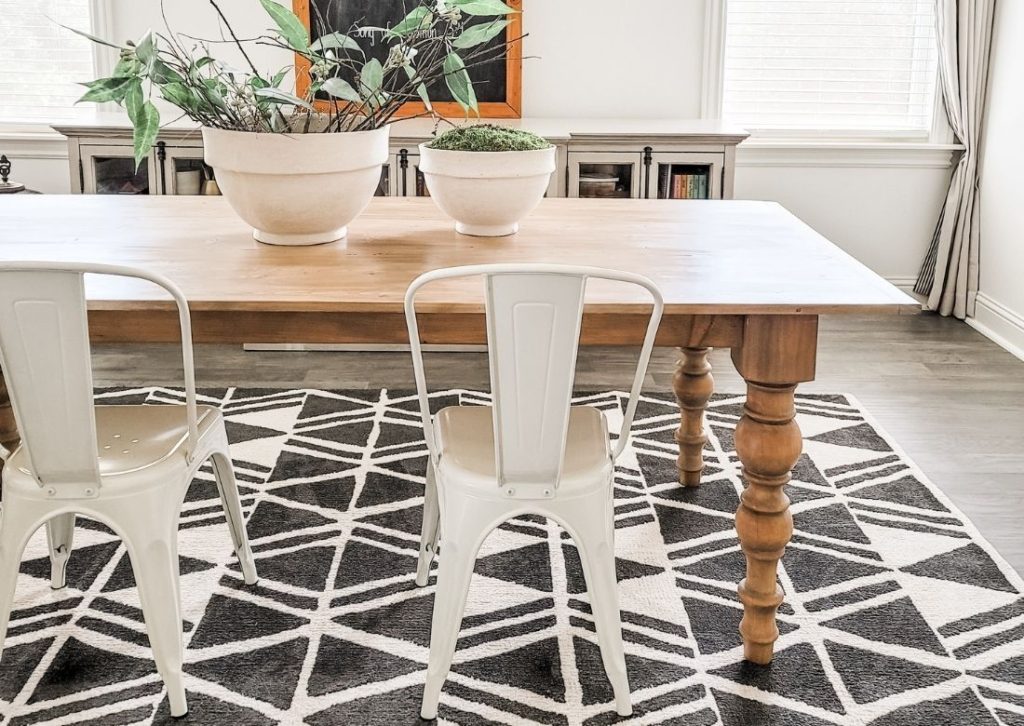
One of the things I love about this simple and straight forward table design is that you can customize the width and length for your needs and specifications. Maybe you have a more narrow dining area, or maybe you need a more square table to fit your space – you can customize the measurements and follow the tutorial concepts for your own build. When you DIY your own dining table, you can make all those changes and customize the finish color you want too. Whether you paint or stain a table, you’ll definitely want to seal the top with polyurethane. It cures safely to eat off of, and you can get a satin or glossy finish, depending on your style and needs. I went with satin even though semi-gloss would wipe easier – I wanted that aged vintage look without a modern vibe.

DIY Vintage Farmhouse Dining Table – Arhaus copycat – Tutorials:
Here is the plan I followed to build the base. Moore Family Farmhouse Table Design. However, Jen’s table legs are smaller so I adjusted the location of the legs against the aprons to be one inch from the outside of the leg instead of 3/4″. Otherwise, I followed Jen’s cut instructions to build the base.
And here is the tutorial to build the light-weight table top using affordable off-the-shelf boards. Ana White YouTube. One of the benefits of using these thinner boards is that they’re already milled and will butt up against each other pretty well. I began my first attempt at the table top using two inch thick boards and they had to be trimmed so that the edges would be flush, and that my friends is easier said than done. I don’t have a planer or joiner, and I’m guessing most of you don’t either. So, that’s why I love Ana’s simple tutorial using off-the-shelf boards. It’s not perfect, it’s not exact, but these boards are pretty darn close and do the job for my DIY vintage farmhouse dining table – Arhaus copycat version – I mean it’s supposed to look vintage and farmhouse so it shouldn’t be perfect, right?! These boards are so much lighter as well – it really worked out for the best.
Jen Woodhouse and Ana White are master woodworkers and DIYers that I greatly admire and look up to. They’re talented and have taught me a lot on my DIY journey. Be sure to check out their sites and subscribe for updates, they design a lot of cool projects.
DIY Vintage Farmhouse Dining Table – Arhaus copycat – Supply List:
Table base:
4 Modern chunky farmhouse legs
Three 2″x4″, 96″ long boards
Table top:
Seven 6″x1″, 96″ long boards
Kreg pocket-hole screws, 1.25″
Sand paper (80, 120, 160, 220 grits)
Table stain and finish:
Old Barn Living Farmhouse Stain

This post may contain affiliate links. This means I may receive a small commission from each purchase, at no cost to you. Thanks for considering my links!
DIY Vintage Farmhouse Dining Table – Arhaus copycat – Video tutorial:
DIY Vintage Farmhouse Dining Table – Arhaus copycat – Staining Steps:
When it comes to finishing your table or any furniture, you want to take your time and do all the steps thoroughly. Don’t rush the steps that create the beauty of your piece. Sanding your piece with each sanding grit will give you an even and open finish for your stain. Zoe from Crafted by the Hunts explains that it’s best to sand about one square inch per second. So, take your time, cover every inch, and be sure to use each grit because they each have a job in the refining process. Start with the lowest number grit and work your way up. I started with 80, then used 120, 180, and finished with 220. You must also sand with the grain or you’ll have unsightly scratch marks. Zoe also taught me that by using a wood conditioner to prep your wood before staining will help to give you a more even stain. Of coarse proper sanding also helps with an even finish, but using a conditioner is also a must. To get the look of my finished table, you’ll want to do the following in this exact order:
- Sand (80, 120, 180, and 220 grit)
- Dust, wipe, clean the surface of any sawdust (using a tack cloth can help too)
- Apply wood conditioner, let sit for at least 30 minutes before staining
- Using a staining pad, apply the Farmhouse stain wiping it with the wood grain and immediately wipe off residual stain as you go
- Allow to dry (follow Old Barn Living’s instructions). Sand with a 220 grit sanding sponge and wipe clean.
- Using a staining pad, lightly apply one coat of whitewash stain, spreading it quickly and thinly, and wiping so there’s no residual stain sitting on wood
- Allow to dry (follow Varathane’s instructions). Sand with a 220 grit sanding sponge and wipe clean.
- Using a staining pad, apply a thin coat of weathered oak stain, wiping any residual stain off immediately
- Allow to dry (follow Varathane’s instructions). Sand with a 220 grit sanding sponge and wipe clean.
- Using a staining pad, apply one more layer of Old Barn Living’s Farmhouse stain if you need more warmth to your finish.
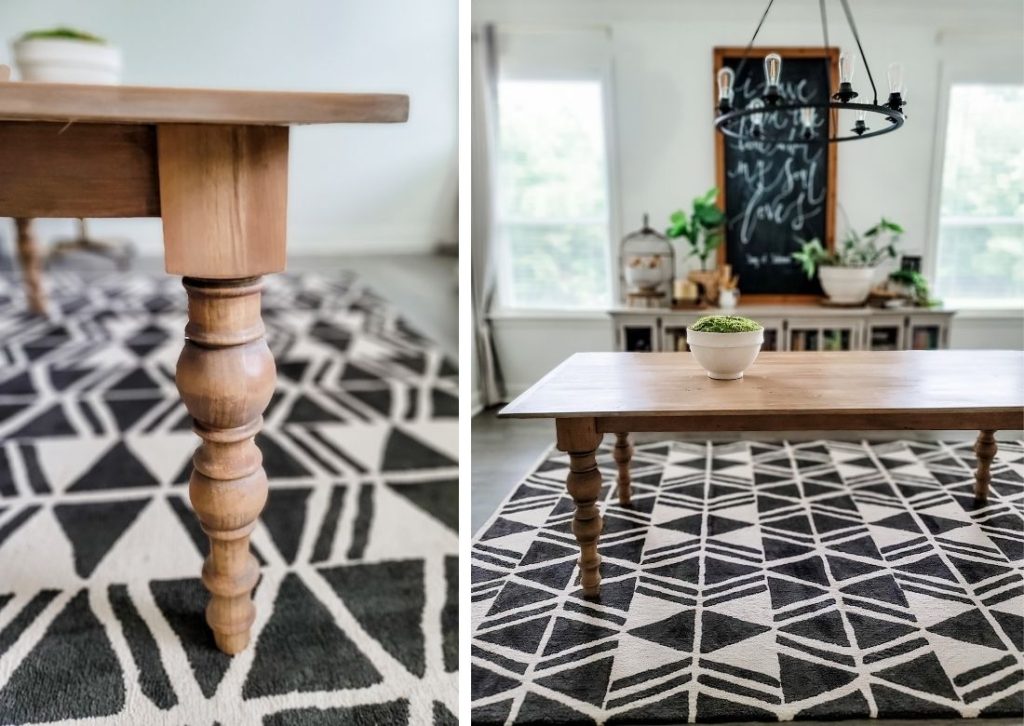
Step 10 was not necessary for the table legs, but I wanted the top to match the legs, so I added one more coat of the Farmhouse stain to the top. - Allow to dry (follow Old Barn Living’s instructions).
- If the wood is too washed out or has too cool of a tone, finish with Minwax special dark finishing wax – or apply another coat of the Farmhouse stain before adding wax. If the wood is too warm or dark, finish with the whit wax – or add another coat of the Weathered Oak stain before adding wax.
Note: I finished the legs with white wax, and the top with dark wax. Then after curing, the top got polyurethane. - Using a lint free cloth, rub on the finishing wax until the surface is covered and then 15 minutes later, buff with a dry cloth.
- You can also apply a top coat of satin polyurethane two days after applying the wax. The wax alone is a finish coat, but the polyurethane is a good way to give the table top a more durable finish at the very end. The white wax also imparts a light definition into the grains of the wood – it’s a beautiful way to add age and a French vintage vibe.

In my quest to achieve a vintage farmhouse finish, I tested many stains and layers on scrap wood. It was tedious and often disappointing, but so worth it to have discovered how to get this weathered vintage look myself. I wish I could have just used one stain and maybe a finishing wax to get this look, but something this special should take a few layers and a little time. I love Old Barn Living’s one-step stain, it’s natural, goes a long ways, and the Farmhouse shade is gorgeous. One quick tip is that I gently stirred each stain before using it, I don’t shake the cans and cause air bubbles. This order of stains I used will also be done on my built-in shelves as well as a few other projects – so be sure to subscribe and stay connected as I share many more DIY and decorating projects.
I really hope that my success with this DIY Vintage Farmhouse Dining Table – Arhaus copycat encourages you to make your own table, or even stain an unfinished piece you’ve been wanting done. I was totally insecure and nervous about staining, but applying stain with a staining pad made the process feel more natural for me and if you test on a scrap piece of wood first, you can get the feel of how much stain to leave on the pad, how much pressure to apply, and how quickly you need to wipe away residual stain. Now I feel much more comfortable and confident when it comes to staining. I can’t wait to stain my floating shelves and enjoy this beautiful look again. Please let me know in the comments below what you think. Do you like the weathered vintage farmhouse stain color or do you prefer something more modern?

You may also like:

POSTED IN: DIY Projects
Let's be friends!
Related Posts
Search
Categories
Subscribe
Get the latest posts, discounts, and design inspiration right to your inbox.
