DIY Stenciled Dressers

DIY Stenciled Dressers
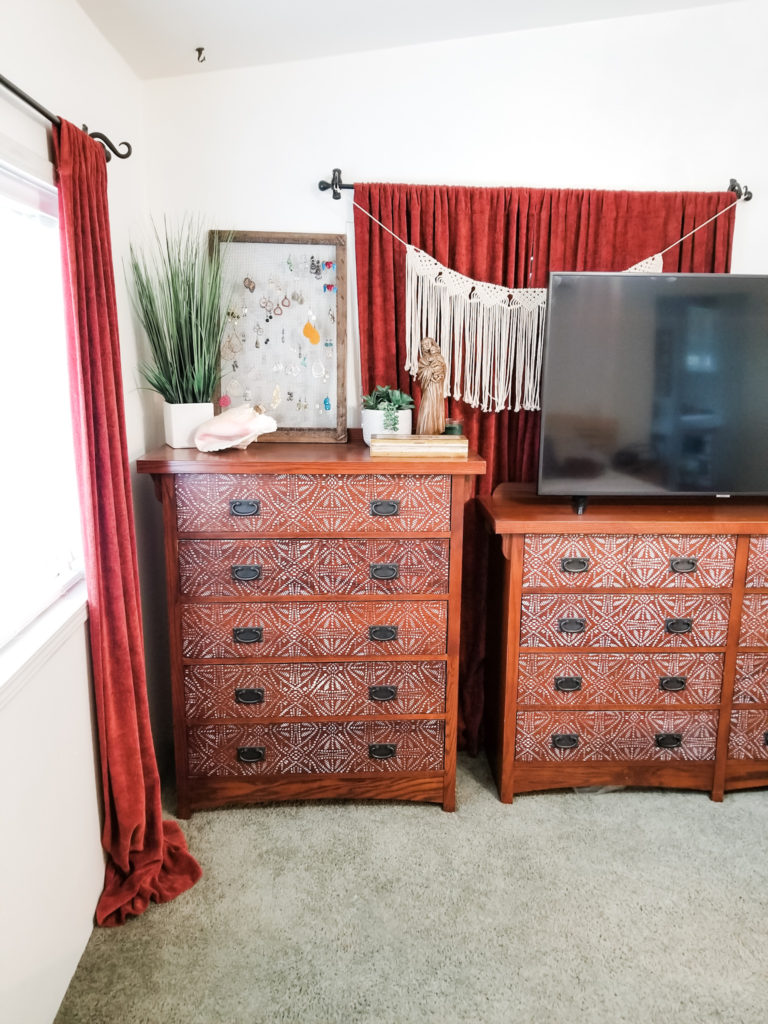
The final touch for the bohemian master bedroom redesign was a makeover for the dressers. These mission style dressers are in perfect condition and meet the client’s needs. However, the darker stain wasn’t ideal for the light and airy vibe in their new boho room.
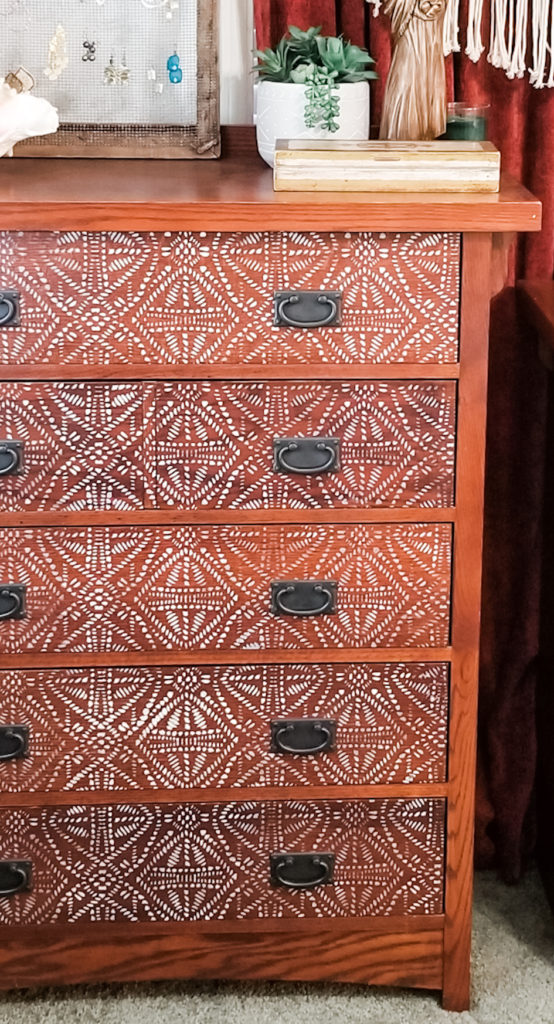
There are some ways to makeover wood furniture; you can paint, cover with wallpaper, and stencil, to name a few. After weighing out the options, we went with stenciling a tribal batik pattern only on the drawers of each dresser.
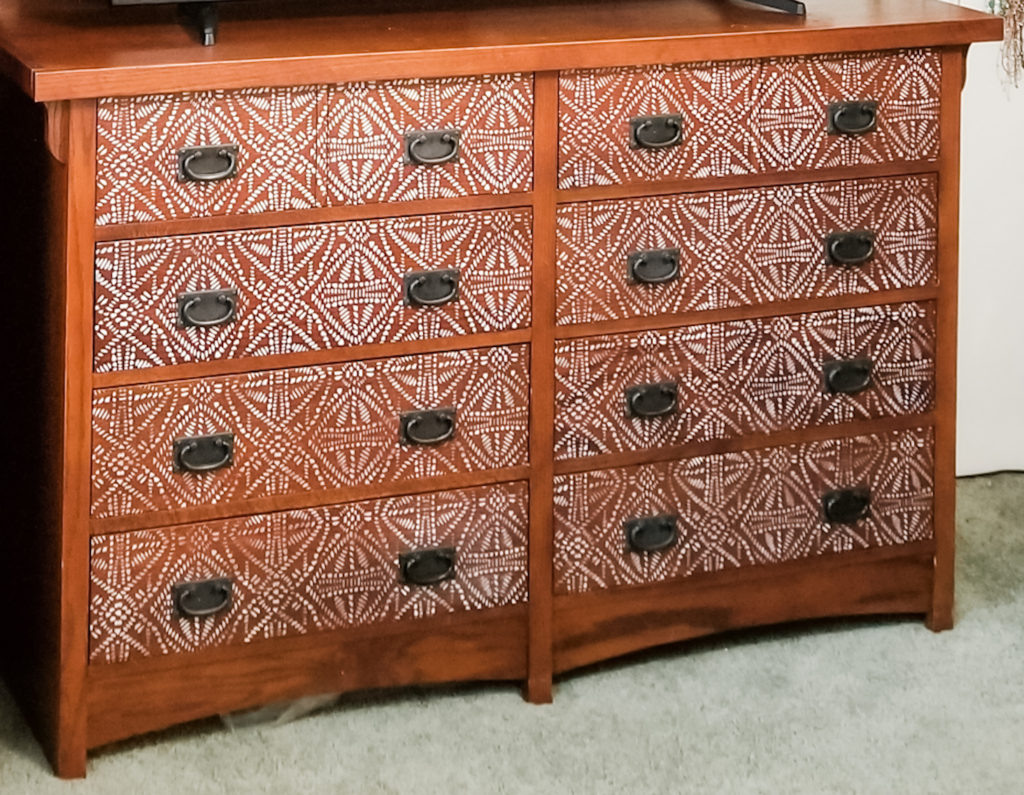
The pattern is perfect for this boho room, and the creamy white colored design brightens the dark wood just enough. We could have also painted the top piece the creamy white or even the entire frame, but we were conservative and subtle with our makeover approach.
Stenciling takes time and patience. It’s not a great project if you’re looking for immediate satisfaction, but the results can be stunning. Here are some times from my experience stenciling these dressers:
- Number the drawers. I used a piece of painter’s tape inside the drawer to write the number, then I drew a sketch of the dresser and indicated each drawer’s number on the sketch. This will help you to easily put the drawers back in order – especially with the continual pattern we used.
- Keep the hardware in order. After removing each drawer handle, I lined them up in the same order so that they could be placed back onto the same drawer.
- Use painters tape to attach your stencil. The painters tape holds well and removes easily.
- Paint a few drawers at a time. I used some books underneath the drawers to make them lay flat and sturdy. I lined up as many drawers that fit inside the stencil. This saves time and keeps the pattern continual.
- Use as little as paint as possible. If the paint is too thick, it will run behind the stencil and could ruin your design. I used a towel to lift extra paint, but even then I sometimes experienced extra paint.
- Use a sponge roller for large stencils. The roller will help keep the paint evenly distributed and covers a larger portion than a small dabbing sponge.
- Make sure to let the paint dry before removing the stencil – or be very careful.
- Use a craft acrylic paint. There are so many colors these days to choose from, it dries quickly, and it’s inexpensive.
- When you seal the stenciled design, either spray or apply with one swipe of a brush. The seal will smear or even remove your design. If you don’t seal the design, it can get scratched off or worn off. Save all your hard work and just seal it with a water-based polyurethane. If you don’t have a light touch for painting, get a spray can of it instead.
- Be sure to follow the instructions on the can of polyurethane – you want the coats to fully dry and cure before using and installing the hardware.

This awesome stencil is offered by Royal Stencils on Etsy.com. This shop includes helpful instructions and delivers a high-quality stencils. They have dozens of designs to chose from.

Here are more posts you may enjoy!
Macrame wall hanging
DIY pallet headboard
DIY boho inspired jewelry display
Bohemian style at Walmart
Bohemian style from Amazon
Boho plant shelf
POSTED IN: DIY crafts
Let's be friends!
Related Posts


Search
Categories
Subscribe
Get the latest posts, discounts, and design inspiration right to your inbox.
