Book wall art

Book wall art
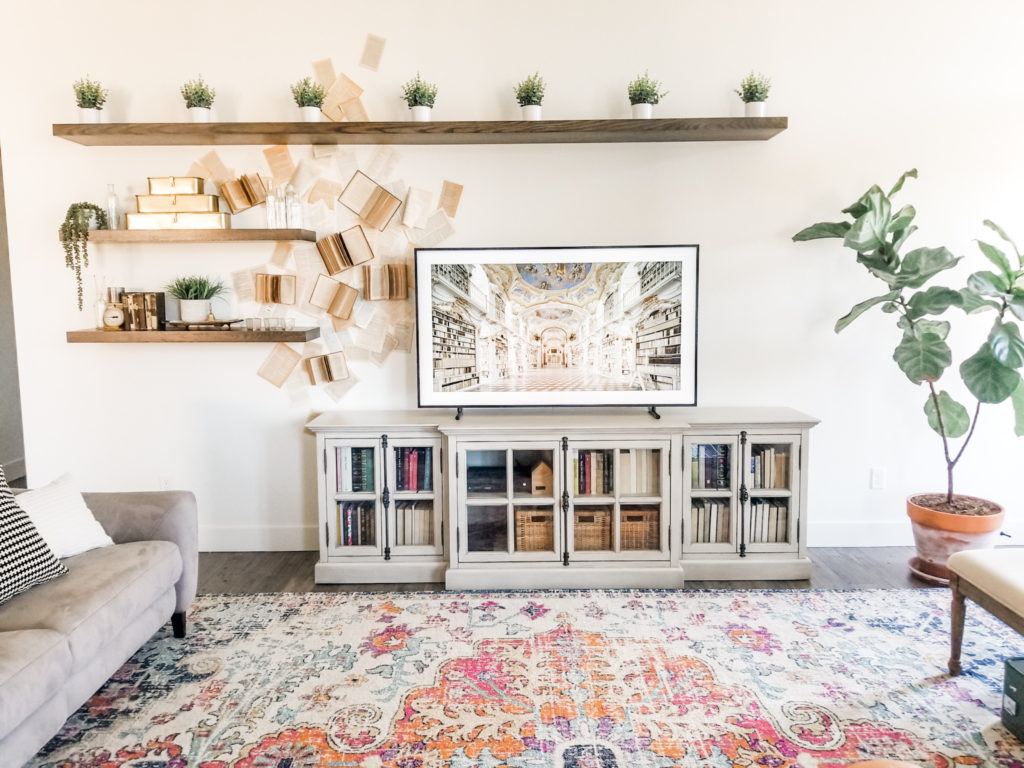
I have been so excited and nervous about this wall-art project. Could I pull it off? Would I get tired of it shortly after? Do I use books I love or just repurpose some damaged ones? The answers ended up being; yes I pulled it off, I don’t think I’ll tire of it anytime soon, and I used damaged ones.
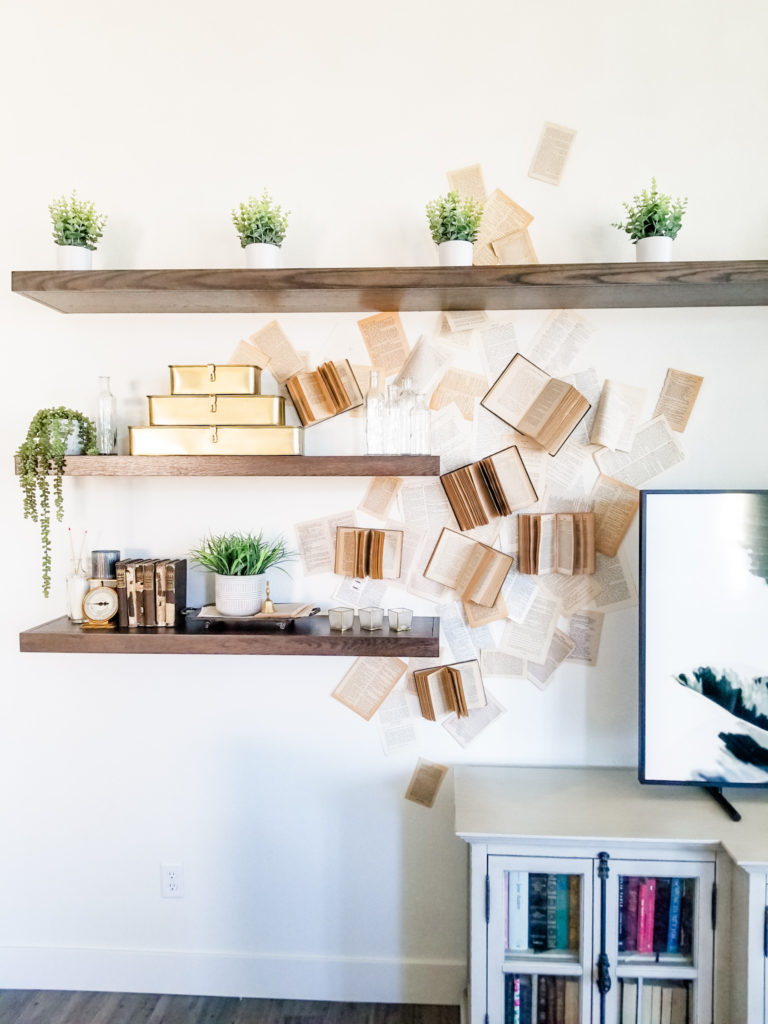
For several years now, I knew I wanted to create wall art using old books. I love reading, I love old books, and I’m constantly inspired by Anthropology displays – so creating my own book wall art was inevitable. But, I had no idea of how to attach the books (without putting a million holes in my wall) or how to arrange them so that there was some movement and direction. I was nervous I wouldn’t like it and then all I would be left with was a wall to repair. Lucky for me – I love the final result (only 2 nails per book) and I hope you do too!
Tools
Brad nail gun and brad nails (I used 1.25” nails)
Glue Dots
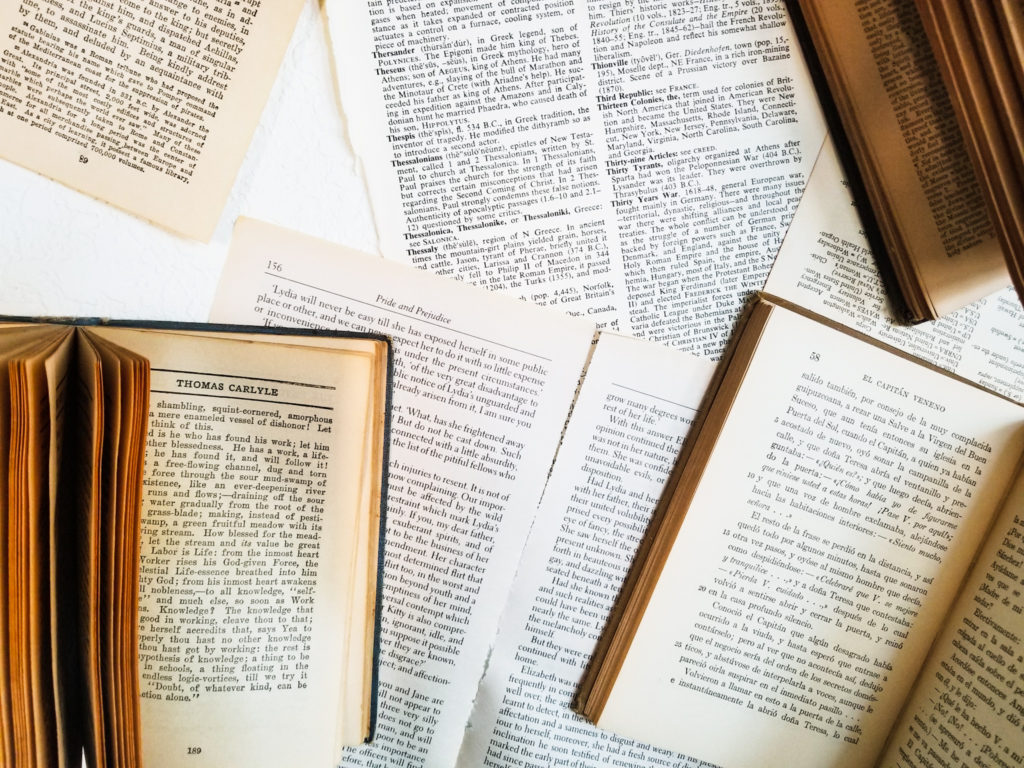
Loose book pages
Thumbtacks
Step stool
Old books (I had some and found the rest from Aunt Bees House – they were less expensive than the local used-book stores. However, garage sales, Craigslist, and estate sales are also good places to search.)
Steps for attaching book wall art:
1. You’ll need to gather loose book pages of varying sizes and color. Gather or buy old books of varying sizes (aim for an odd number of books – I used seven). Organize the pages by size so that you can easily grab the size you want.
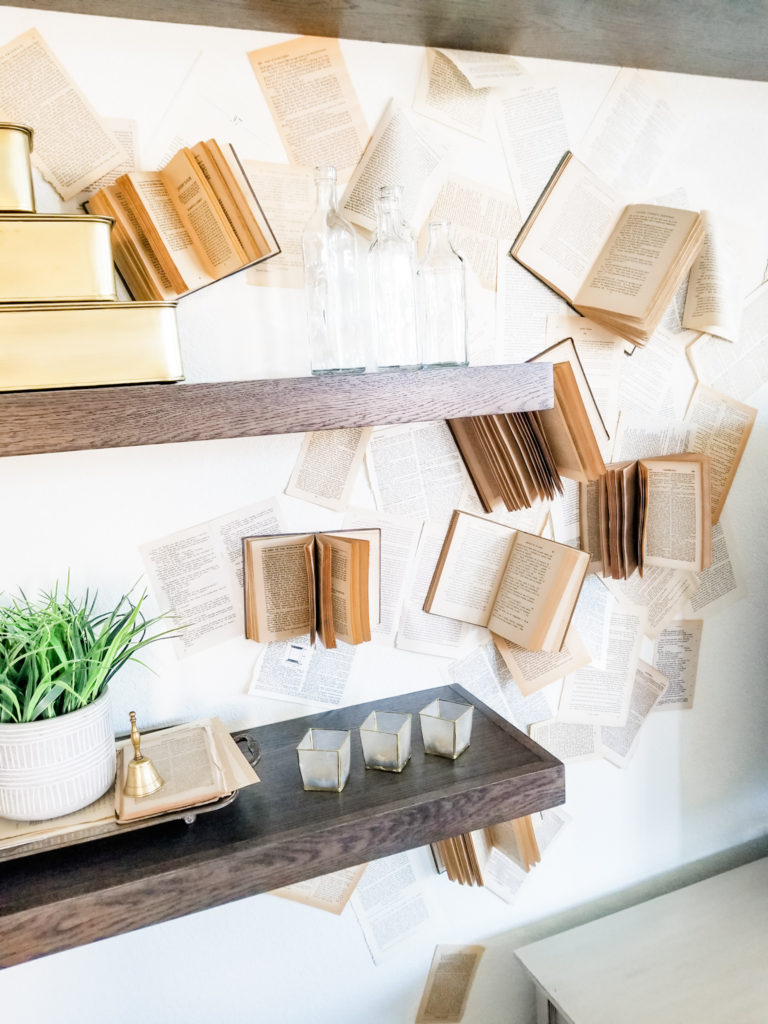
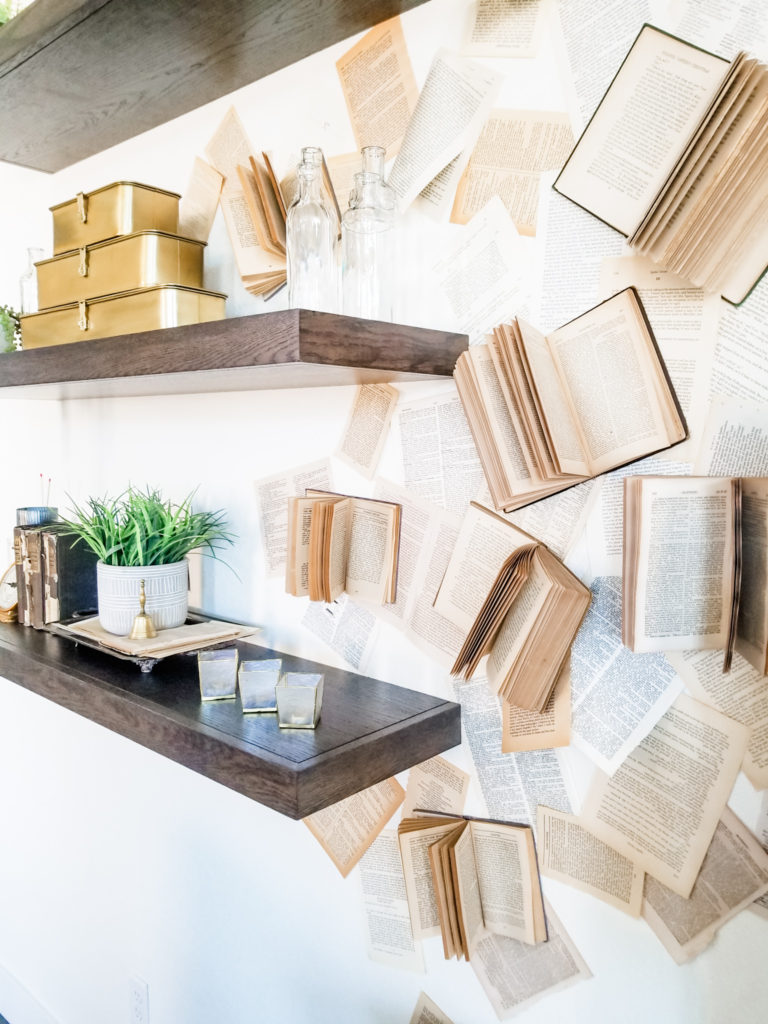
2. Use Glue Dots or tape to attach book pages to the wall. I started in the middle of my area and then worked out. Be sure to angle pages, overlap pages, turn some upside down, and be aware of the text on the page – make sure you’re OK with it.
3. Once you have a good foundation of book pages for the background – start with a book towards the center of your design and nail one side of the book cover with a pinch of pages too – then nail the other side. To help hold back more pages than the nail would hold, I used thumbtacks and then taped one page back to cover the tack. You can decide if you want the book fully opened or if you want the pages flared. For most, I let the book lay however it did. Angle the books differently to help give movement to the design.
4. Step back often and add more pages or books when needed. I added several pages and one more book over a week of looking at it and noticing gaps. Who knows if it’s completely done yet…
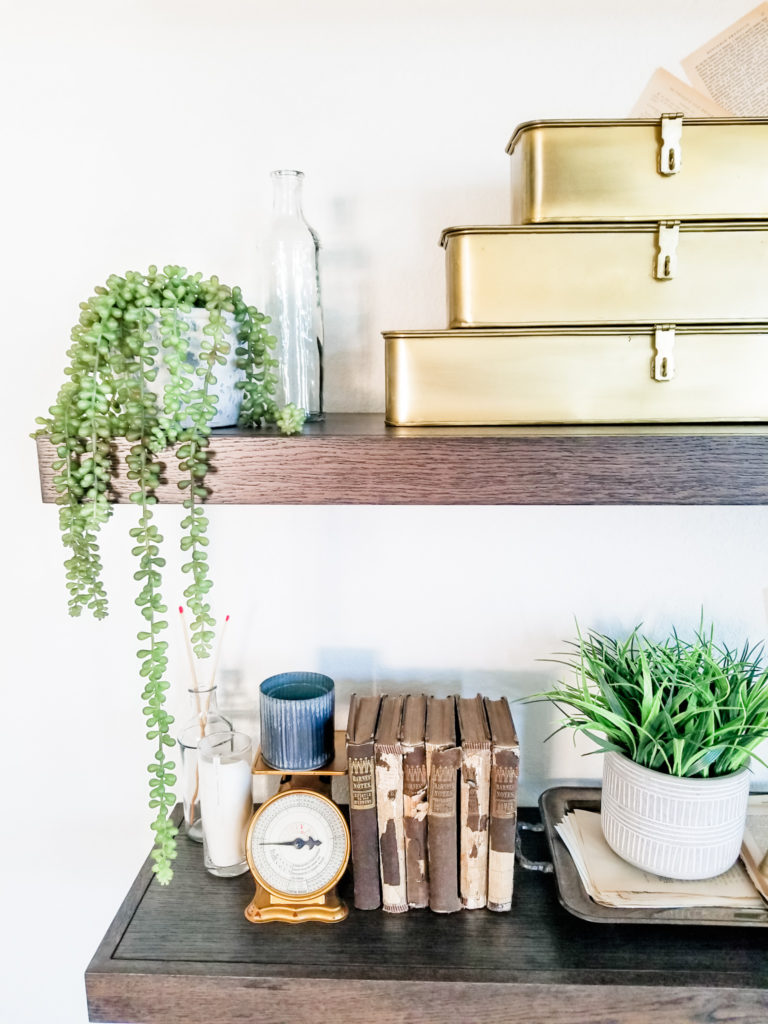
Here are some of the items I used to style my floating shelves:
Set of clear bottles
Brass boxes
Votive candle holders
Faux eucalyptus plants
Faux string of pearls faux plant
Even though I repurposed old damaged books, I lucked out with my shipment of book pages from Etsy! I recieved a page from my favorite book, Pride and Prejudice, by Jane Austen.
Let me know what you think about book wall art! Thanks so much for stopping by. For more inspiration, follow me on Instagram and Facebook.

POSTED IN: Decorating
Let's be friends!
Related Posts

Search
Categories
Subscribe
Get the latest posts, discounts, and design inspiration right to your inbox.
