Awesome DIY Modern Farmhouse Floating Shelves

Awesome DIY Modern Farmhouse Floating Shelves
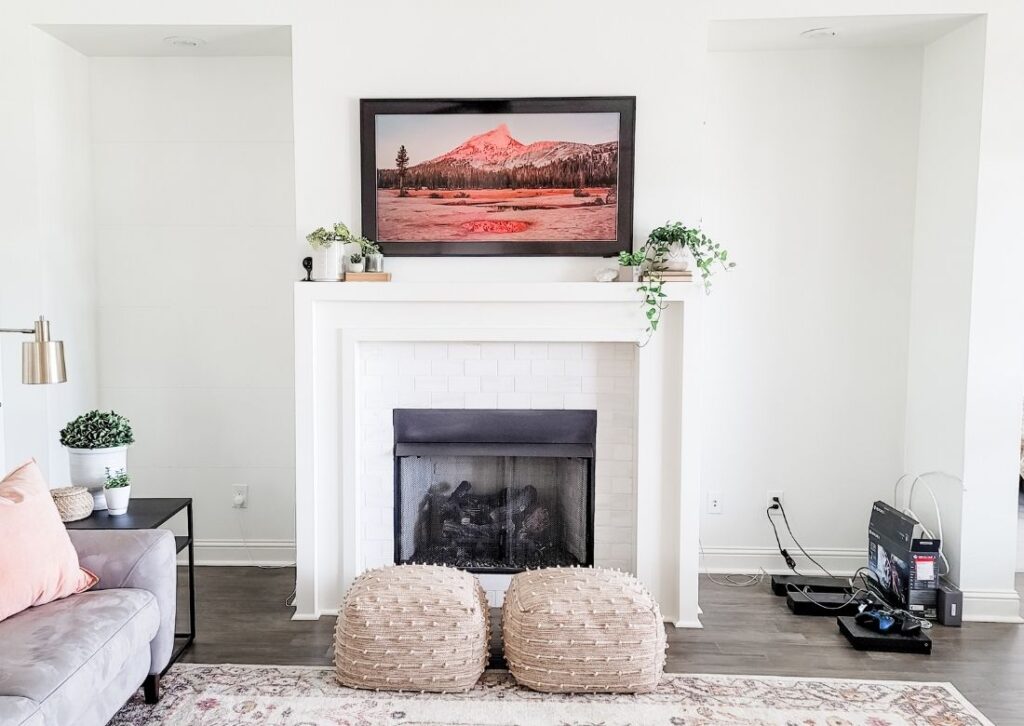
When we built our home, we had ‘upgrade’ options to choose from which also upgraded the price. We opted out of most of them because of my DIY plans, or because we didn’t care about the option. One upgrade option was to have built-ins installed on each side of our living room fireplace. The decision to skip the upgrade was easy because I knew I would be adding my own floating shelves one day. And that day finally came, although the project spanned months instead of weeks to complete these awesome DIY modern farmhouse floating shelves.
My timeline to complete these floating shelves was longer because of the 2021 wood shortages, and I ran into some hiccups along the way. However, my learning curve should help you to fast track your way to building floating shelves much more quickly. The best part about this project is that the shelves turned out exactly how I envisioned them. My husband likes them so much he was trying to talk me into building matching ones in the kitchen nook.
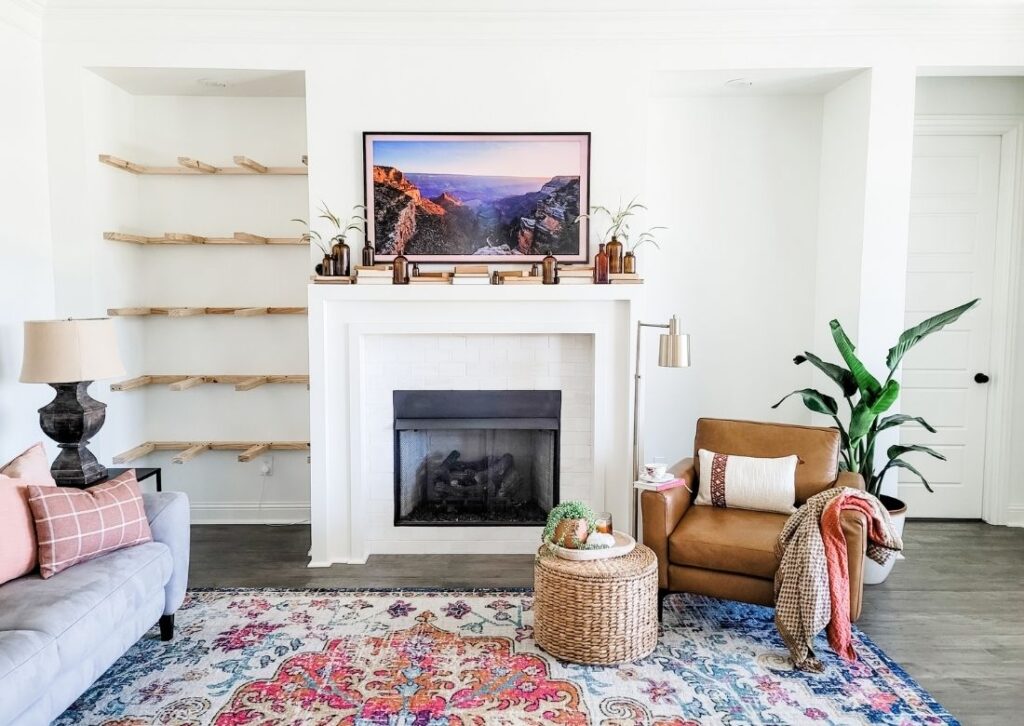
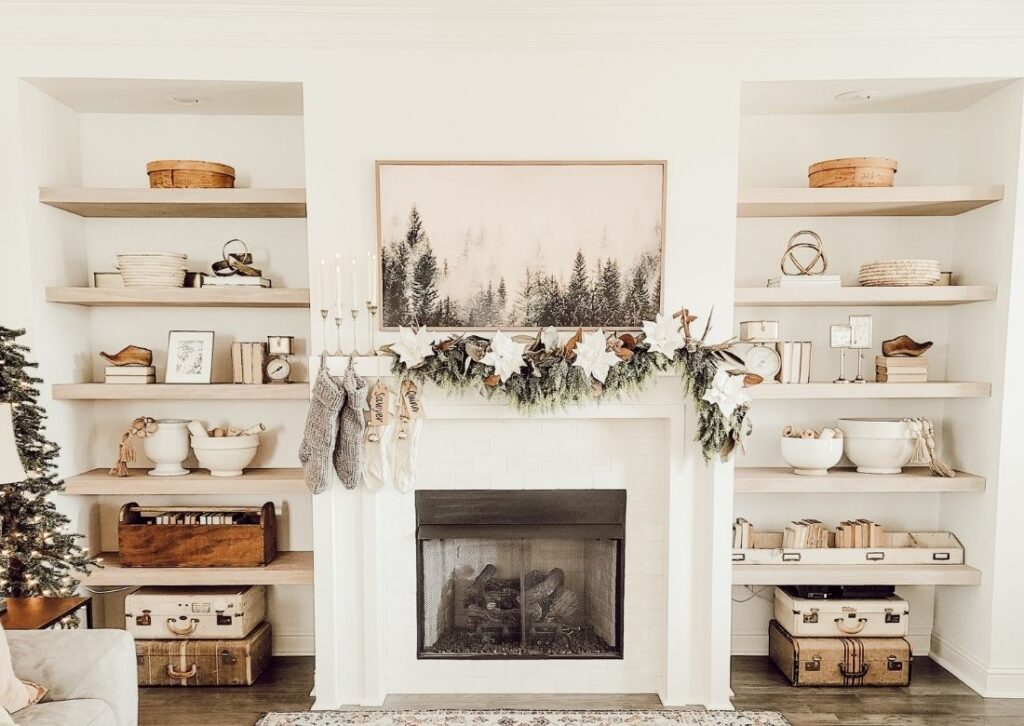
The awesome DIY modern farmhouse floating shelves add so much character and interest to the space, and I have had so much fun styling these shelves as a pair. Styling shelves is one of my favorite things to do, my brain starts restyling shelves everywhere I go even if the existing styling doesn’t need it. When you subscribe to my blog, you will receive my free ebook on how to style shelves. The ebook isn’t too long, it’s full of photos, and it’s where I share my easy-to-follow recipe on how to style beautifully decorated shelves. If you have shelves for a pantry, storage closet, or library – they are most likely for storage and organization which doesn’t mean they can’t look pretty too, but my recipe isn’t for storage shelving. Decorative shelf styling has negative space and patterns – and once you read my book, you will never look at a shelf the same way again.
Awesome DIY Modern Farmhouse Floating Shelves
I never start a DIY project without finding my own inspiration and clear instructions on how I will approach my project. The main blog that guided me to select the bracket system I used was, Christine at Honey Built Home. I loved that Christine used 2×3 boards and pocket holes to create her sleek floating shelf brackets. I felt comfortable with this approach, so I began by measuring my alcoves and planning out how many 2×3 boards I would need. I located and marked the wall studs too and headed off to the Home Depot. Here’s a photo of just the bracket construction.
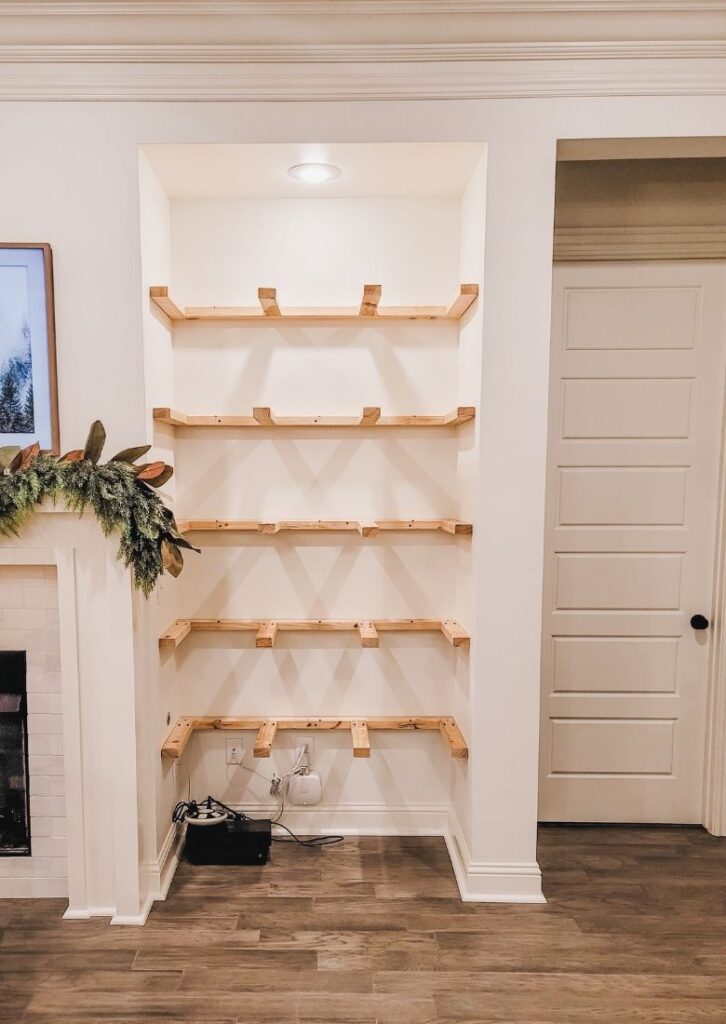
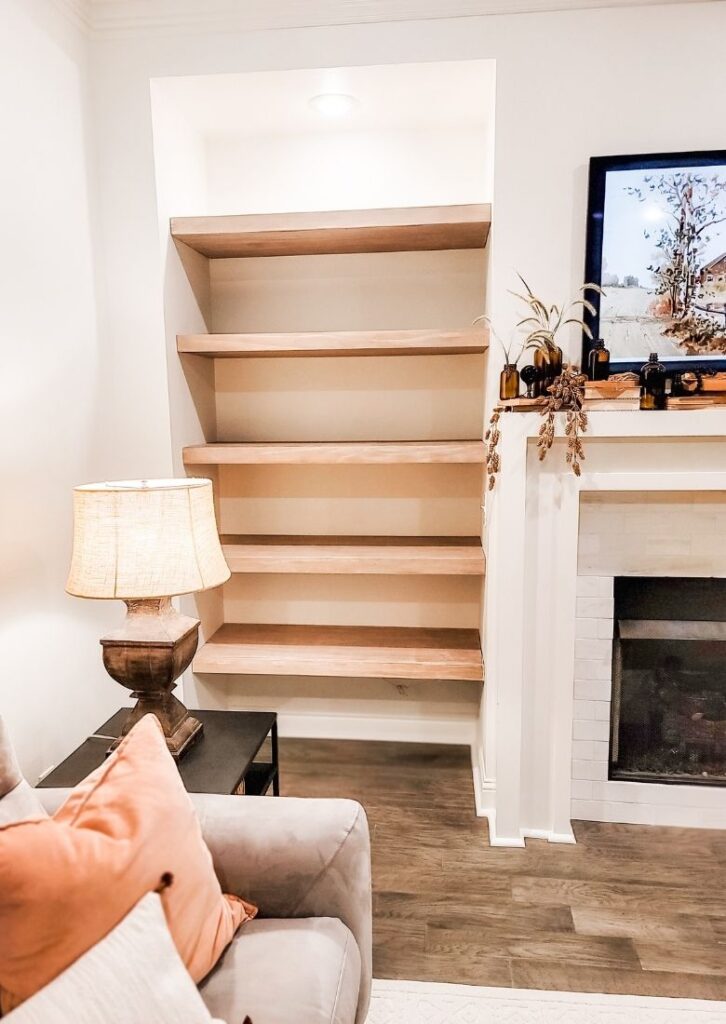
Besides feeling confident that I could create this style of bracket with no problems, I also liked that this sleek and strong bracket, along with two pieces of half inch plywood would create a thickness that could be finished with a 1″ x 2.5″ select pine board along the front. All the wood I would need for these awesome DIY modern farmhouse floating shelves was all off-the-shelf lumber at my local Home Depot, and it wouldn’t break the bank! Had I known there would be plywood shortages, I would have stocked up on what I needed at this point, but as they say, hindsight is 20/20. To determine the vertical space between my shelves, I used some painter’s tape to layout my design. I wanted to make sure that the shelves would look how I wanted them to and that they would fit around the outlets, light switch, and fireplace port. Seventeen inches between each shelf was the sweet spot for my shelves and I liked the taller space left at the bottom. The floor space is used to store our cable box, game station, and cords. Right now, I’m using vintage suitcases to store the technology, but I will probably try some other looks to decorate the floor space in the future.
Awesome DIY Modern Farmhouse Floating Shelves
Once all the shelf brackets are level, installed into the wall studs and secure, it’s time to cut the plywood shelf tops and bottoms. I thought this would be the easy part, cutting rectangles couldn’t be too difficult, right? I’ve heard that even new construction rarely has a perfectly square walls, but it honestly didn’t occur to me until I measured my first shelf. How in the world was the width shorter in the front than in the back, and then the wall came in even more towards the center! I felt so frustrated and worried. How was I going to get the right cuts for my shelves without having half-inch caulking in some spots? The answer came to me by my research-a-holic husband. Jeremy gave me my answer like it was so simple, he said you have to scribe the wood.
After watching some videos on scribing wood and how it allows the wood to perfectly line up with uneven walls, I knew this was the right way to cut my plywood shelves. I started out with one scriber, and it didn’t give me the accurate results I wanted, so I ended up with AccuScribe Pro. I prefer this scribing tool because it was easy to lock into place and secure the settings I needed. There are several ways to adjust the tool to make it work with your walls and wood. It was worth the price because it did the job without hassle, and I could use the tool with ease. Each time a shelf was scribed, I set it into place to make sure it was a good fit before moving on.
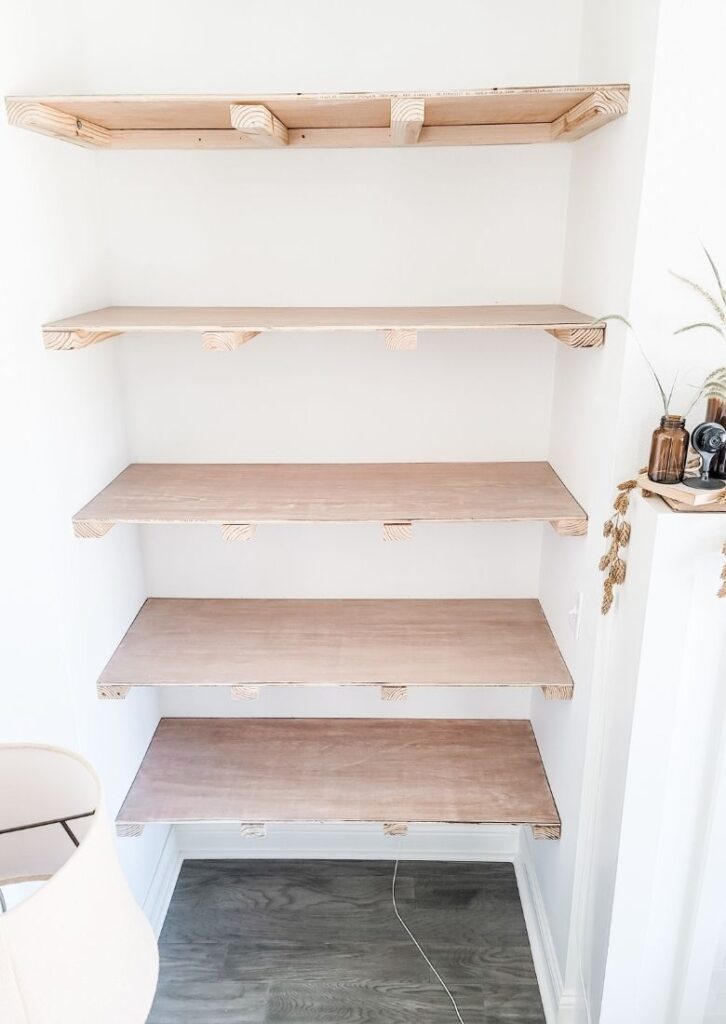
Here’s a photo of my top shelf boards set into place. Once I scribed the top boards, I just cut a duplicate for the underside board because the wall didn’t change much in their close proximity. However, all five shelves that I scribed were all slightly different, so I had to scribe five times on each side to make sure I had snuggly fitting shelves. I then used my Dewalt jigsaw to cut my scribed lines and having this powerful tool with a finish blade cut my wood like butter. Using quality tools creates quality projects and makes the process so much easier. I also had to make sure that the brackets didn’t extend beyond the plywood. The bracket boards had to line up with the plywood so that I could securely attach the front face boards.
Awesome DIY Modern Farmhouse Floating Shelves – Front face boards
I wanted to make sure all my wood (plywood and pine boards) was cut and ready for sanding and staining, so next, I measured the width of each bracket in front. I wanted a snug fit for the front face board, but not tight. With the pine boards cut and fitting securely, they were also ready for sanding and staining.
Once the wood was cut and each piece of plywood was scribed and labeled for placement, I began the sanding process. After gaining staining experience from my vintage farmhouse table, I knew exactly how I wanted the floating shelves to look. I love the look of worn and weathered wood, but the texture of actual weathered wood isn’t always easy to clean and dust. I can’t believe how half inch plywood was transformed to look like high-end custom shelves – it still blows me away. I sanded each shelf (20 total) and 10 pieces of pine for the face front boards with three grits of sandpaper using my orbital sander. I start with 80 grit, then 120 grit, and finished with 220 grit. I sand in our driveway and then blow off the dust with our leaf blower.
Awesome DIY Modern Farmhouse Floating Shelves – Staining
Once all the wood is sanded and ready to receive the stain, I wipe them down again to remove all dust and debris from sanding. This is the annoying step for me. After all that sanding who wants to clean?! With all the shelves ready, I applied an even layer of wood conditioner, leaving no puddles, but not spending too much time for a perfect application. Just make sure you get full coverage with an even application and move on to the next board. It dries rather quickly and after 30 minutes you can apply your first coat of stain if you want.
My staining process is easy, and I can’t believe I’m saying this, but it is also fun. I was initially so intimidated by stain and worried about getting an even coat with a brush, but once I discovered staining pads, my confidence grew, and I am able to achieve my signature color every time. Here are the simple steps I used to stain my awesome DIY modern farmhouse floating shelves:
- Sand outside-showing surfaces with 80, 120, and 220 grit paper using an orbital sander
- Thoroughly clean sanded surfaces
- Apply one coat of wood conditioner (allow to dry for at least 30 min.)
- Wearing gloves, use a staining pad to rub on and rub off an even application of Old Barn Living Farmhouse stain (allow to dry for recommended 4 hours)
- Give a light sanding with a 220-sanding sponge, and clean all dust off
- Wearing gloves, use a staining pad to lightly rub on and rub off an even application of Varathane white wash stain – be sure to rub off all excess and to rub-in bright spots of the white wash. This stain tends to dry quickly so work in smaller areas to make sure it’s evenly rubbed on.
- Apply an even layer of matte polyurethane to protect the finish
Awesome DIY Modern Farmhouse Floating Shelves – Installation
Once the wood was stained and done, the installation process went by quickly. I installed the bottom piece of plywood using a brad nail gun and wood glue. You may need the help of clamps at this point. Then install the top shelf board with more wood glue where it meets the bracket and then brad nail into place. At this point, the shelves were really taking shape and looking good. With the face front boards ready to go, I added some wood glue and smoothed it on to avoid dripping, and then I clamped it into place before nailing it into each bracket board. You’ll want to select straight pine boards because any bowing will affect the look once installed.
I had just a few boards that bowed at one end and to make sure it stayed straight, I clamped it in place when I glued and nailed it in. Then I left the clamps on overnight to make sure there wouldn’t be movement during the glue drying process.
Awesome DIY Modern Farmhouse Floating Shelves – Video tutorial
Those are the basic steps, with some tips along the way, but if you learn better by watching, you’ll want to check out my YouTube video when I show you the whole process. Be sure to have your volume up and feel free to send me any questions that come up along the way. I’m so happy that these awesome DIY modern farmhouse floating shelves are done and I’m even happier about how beautifully they turned out – I can’t believe that I created custom floating shelves and I’m here to tell you that you can too! Every DIY project that I tackle gives me more confidence for the next. There will be learning moments and mistakes, but I hope to help you to avoid those same mishaps.
Awesome DIY Modern Farmhouse Floating Shelves – Video tutorial
Thank you for checking out this post. I hope it is helpful and encouraging for you to take on the next DIY project that you have in mind. If I can construct and build, anyone can. Be sure to subscribe to my blog and get your free shelf styling ebook – you will get excited about styling shelves after learning my easy-to-follow recipe!

You may also like:
POSTED IN: DIY Projects
Let's be friends!
Related Posts
Search
Categories
Subscribe
Get the latest posts, discounts, and design inspiration right to your inbox.
