Affordable DIY Cane Headboard

Affordable DIY Cane Headboard
The first room I’m tackling in the new house is Quinn’s room, but the second room is Sawyer’s room. I want their rooms to be a refreshing and relaxing space with colors and the style they prefer. Each space should reflect their likes, preferences, and personalities. I have had so much fun planning and discussing Sawyer’s room design with her and soon realized that I needed to create an affordable DIY cane headboard. I have probably asked her a million questions, but I want to make sure I know exactly what she likes and doesn’t like so that when the room is revealed she will be thrilled.
Both girls have agreed to stay out while I’m putting each space together, they want it to be a surprise and I’m all over that. However, some parts won’t entirely be a surprise, but hopefully they will be surprised at how great it all looks together! Sawyer helped me design this affordable DIY cane headboard, and we saved hundreds by making it ourselves. Cane furniture is beautiful and pricey.
Affordable DIY Cane Headboard
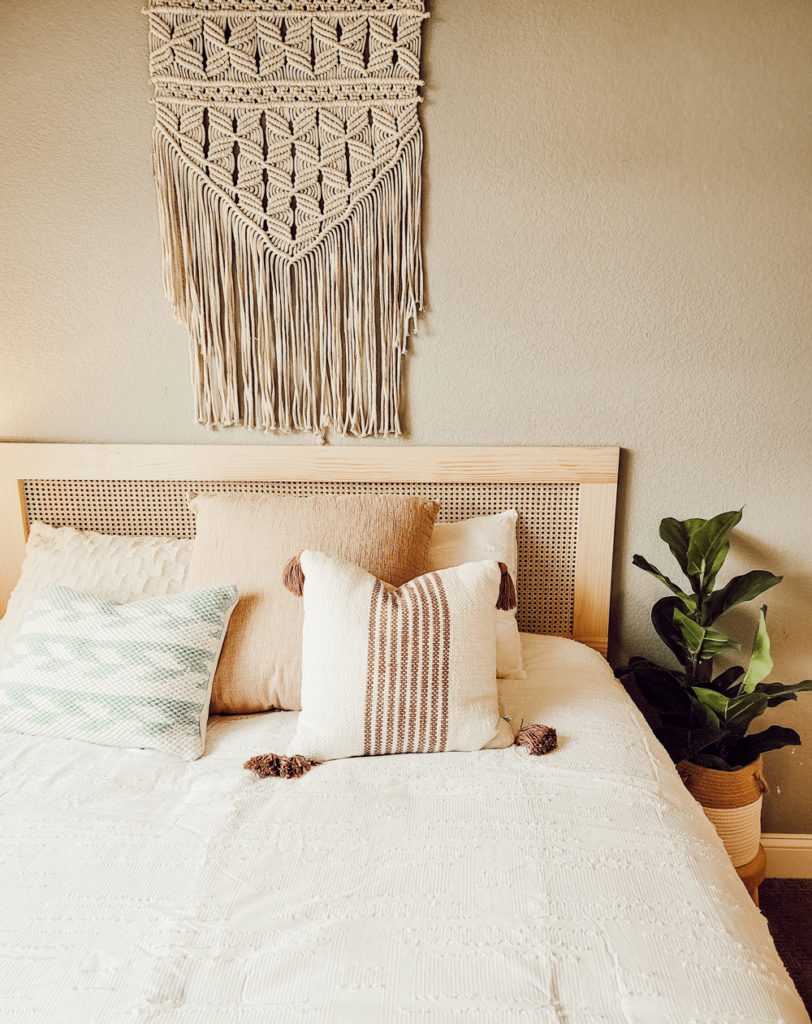
Sawyer’s bed is a queen size, so the measurements I provide are for a queen mattress on a Hollywood frame. She was also very specific about how tall she wanted the headboard – not too tall, but not low profile either – she wanted the cane to show around her pillows, but not too much. I love that she knows exactly what she wants. Here are the basic steps to create this wall mounted headboard, but you can quickly watch the video to understand the construction.
- Day 1 – soak your roll of cane webbing in the bathtub (20″ wide x 6′).
- Day 2 – drain the bathtub and let the webbing air dry until it’s not dripping and damp to the touch – it should still feel wet and be pliable.
- Cut two 1×4 side boards at 16″ long (sand).
- Cut the top 1×4 board at 62″ long (sand).
- Cut the bottom 1×10 board at 62″ long (sand).
- Use the Kreg pocket hole jig to drill two holes at each end of the top and bottom boards (eight holes total).
- Then line up all four boards to create your rectangular frame, add 1.5″ wood screws to all eight holes connecting the side boards into the top and bottom boards.
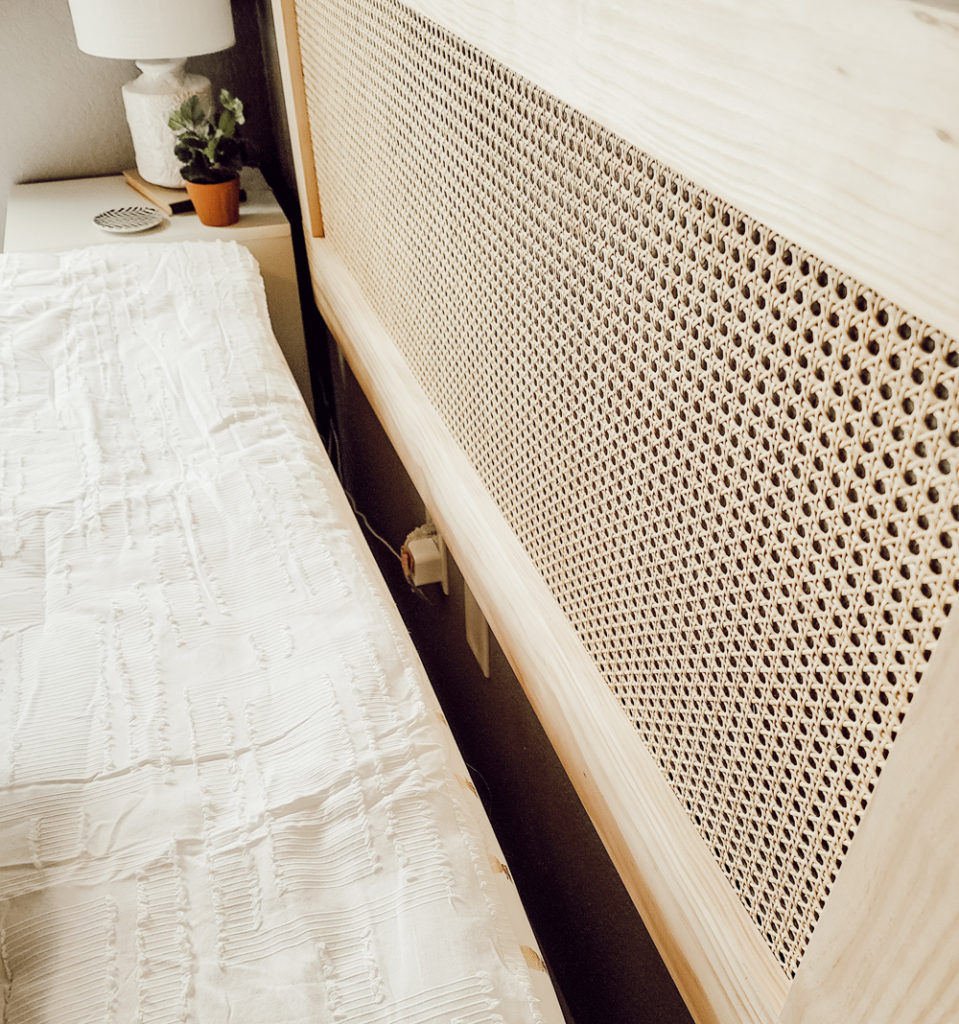
- Determine which side will be front facing. Now turn the frame over so that you can attach the webbing to the back side.
- Carefully unroll the cane webbing making sure the holes are lined up along the top board. Use clamps to hold the webbing in place.
- Use a staple gun and 3/8″ staples to secure the webbing to the frame.
- You can cut off any excess webbing, but be sure to leave about an inch of webbing outside the staples.
- Optional: Add duct tape to the edge of the webbing to prevent the webbing from scratching the wall.
- Find the center of the top of the headboard, measure, mark, and predrill holes for the metal French cleat.
- Determine where to install the other half of the French cleat onto the wall, measure, mark, and predrill. The French cleat comes with a level to make this part even easier.
- Hang the headboard and enjoy~
Affordable DIY Cane Headboard – Watch + Learn
Sometimes a video is the best way to learn! I loved being able to show how to use the Kreg pocket jig tool to make my hidden pocket holes. It’s a $20 tool that elevates wood working. I will be using this tool for so many projects! Please check out the video and hit that Like button~
Shop the space:

This site contains affiliate links to products. We may receive a commission for purchases made through these links at no extra cost to you. Thank you for your consideration in using my links!
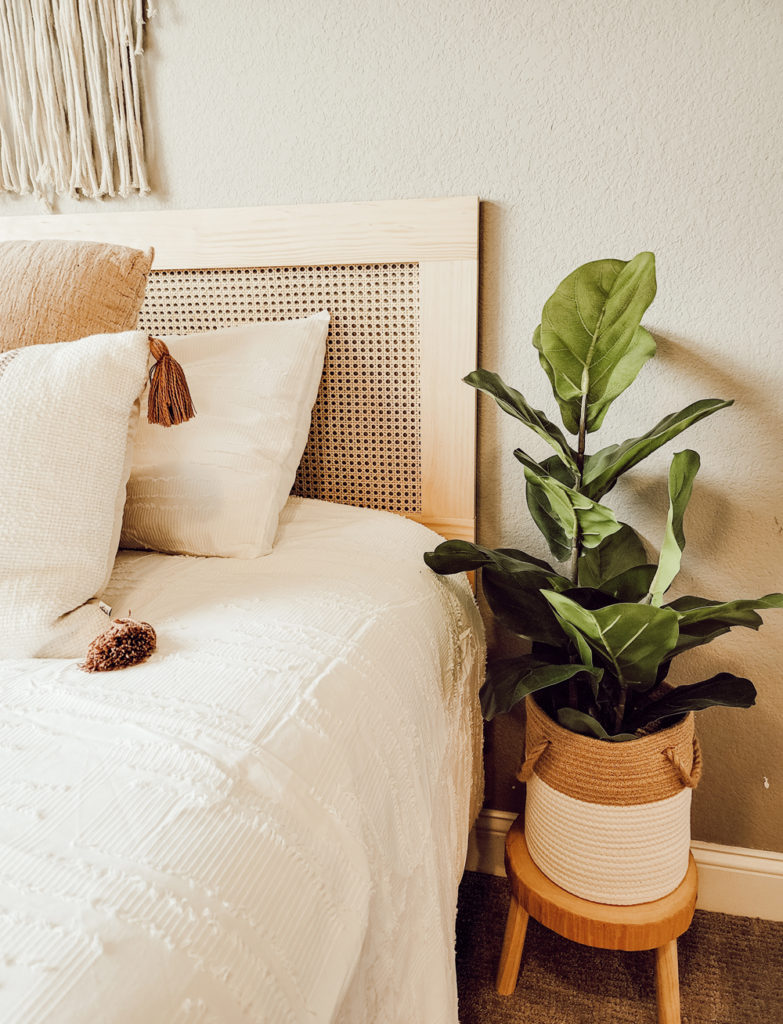
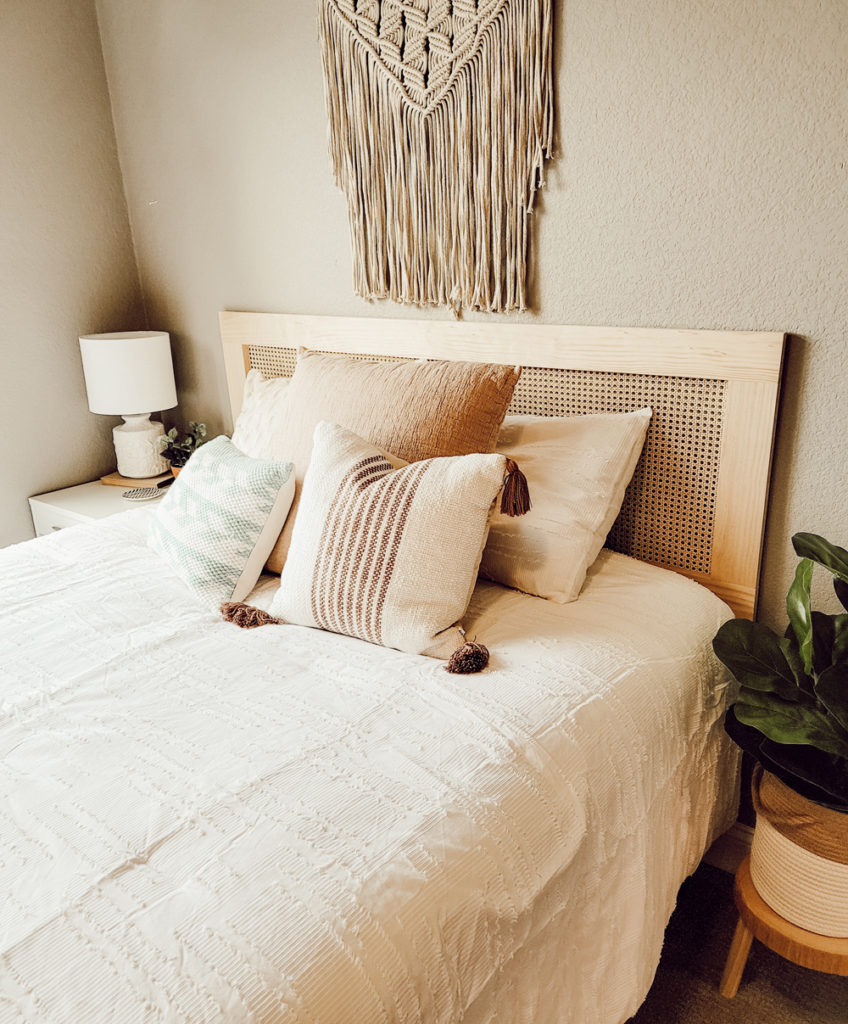
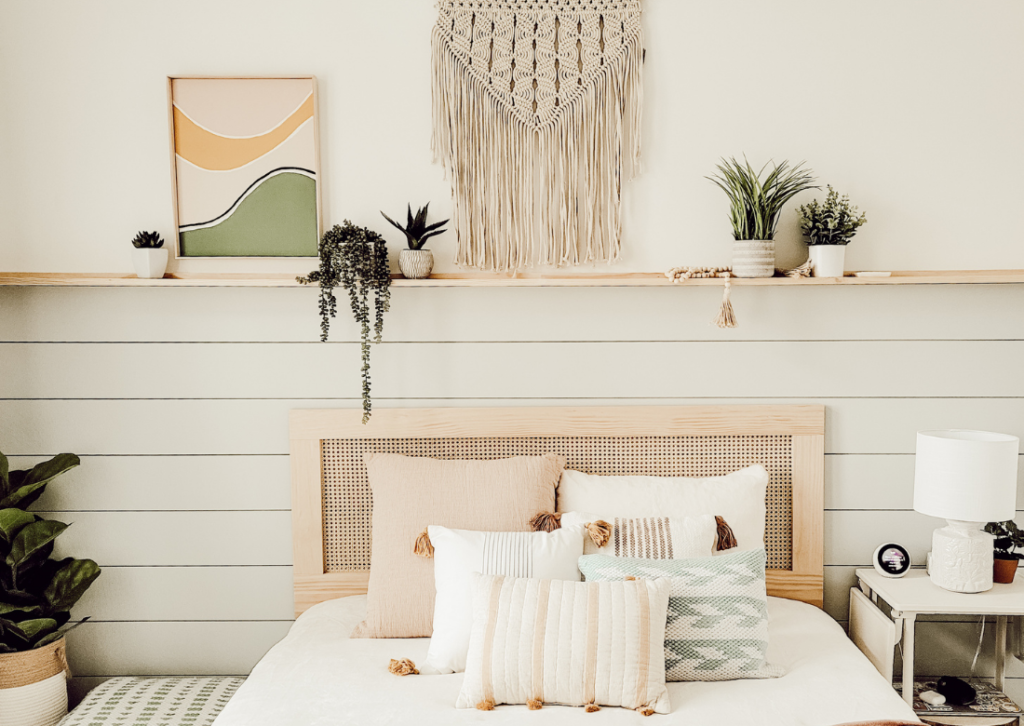
Here is the headboard in her new bedroom. The best part about this DIY is that she loves it and it’s exactly what she wanted. Be sure to sign up for my emails and join me as I tackle a ton of DIY projects in the new house to elevate it above builder-grade and give it character and personality~ Thanks for checking out this post, let me know if you have any questions, and I’d love to know what you think so please drop a comment below.
You may also like:
How to Create Boho Farmhouse Shiplap
DIY Boho Plant Stand
How to Hack Boho Kitchen Lights
DIY Accent Wall + Headboard
DIY Boho Framed Canvas Art
Boho Pallet Headboard

POSTED IN: DIY Projects
Let's be friends!
Related Posts
Search
Categories
Subscribe
Get the latest posts, discounts, and design inspiration right to your inbox.
